Olive - Meanderthal’s BS BL
- Thread starter Meanderthal
- Start date
- Watchers 23

incredible work i love it and very informative too i will get the HRG lift kit some skit plates and 245/65 R17 KO2s i fear if i go for the 70s it will rub
OP
OP
- First Name
- Eric
- Joined
- Mar 19, 2022
- Threads
- 10
- Messages
- 2,164
- Reaction score
- 3,155
- Location
- Belleville, IL
- Vehicle(s)
- '08 BMW R1200 GS Adv, '23 Norden Expedition
- Thread starter
- #33
I have 245/70/16 size tires/wheels. You have the right size tire in mind if you are sticking with the stock wheels, or any other 17" wheel.incredible work i love it and very informative too i will get the HRG lift kit some skit plates and 245/65 R17 KO2s i fear if i go for the 70s it will rub
yes for now im sticking with the stock wheels maybe in the future i will change themI have 245/70/16 size tires/wheels. You have the right size tire in mind if you are sticking with the stock wheels, or any other 17" wheel.

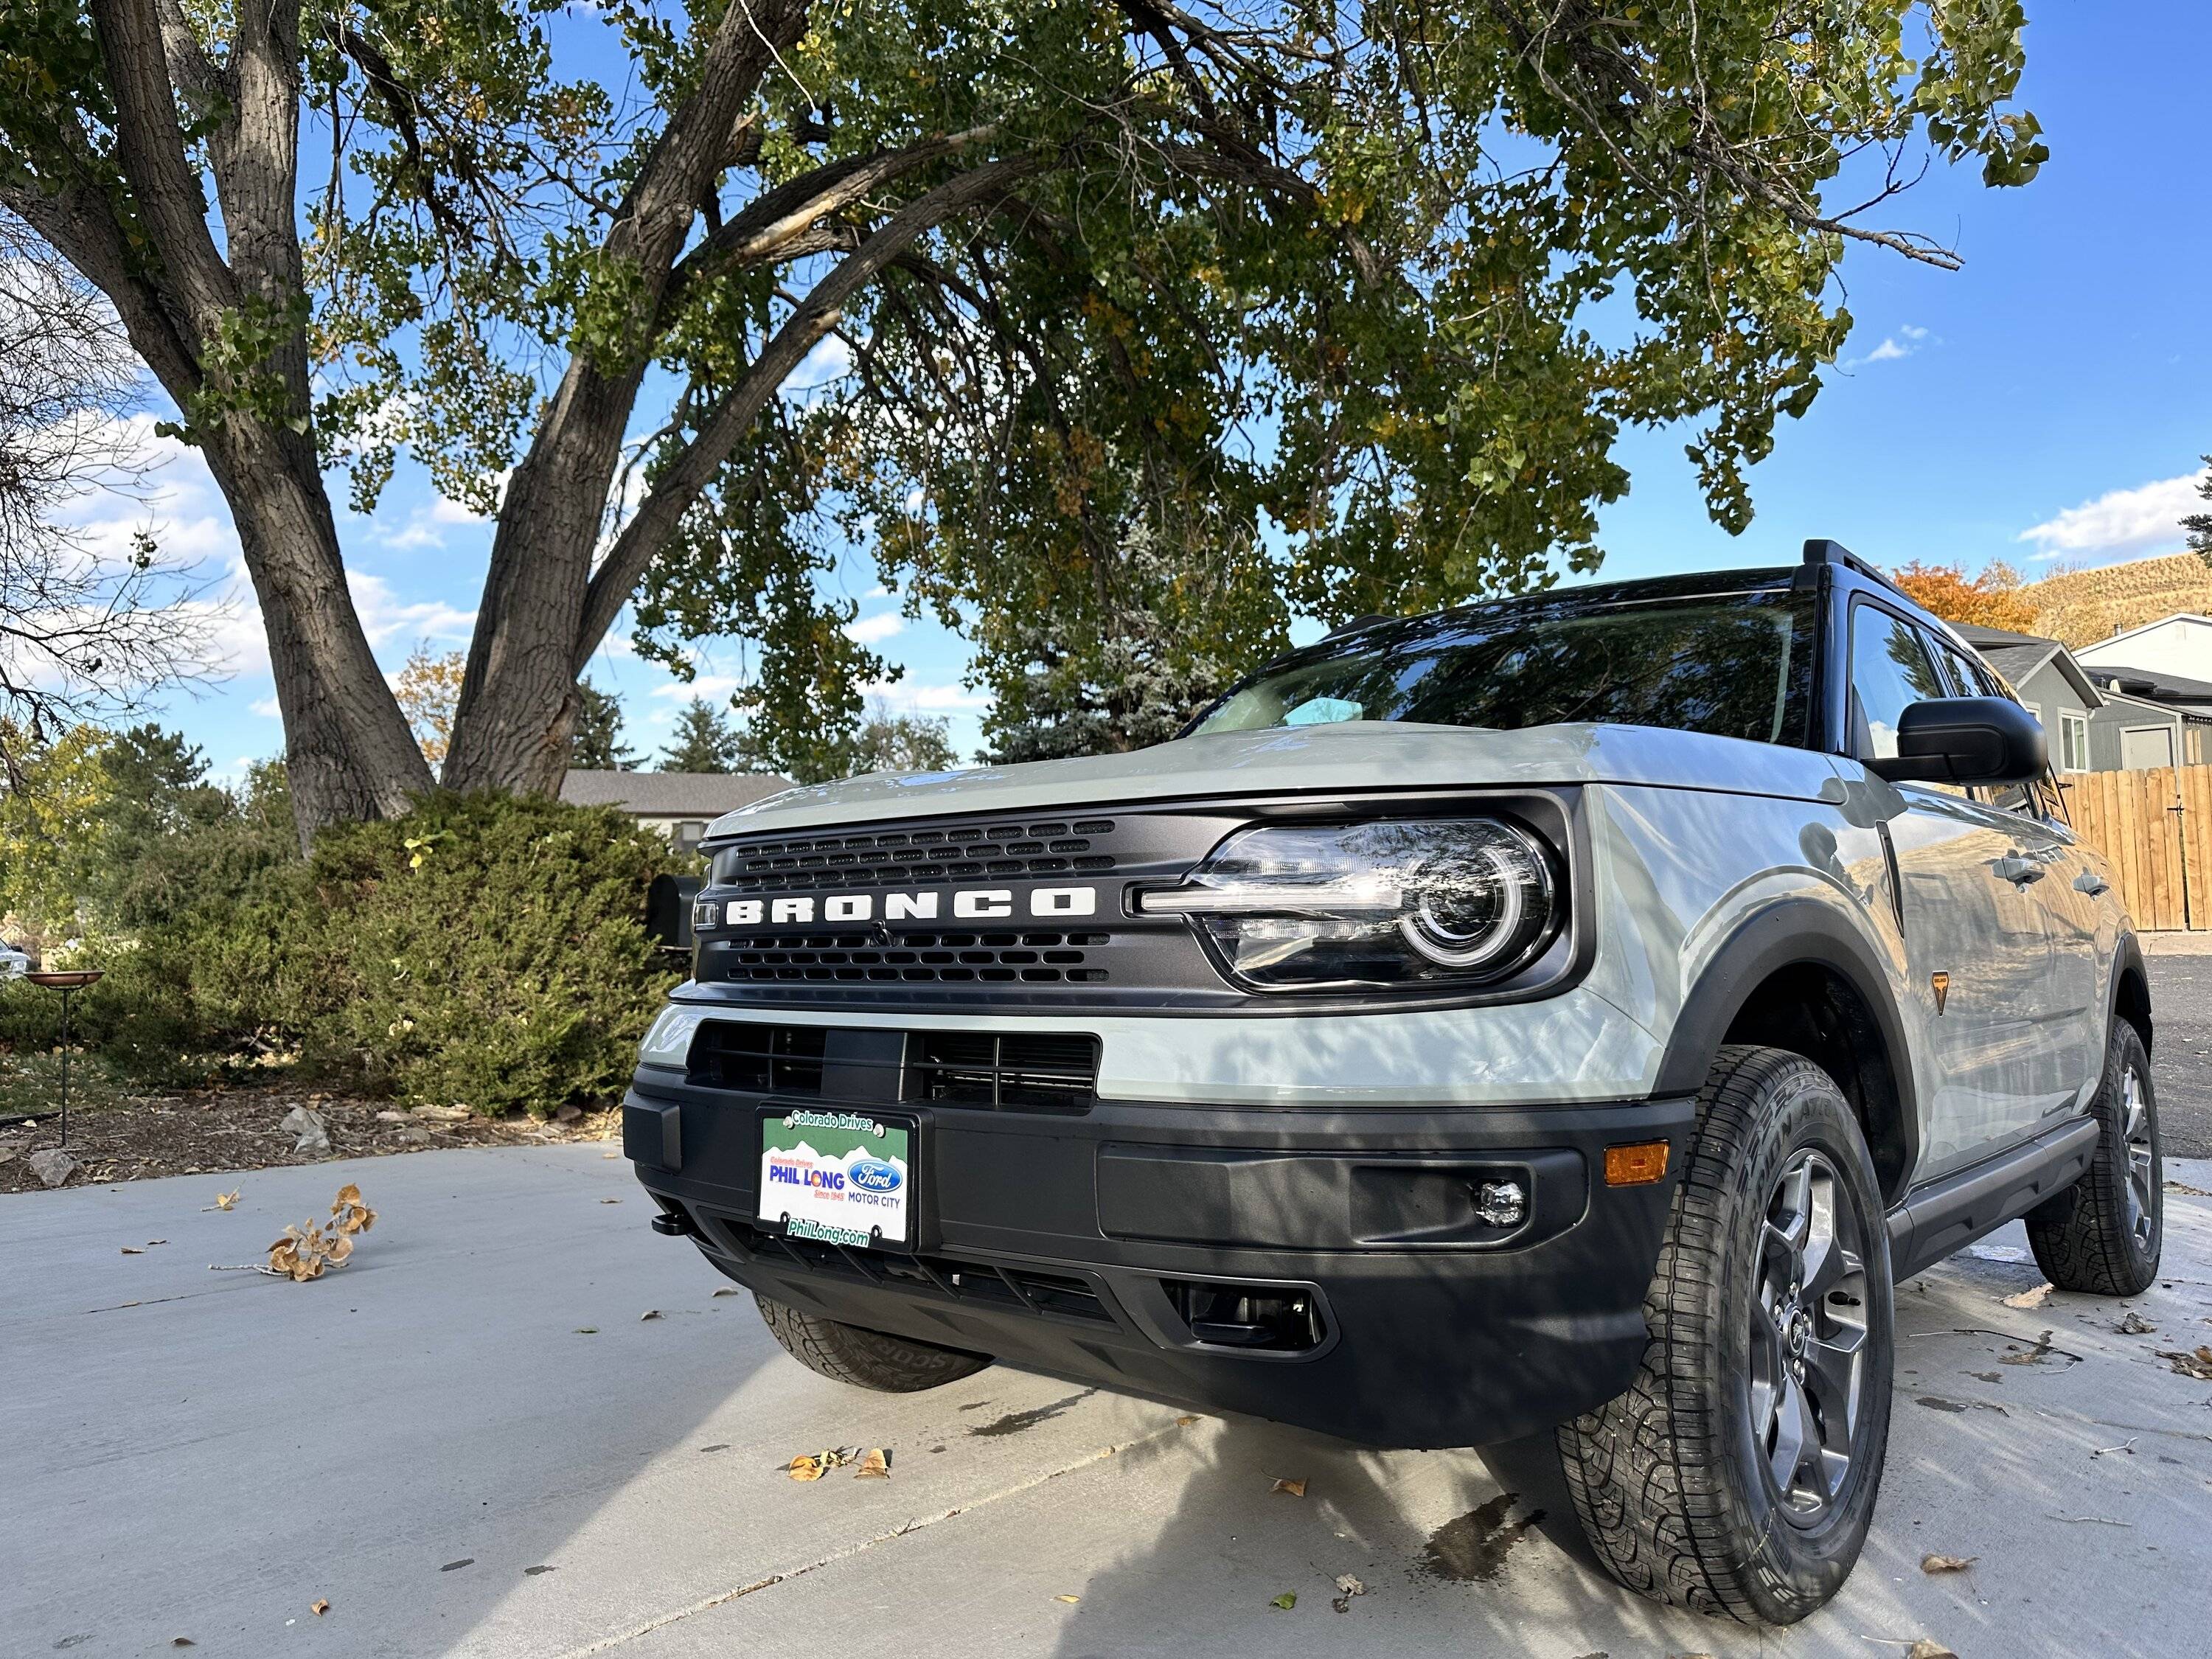
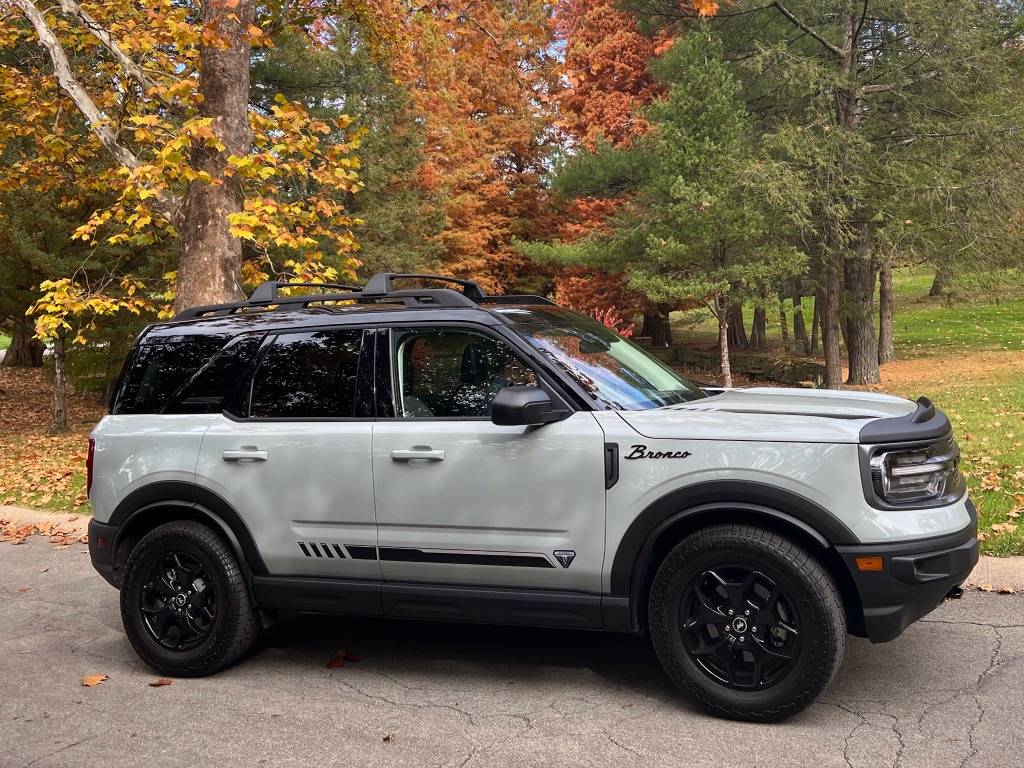
Olive
On Wednesday, 26 October 2022 I took possession of my Cactus Gray Bronco Sport Badlands. Here it is in my driveway after the 90 mile drive home from Colorado Springs.

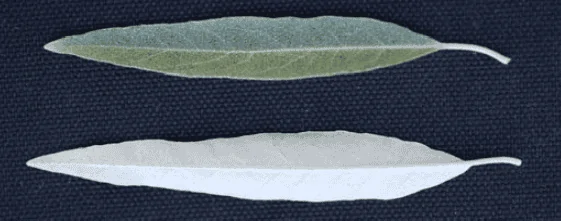
Why “Olive”? Well for me the color is the thing that really stands out and has gained a lot of comments and attention. For me, this color reminds me of the Russian Olive tree’s leaves.

There’s some green and some gray. So, I gave it the name “Olive”
With about 7 months between ordering and delivery, I had a lot of time to think about what I wanted to do. I also got a lot of inspiration from this forum and the member’s posts. I started to build a list of the the things I was going to do, along with ordering the parts and supplies I would need.
I took some pictures and collected some experience/thoughts while I was making these changes. Each item in the list below that I worthy of creating a post, is (or will be) a link to a separate post in this thread.
Here is my list:
Grille Letters
Door Badges Removed
Bumper Marker Lights/Reflectors
Fender Lights - WinPower LED Side Marker Light Turn Signal (instructions)
Hatch Letters
Hatch Ford Logo/GOAT Badge
Rear Bumper Top Protector
Hood Deflector - TBD - Air Design II
Blind Spot Mirrors
Cup Holder Trays
Antennae
Lift Kit - HRG
Brake Pads - Power Stop Ceramic
Hood Struts - Sukemichi
Wheel Spacers
Fender Flares - Air Design
Wheels/Tires/lug nuts
Fitting 245 Spare
LEDs for Tail Lights
Bike mounts
Oil drain valve - Fumoto F107SX
Ceramic Coat
Cerakote Trim
CarPlay Wireless Adapter
Speakers
Paint Correction and Ceramic Coat
Measurements
Ground Clearance (stock and after) - 9” stock, 10.75”Tire Diameter (stock and aftermarket) - 28” stock, 28-7/8” ToyoWheel/tire weight: Stock Spare - 50.5 lbs, DX-4 - 53 lbsDrive line angles (stock and after)StockSitting: FR-7.7, FL-6.4, RR-1.9, RL-2.9Full Droop: FR-20.7, FL-17.3, RR-13.5, RL-12.1LiftSitting: FR-14.6, FL-12.7, RR-6.6, RL-7.1Full Droop: FR-26.6, FL-22.5, RR-14.1, RL-12.7Reference
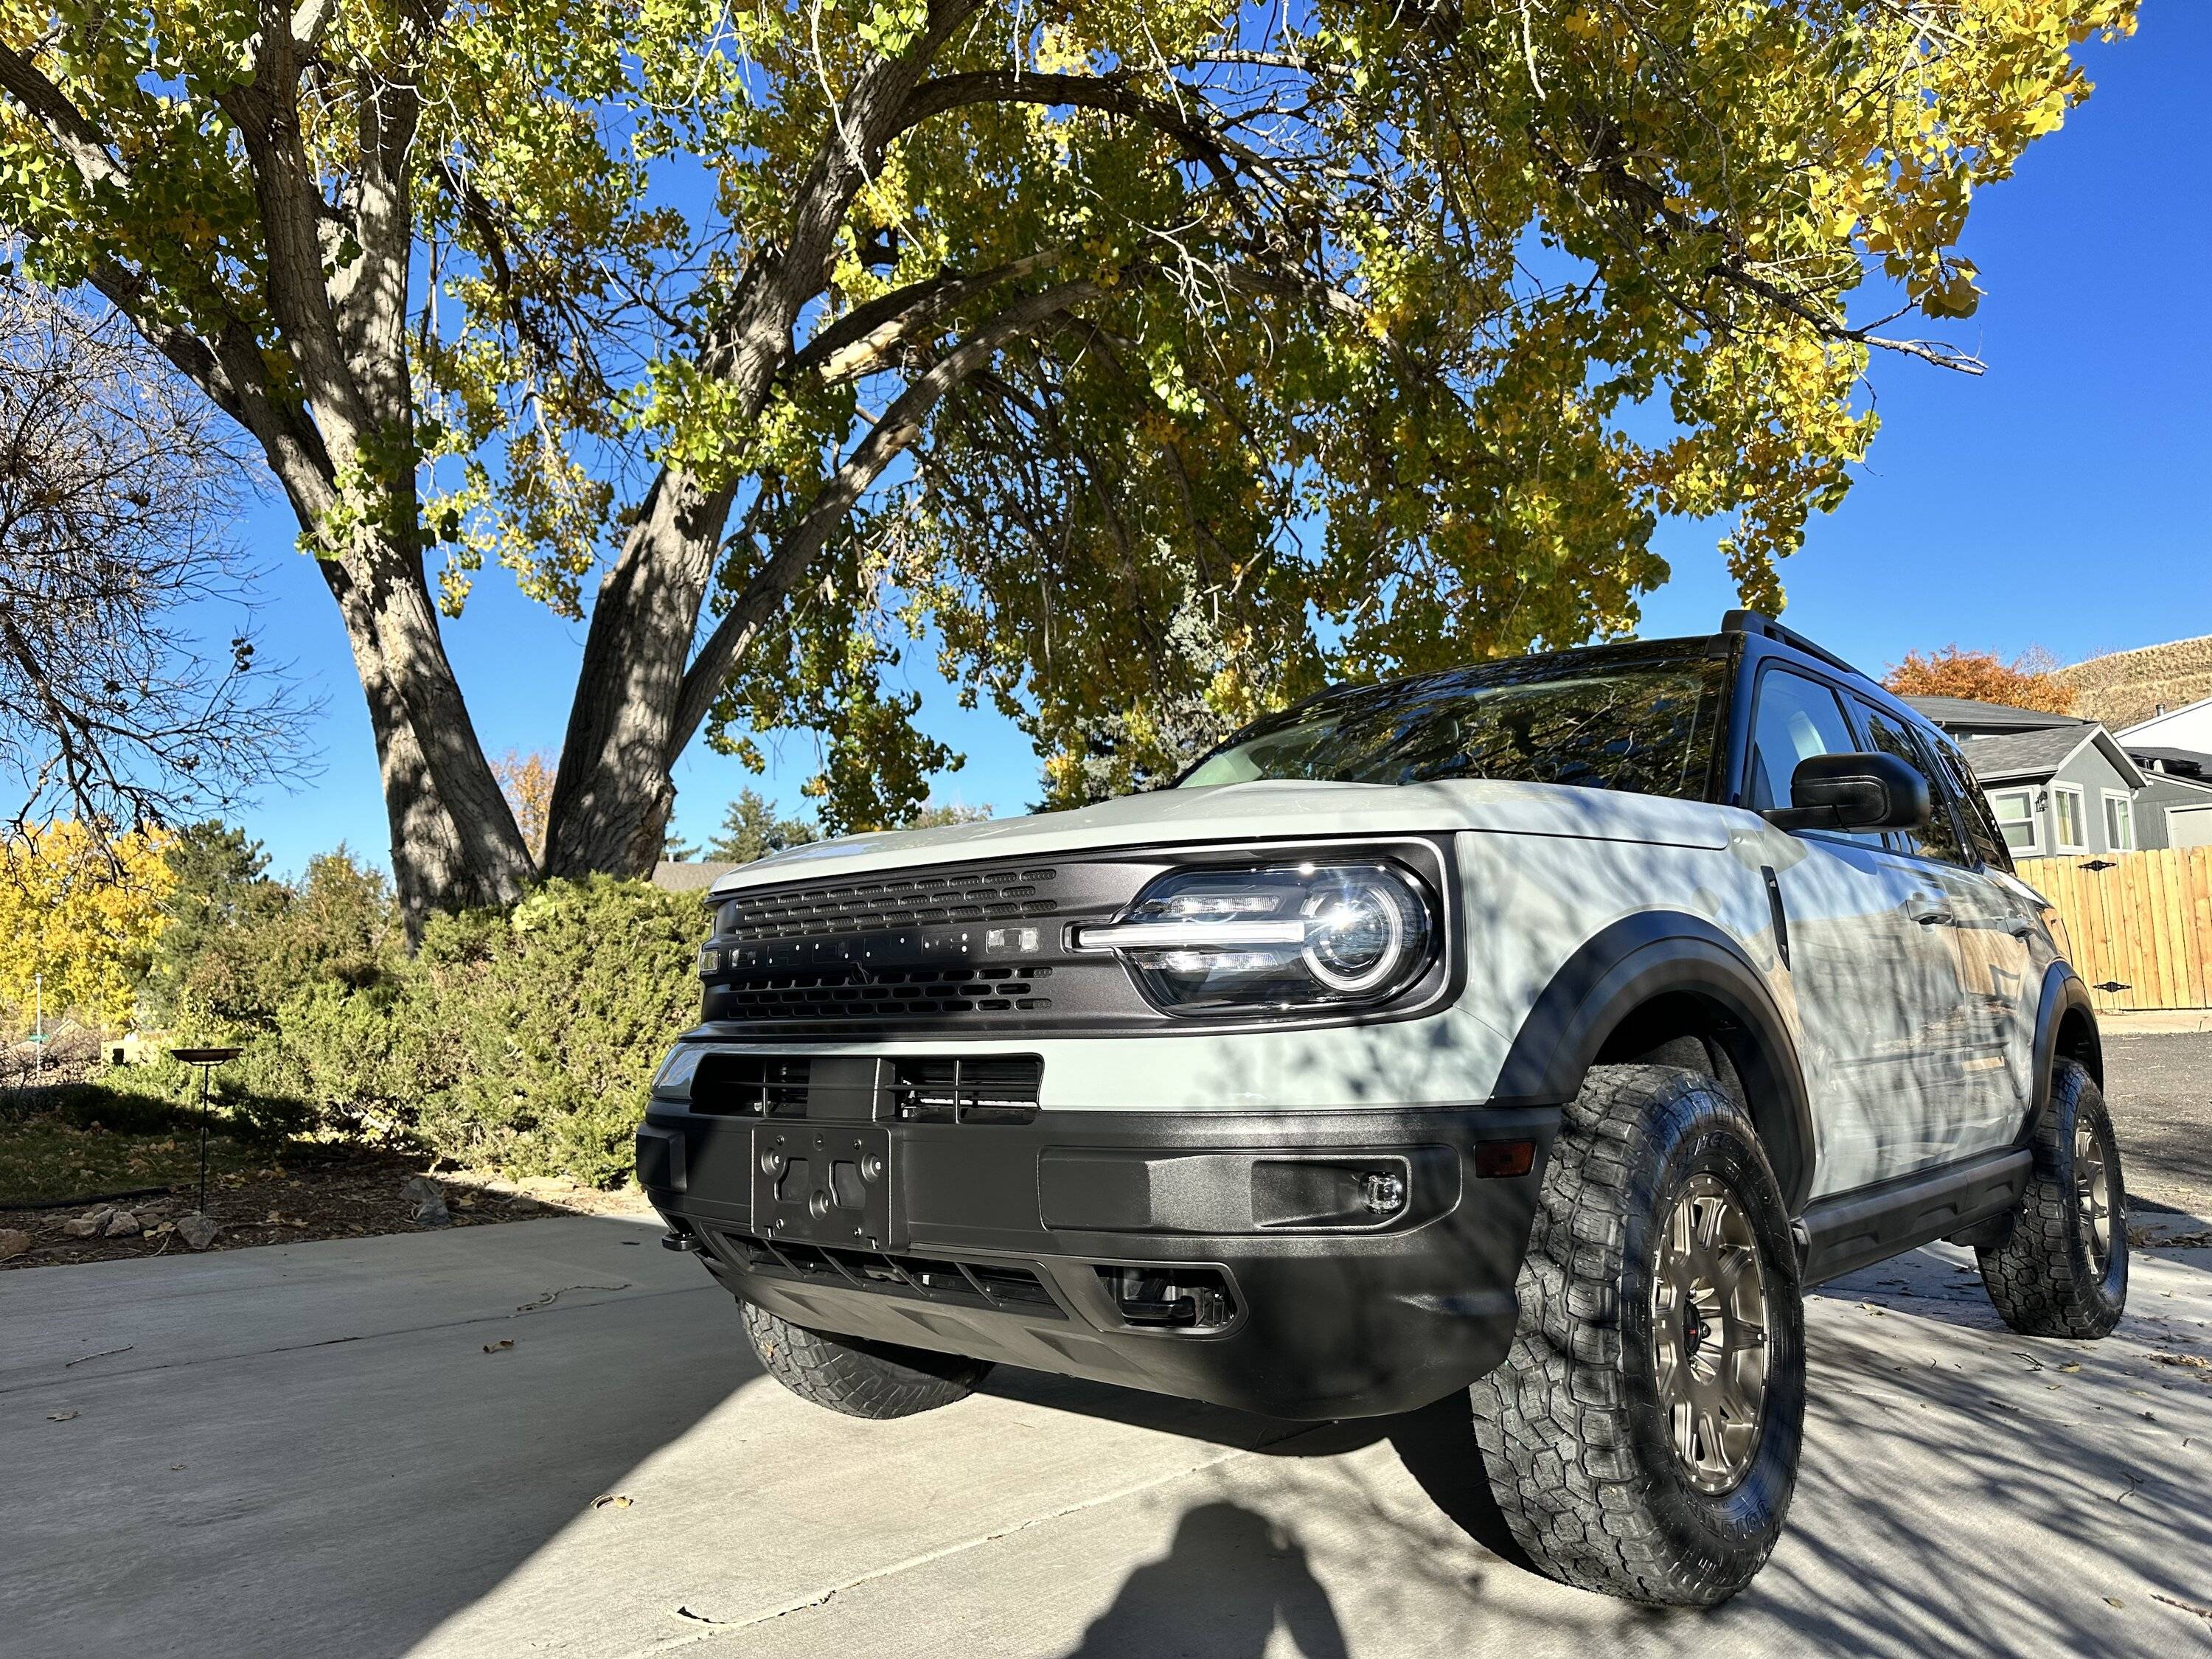
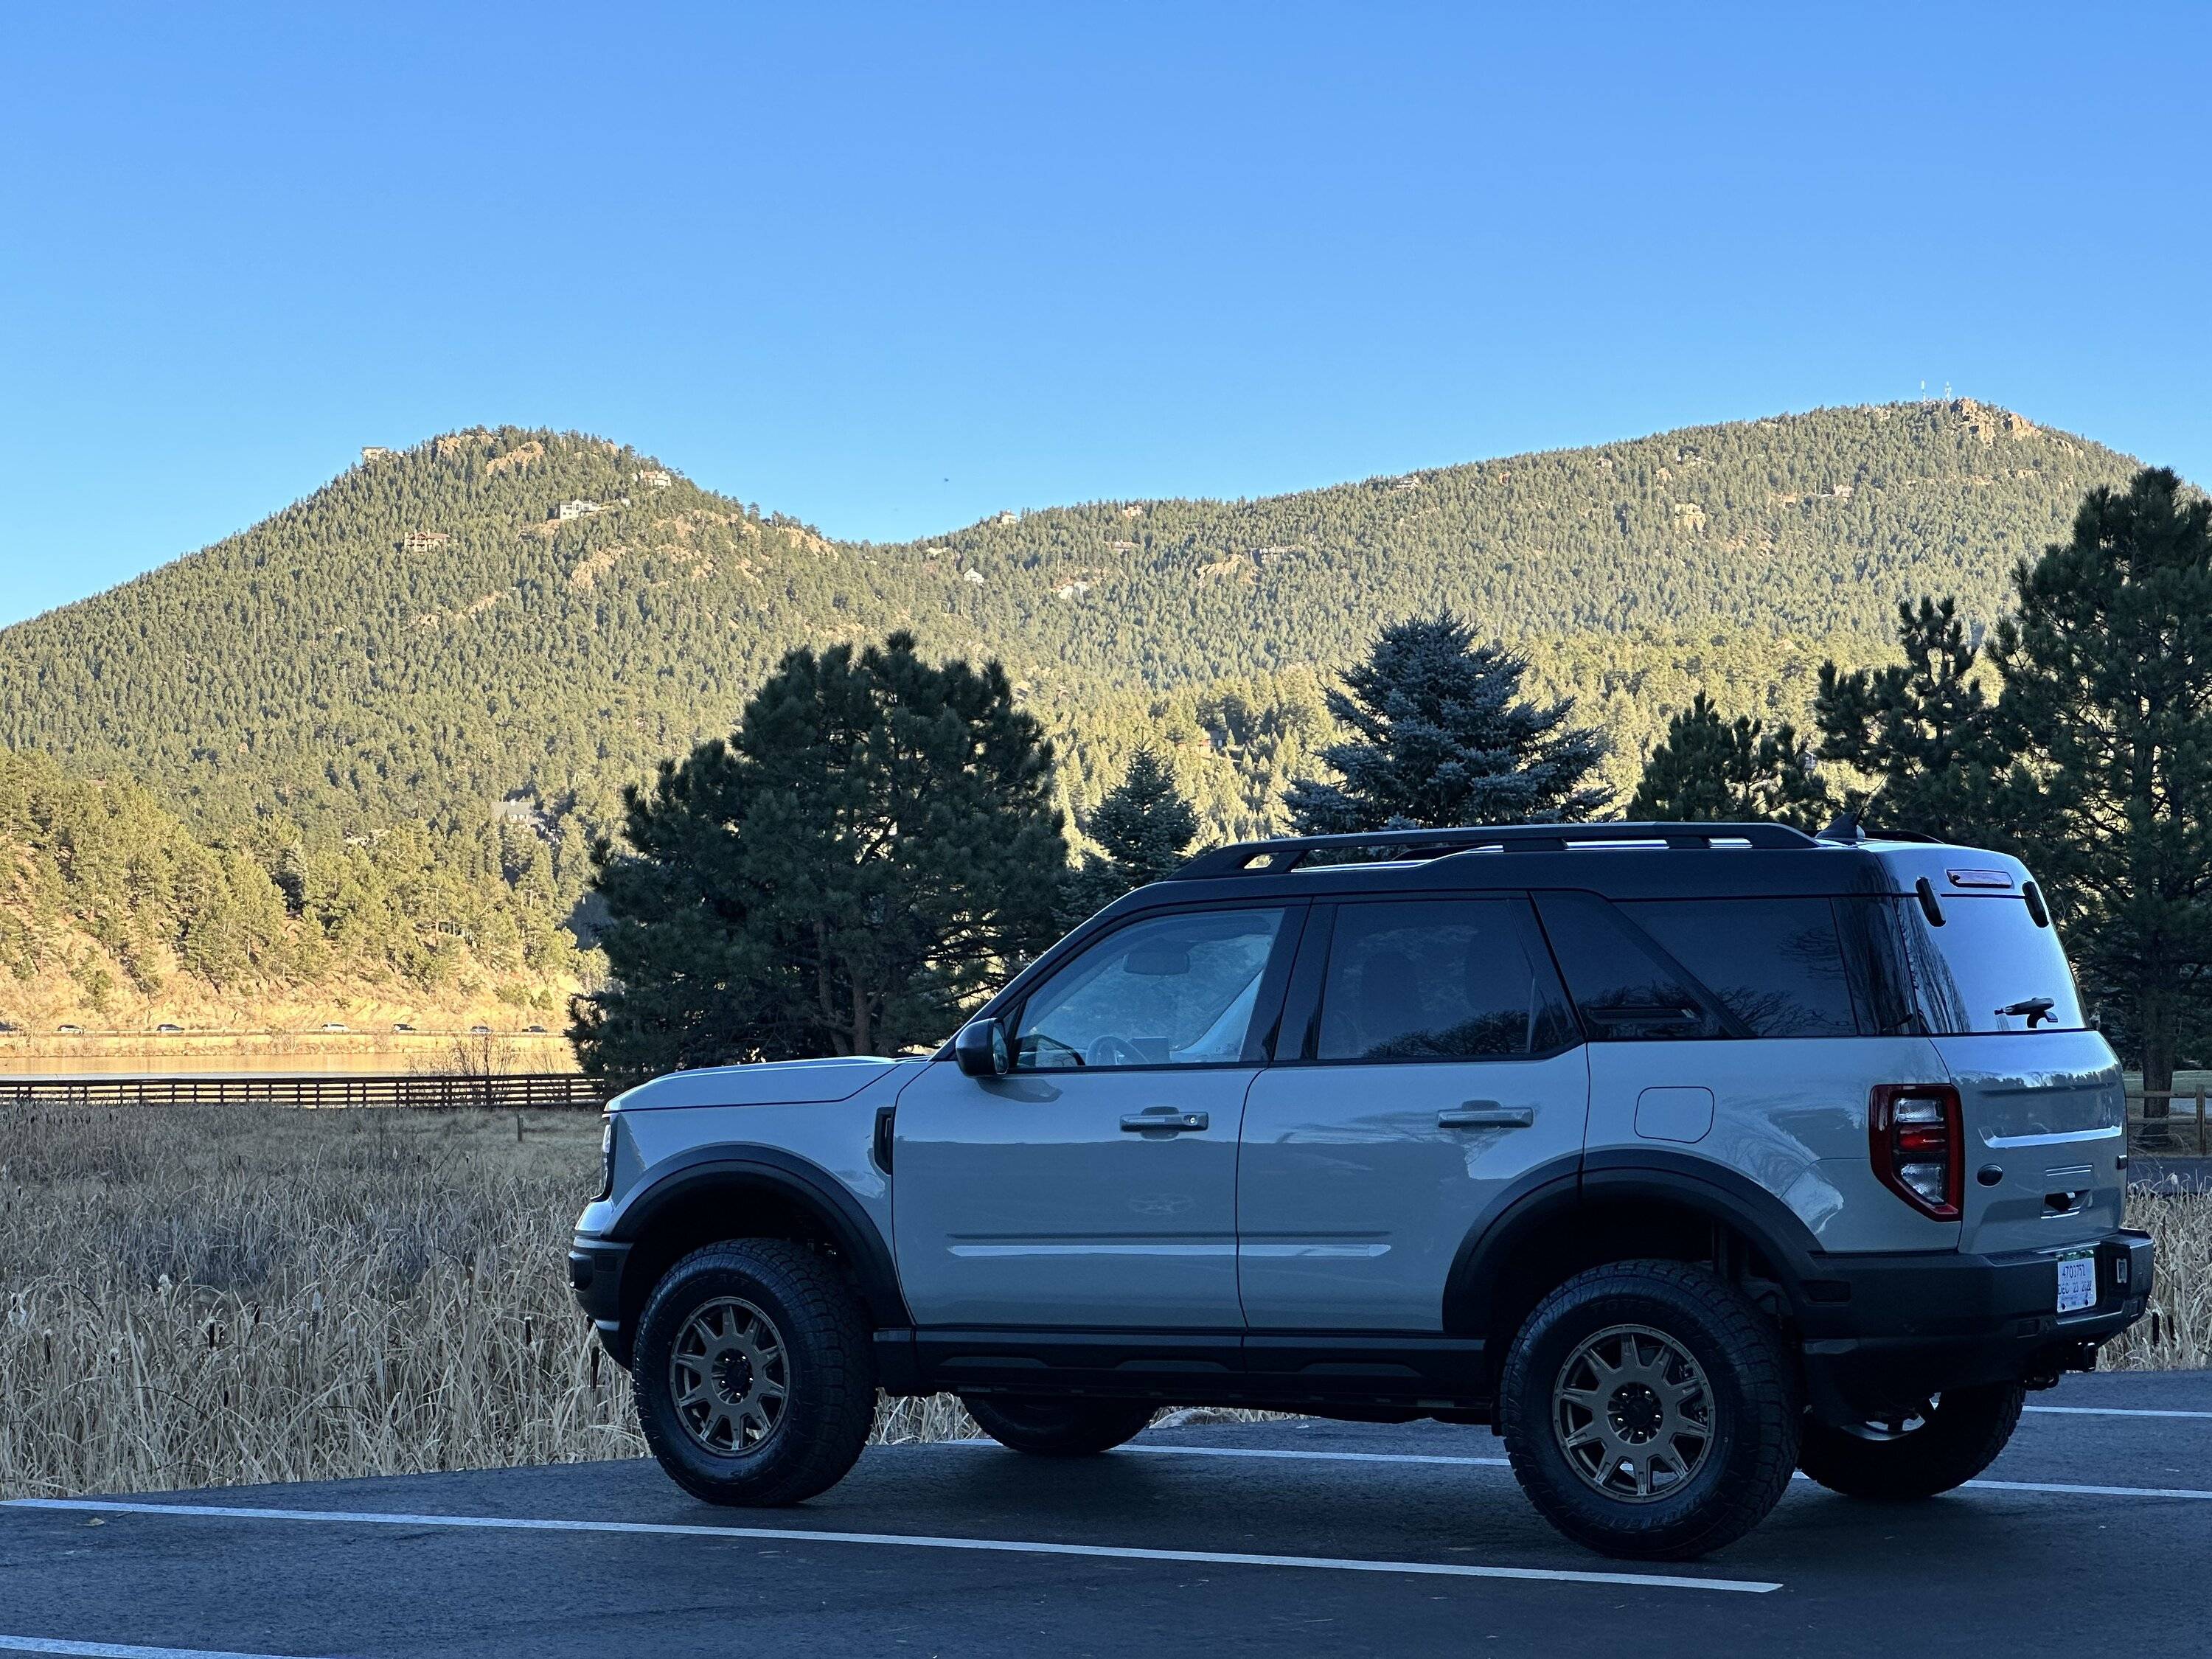
Now today after a week of working on it mechanically and aesthetically this is the transformation.
Appreciate your impeccable skills , one of the nicest bronco’s on this forum . 100 % enjoy
I spoke to tire disc on this forum and they said that a 245/70/17 would fit on my first edition , after seeing what you have done , I think that is incorrect. I would stick with 245/65/17
OP
OP
- First Name
- Eric
- Joined
- Mar 19, 2022
- Threads
- 10
- Messages
- 2,164
- Reaction score
- 3,155
- Location
- Belleville, IL
- Vehicle(s)
- '08 BMW R1200 GS Adv, '23 Norden Expedition
- Thread starter
- #38
There were a lot of changes made at the same time, so it is impossible for me to isolate the changes to just the lift kit. I think that if you did the lift kit and did not change anything else that it would not be that much different of a feel than it is at stock height.How does it feels to drive with Lift Kit - HRG does it changes a lot how the car handles?

- First Name
- Albert
- Joined
- Nov 17, 2022
- Threads
- 0
- Messages
- 3
- Reaction score
- 3
- Location
- Salt Lake City, UT
- Vehicle(s)
- 2018 subaru crosstrek, 2023 BS BB being built
Did you consider the Ford Ranger Lift? If so, what made you choose HRG over it?
How's the tire rub after the lift? Would you get anything smaller for a 16" wheel at all? I'm considering 16" for mine, but would rather not do any cutting/trimming.
How's the tire rub after the lift? Would you get anything smaller for a 16" wheel at all? I'm considering 16" for mine, but would rather not do any cutting/trimming.
OP
OP
- First Name
- Eric
- Joined
- Mar 19, 2022
- Threads
- 10
- Messages
- 2,164
- Reaction score
- 3,155
- Location
- Belleville, IL
- Vehicle(s)
- '08 BMW R1200 GS Adv, '23 Norden Expedition
- Thread starter
- #40
I looked at Ford Ranger Lift early but I can’t remember why I crossed them off the list and went with HRG. I do feel like HRG is a little more active and probably a little bit more of a company than FRL is. FRL seems to be more like a guy in his garage. HRG is probably only a step above that but at least it’s a step.Did you consider the Ford Ranger Lift? If so, what made you choose HRG over it?
How's the tire rub after the lift? Would you get anything smaller for a 16" wheel at all? I'm considering 16" for mine, but would rather not do any cutting/trimming.
All that being said, I did just order the Flat Out Suspension GR 40 kit. It might take up until January sometime for it to come in. After that, I will be selling my HRG lift kit, if anyone will buy it. I really want the ability to adjust the shocks and the extra suspension travel (just in case).
As for rub, I am seeing a little bit of rub on the bottom of the wheel well. So, all that info that I posted in the thread on the rub, will be updated eventually. The vehicle is in at the dealer to figure out why the brakes are FUBAR right now. Got a brand new Escape SEL to drive which I guess I got lucky enough to be there when they had just gotten a few. I was the first to drive it, with only 7.1 miles on the clock.
Where is the rub coming from, I believe it is from the 1” spacers. With the steering turned the spacer pushes the tire toward that flange by that amount. I might end up trying a 0.6” spacer instead to see if that cures it. To me, it has to have some spacers with the fender flares or it will just look horrible. There are a lot of people here running a 29.5” tire that have no rub. In a 16” wheel size, that tire should be 245/70/16. These Toyo’s are actually a little under that at 29”. I do like the look and the slight rub I’m seeing is not an issue for now.
- First Name
- Albert
- Joined
- Nov 17, 2022
- Threads
- 0
- Messages
- 3
- Reaction score
- 3
- Location
- Salt Lake City, UT
- Vehicle(s)
- 2018 subaru crosstrek, 2023 BS BB being built
Great feedback, thanks. I'm still partial to FRL right now for no real reason haha. I just know I won't be going with the RC lift, and I feel like I can't go wrong with HRG or FRL.I looked at Ford Ranger Lift early but I can’t remember why I crossed them off the list and went with HRG. I do feel like HRG is a little more active and probably a little bit more of a company than FRL is. FRL seems to be more like a guy in his garage. HRG is probably only a step above that but at least it’s a step.
All that being said, I did just order the Flat Out Suspension GR 40 kit. It might take up until January sometime for it to come in. After that, I will be selling my HRG lift kit, if anyone will buy it. I really want the ability to adjust the shocks and the extra suspension travel (just in case).
As for rub, I am seeing a little bit of rub on the bottom of the wheel well. So, all that info that I posted in the thread on the rub, will be updated eventually. The vehicle is in at the dealer to figure out why the brakes are FUBAR right now. Got a brand new Escape SEL to drive which I guess I got lucky enough to be there when they had just gotten a few. I was the first to drive it, with only 7.1 miles on the clock.
Where is the rub coming from, I believe it is from the 1” spacers. With the steering turned the spacer pushes the tire toward that flange by that amount. I might end up trying a 0.6” spacer instead to see if that cures it. To me, it has to have some spacers with the fender flares or it will just look horrible. There are a lot of people here running a 29.5” tire that have no rub. In a 16” wheel size, that tire should be 245/70/16. These Toyo’s are actually a little under that at 29”. I do like the look and the slight rub I’m seeing is not an issue for now.
I briefly considered the Flatout suspension, but it's getting out of my budget range.
I wonder now if I get the same wheel and tire size as you, without the spacers, if I'll get rub. I didn't get the fender flares with my BS BB, so I don't have the same worry as you regarding the look/stance.
OP
OP
- First Name
- Eric
- Joined
- Mar 19, 2022
- Threads
- 10
- Messages
- 2,164
- Reaction score
- 3,155
- Location
- Belleville, IL
- Vehicle(s)
- '08 BMW R1200 GS Adv, '23 Norden Expedition
- Thread starter
- #42
Given the experience of about a dozen or more people here on this forum, you would not have an issue with rub with the same wheel/tire size as me, but without a spacer.I wonder now if I get the same wheel and tire size as you, without the spacers, if I'll get rub. I didn't get the fender flares with my BS BB, so I don't have the same worry as you regarding the look/stance.
OP
OP
- First Name
- Eric
- Joined
- Mar 19, 2022
- Threads
- 10
- Messages
- 2,164
- Reaction score
- 3,155
- Location
- Belleville, IL
- Vehicle(s)
- '08 BMW R1200 GS Adv, '23 Norden Expedition
- Thread starter
- #43
I just went back to look at the FRL kit. What bothers me is they don’t actually show the kit itself. You don’t see the parts so it is hard to know if everything is included. Reading the description, I don’t see any mention of the sway bar endlinks. Do they have an extension like the RC kit or do they included longer endlinks like the HRG kit?Great feedback, thanks. I'm still partial to FRL right now for no real reason haha. I just know I won't be going with the RC lift, and I feel like I can't go wrong with HRG or FRL.
One bad thing about the HRG kit is that the endlink connectors are thicker than the stock one which requires a relocation of the ABS sensor wire mounting on the wheel well. Otherwise the endlink connector can rub on the wire at certain steering inputs and suspension compression.
- First Name
- Albert
- Joined
- Nov 17, 2022
- Threads
- 0
- Messages
- 3
- Reaction score
- 3
- Location
- Salt Lake City, UT
- Vehicle(s)
- 2018 subaru crosstrek, 2023 BS BB being built
I asked FRL about this, and this was his response:I just went back to look at the FRL kit. What bothers me is they don’t actually show the kit itself. You don’t see the parts so it is hard to know if everything is included. Reading the description, I don’t see any mention of the sway bar endlinks. Do they have an extension like the RC kit or do they included longer endlinks like the HRG kit?
One bad thing about the HRG kit is that the endlink connectors are thicker than the stock one which requires a relocation of the ABS sensor wire mounting on the wheel well. Otherwise the endlink connector can rub on the wire at certain steering inputs and suspension compression.
"My kit is designed to use factory swaybar end links. There is no need for extended swaybar links. Two front strut spacers, two rear spring spacers, four rear trailing arm spacers, four 1” rear sub frame drop spacers. "
- First Name
- Steve
- Joined
- Sep 12, 2022
- Threads
- 56
- Messages
- 879
- Reaction score
- 850
- Location
- Chicagoland
- Vehicle(s)
- 2023 Bronco sport
So are those overlays coming on a slow boat from China?Grille Letters
The giant 3D letters on the grill has always been something I didn’t really like. The white letters makes that worse. I’ve seen so many people post about putting the overlays on the letters. This is an improvement for the white letters but still a compromise to me.
So I started thinking about what I could do to change it to something I would like. I looked at eBay for pictures of the grille without the letters. Which started to spark some ideas.
At first I wanted to eliminate the “BRONCO” all together. I decided in the end that it would be too plain. I also thought about putting a light bar to carry the light all the way across from one headlight to the other. That too would have issues in that there would be a spot between the headlight and the custom light bar. Then would the light bar light match the headlight light? Again, another dead end idea that just had too many issues.
So, I decided it was really the “white” and the “3D” that bothered me. I was determined to do something different that what I have seen others do. That really comes down to a PlastiDip spray or the sticker overlays.
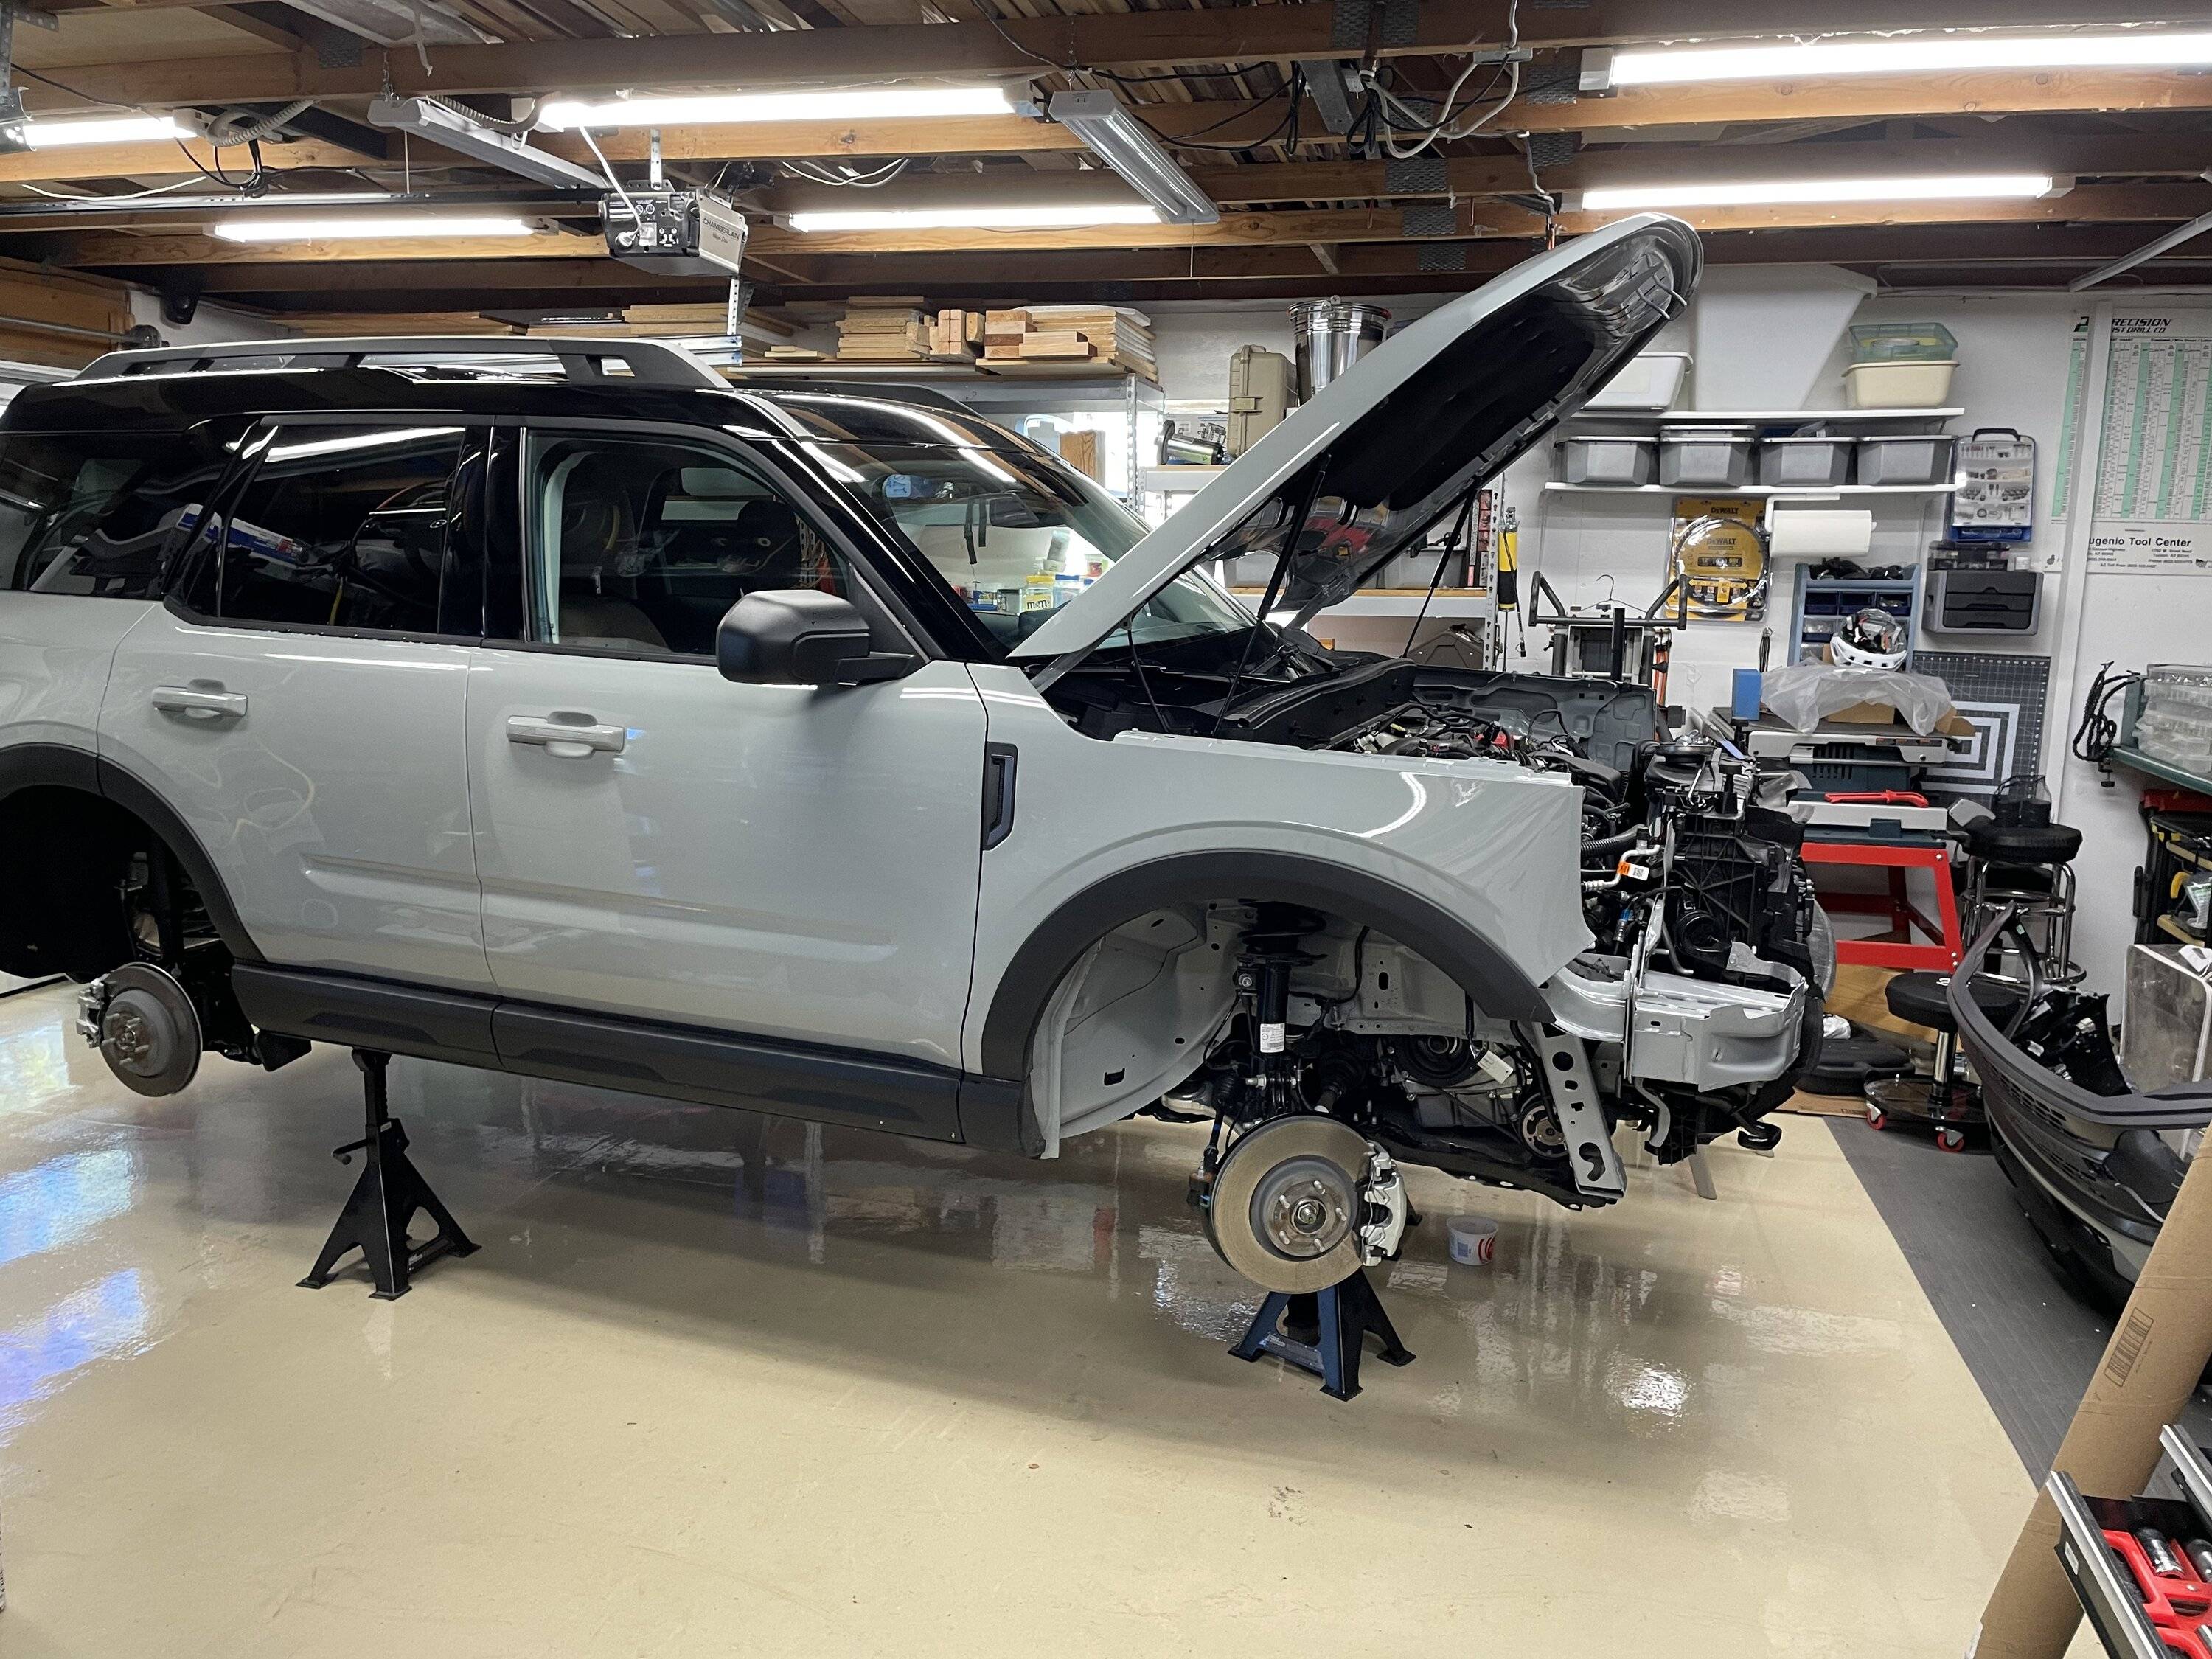
Removing the 3D letters is quite the ordeal. There are a couple of hurdles here. The first try was to just pull the letters off, thinking that they would just be glued on. Unfortunately, Ford got way more aggressive than that. Pulling on the letters just did not seem to be an option. There is some adhesive but also a mechanical attachment. To get to the inside of the grille, you really have to remove the whole front of the car.

Once you get to this point, you’ll realize that Ford used push-nuts on the inside of the letters. These are essentially something that cannot be removed because they slide over the plastic during installation but will bite into the plastic when you try to remove it. Now, I was left with the decision to go “all in”. And I did, by breaking the plastic pins on each of the letters so that the push-nuts could be released.
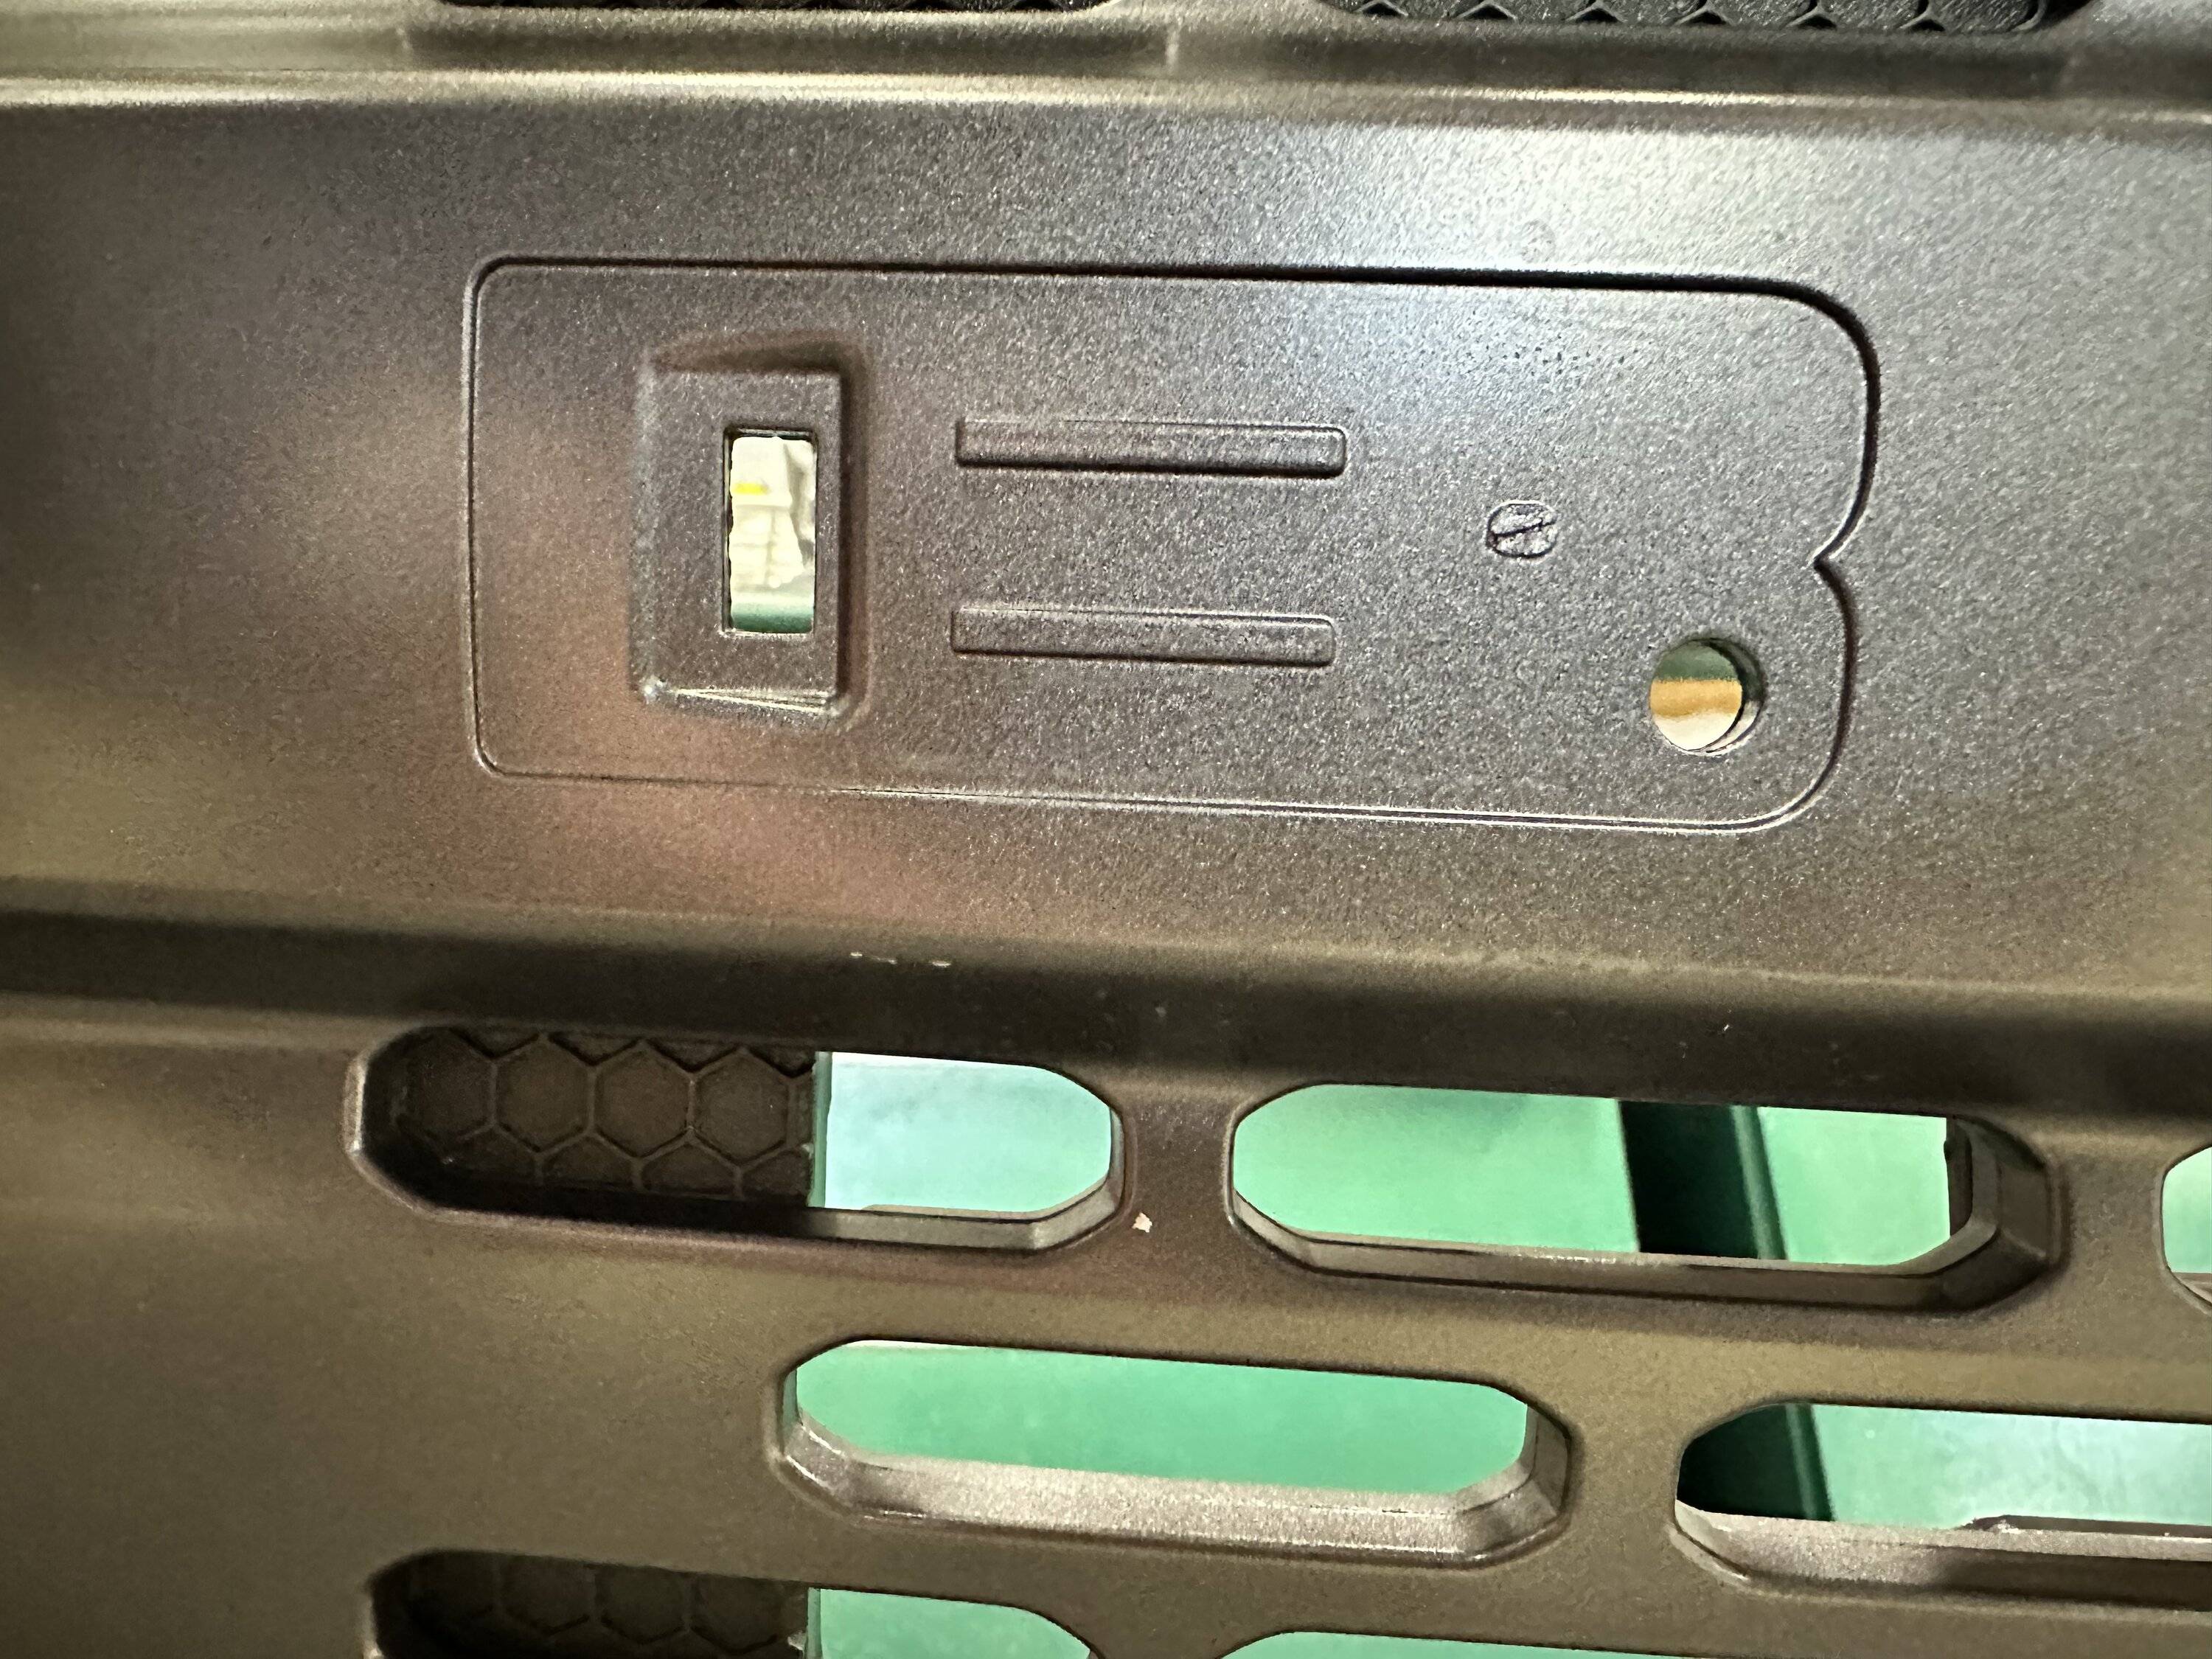
The interesting thing is that Ford put a different clip on each end. On the “B” and the trailing “O”.

The other letters just have 2 posts

The other thing you might notice is the gate vestige from the injection mold in the field of the letter. This is in multiple letters.
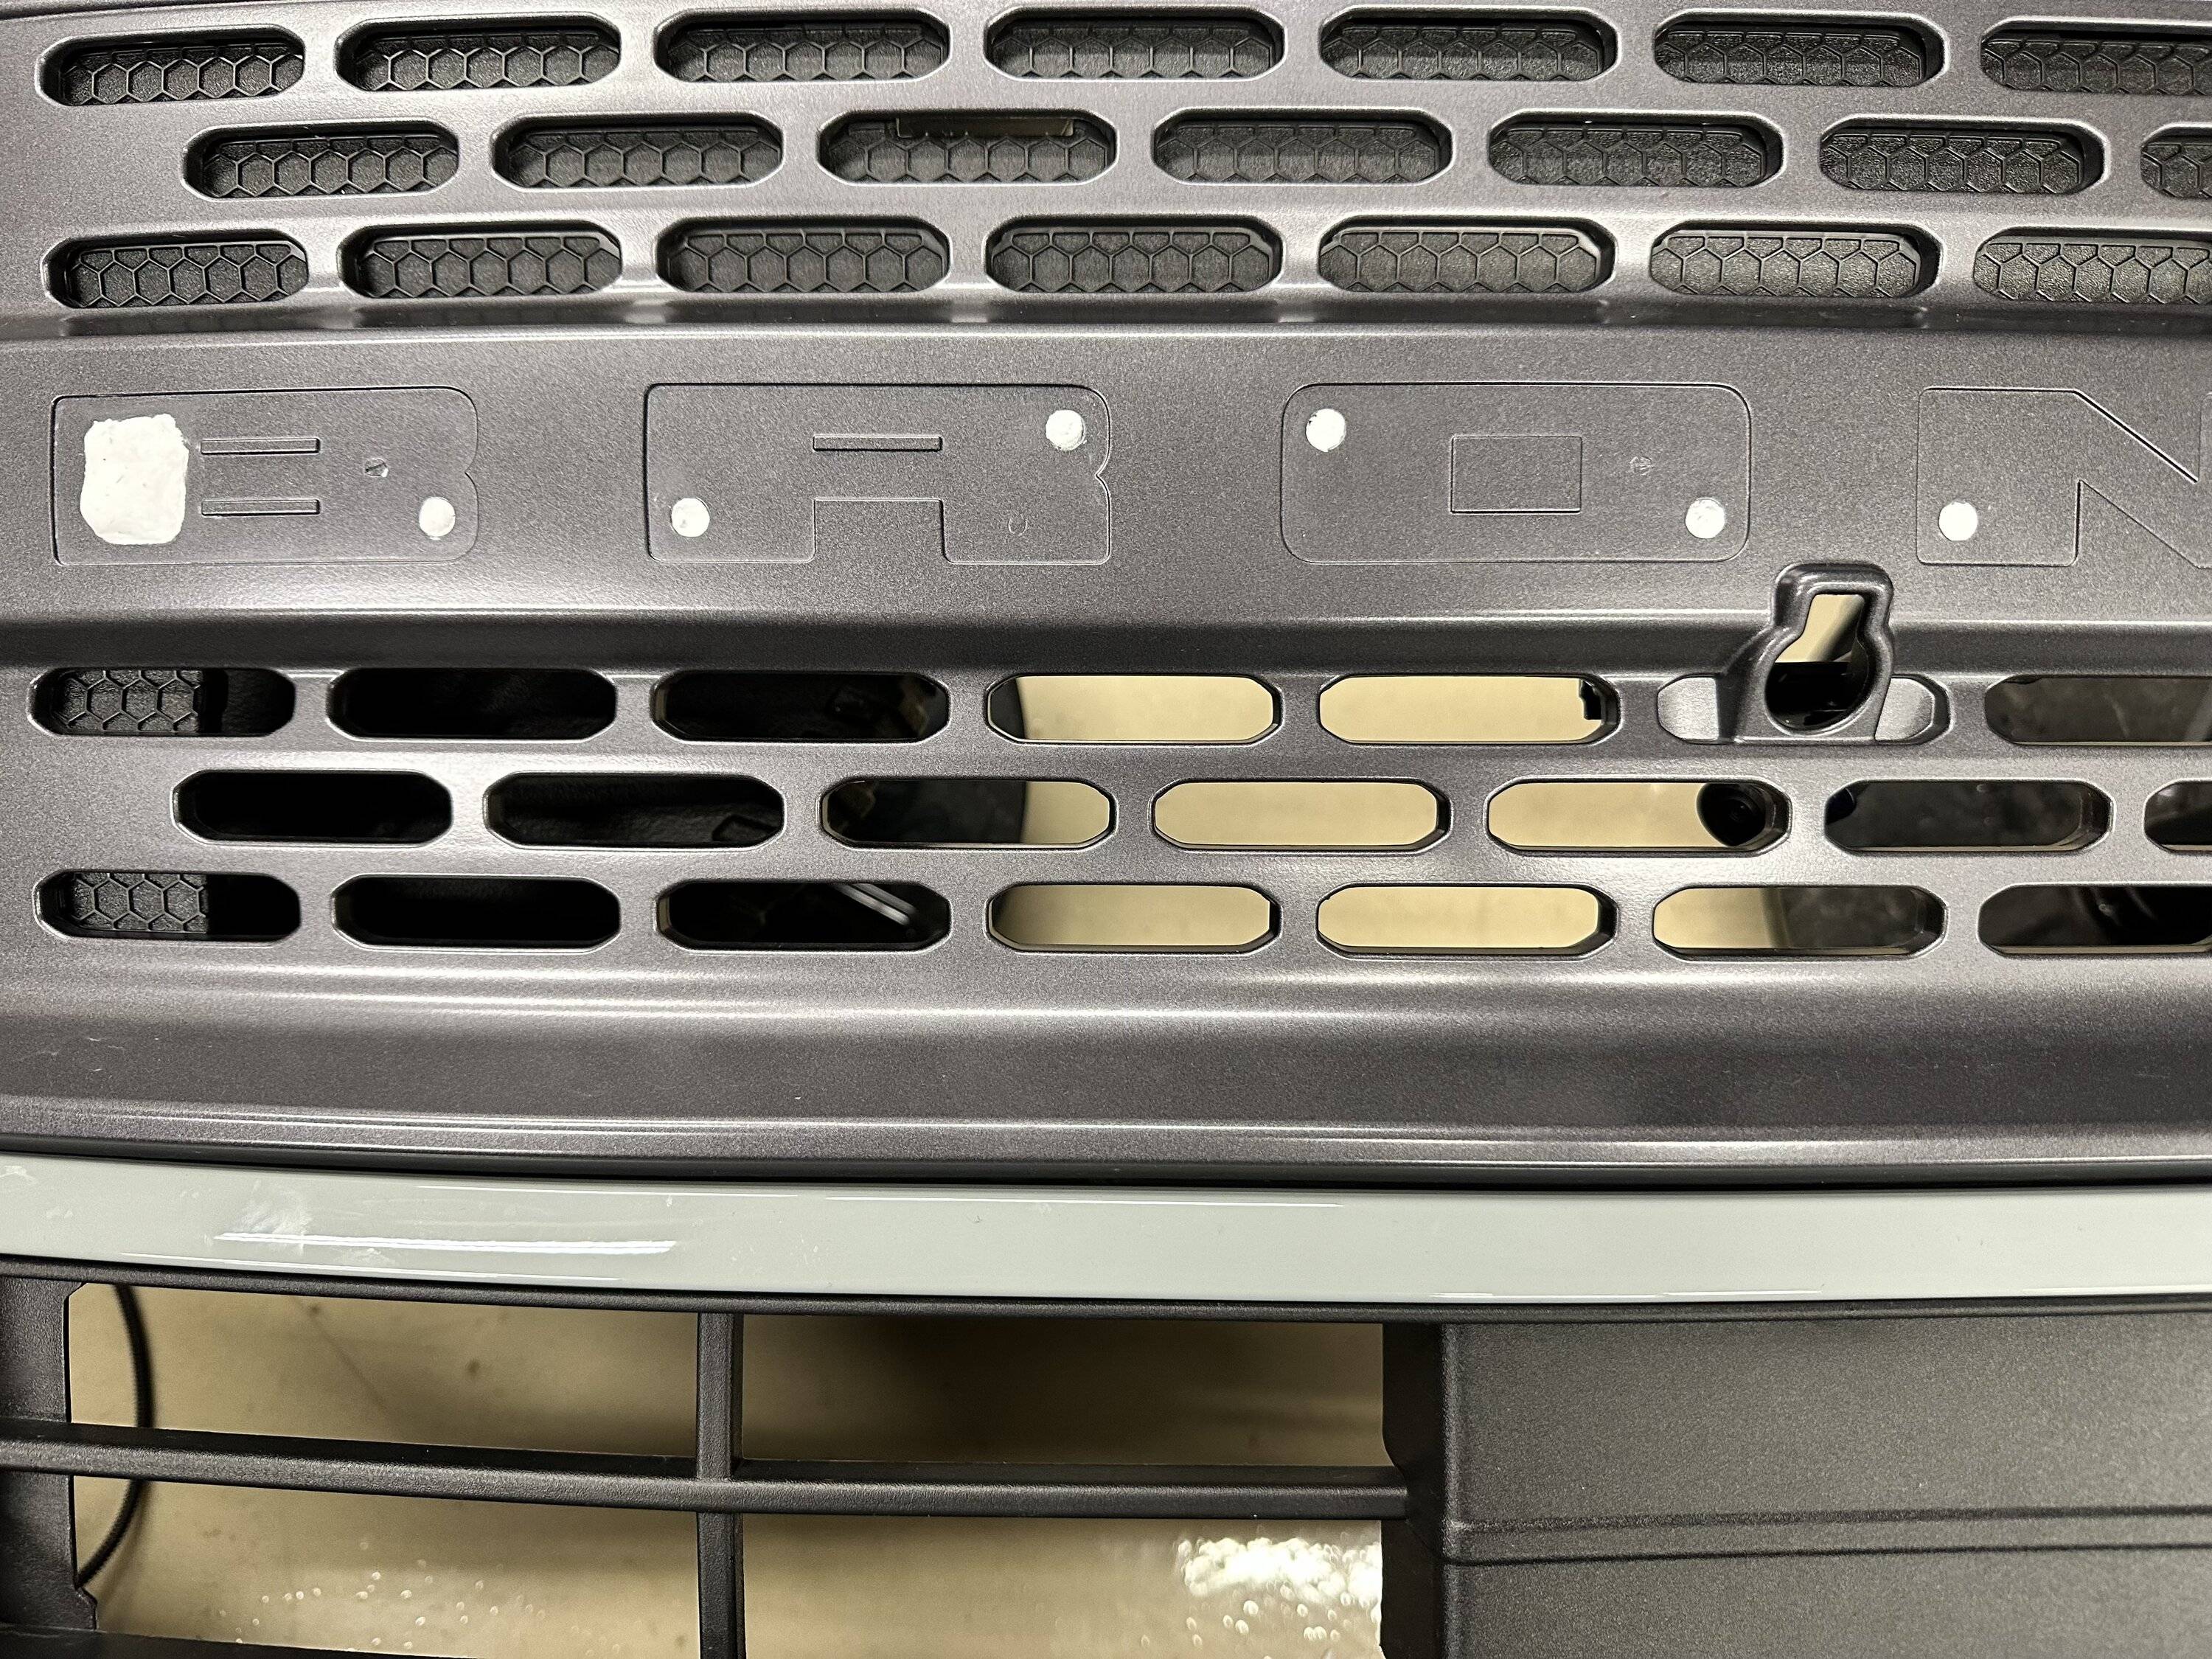
Now how do I get all of this smoothed out? I started with some JB Weld Plastic Weld Putty. Which allowed me to fill in the big holes relatively well but still hard to get somewhat flat/even. The big holes in the end letters is the real problem area.
J-B Weld 8237 PlasticWeld Plastic Repair Epoxy Putty - 2 oz.
I had some regular JB Weld in the garage that is more liquid to fill in some of the smaller gaps. I then had to smooth all of this out as best I could. Using some razor scrapers got everything closer (including the gate vestiges). It was then time to sand it smooth. This is a delicate operation because you don’t want to sand anything outside of the letters.
Here is a picture before the standard JB Weld and the sanding.

Here is a picture with the standard JB Weld and after sanding.

I have ordered some overlay stickers and I will see if that is good enough or if it needs something more. The stickers have not arrived yet, but I will update this post with pictures/thoughts once they arrive and are installed.


 . I've been waiting to see how it turns out. Some where I came across the part numbers for the Gloss Black letters for the grille. With hte Hot Pepper Red I was considering that option as well. Oh and where is that ceiling insulation?