- Thread starter
- #1
When I bought my Bronco Sport, I had a hard time finding one with a Cargo Management System on the lot. And the ones that did have it, weren't marked down with enough discounts to make the upgrade worth it. I decided that eventually I'd just spend the money on buying the parts for the CMS, or buying a custom-built utility box from an emergency vehicle upfitting service. Well, after pricing out a CMS upgrade at almost $1,000, and a custom solution running between $3,000 and $6,000, I decided I'd just make my own.
Using scrap wood that I had laying in my basement from a previous project, I jumped in and started throwing some ideas together.

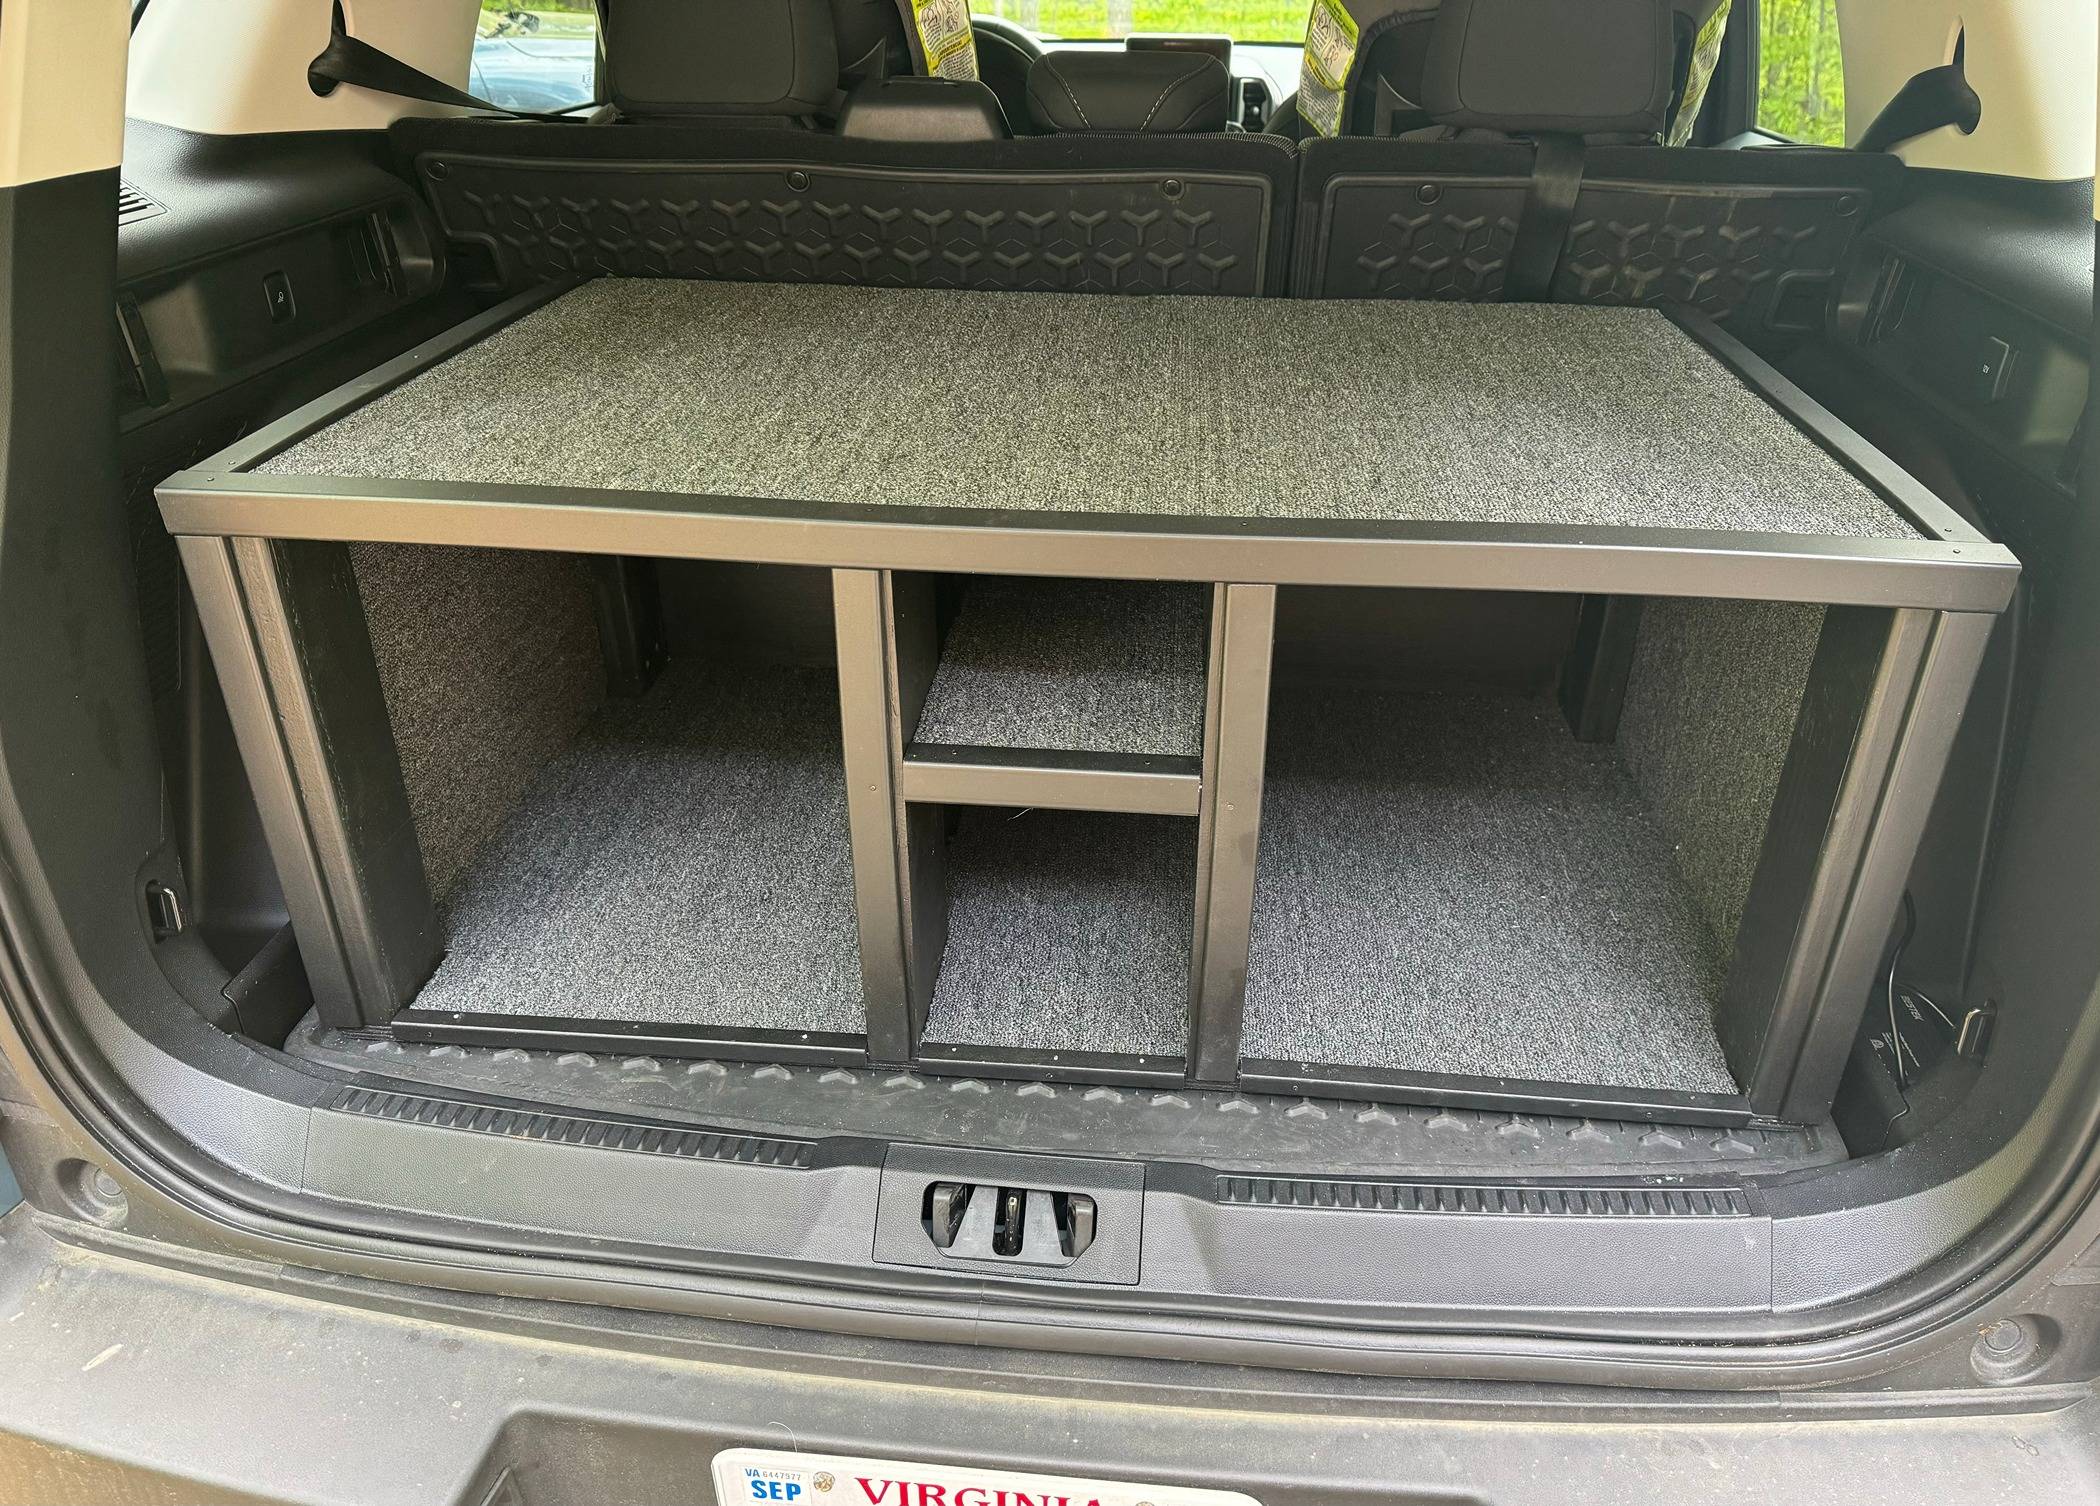
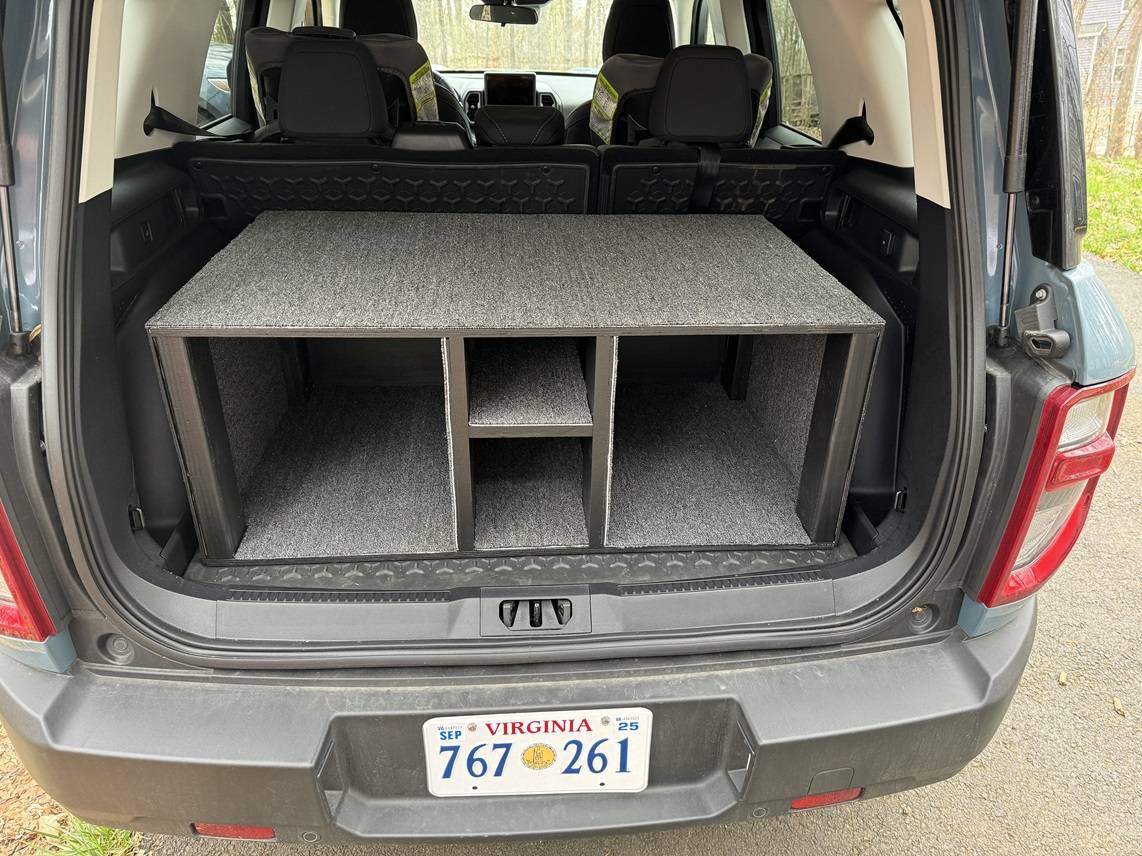
I started with a box that would fit on the OEM mat. I wanted something that would fit without any other modifications, and something I could easily remove for the times that I needed to haul something larger. The corners are 2x4's, and the top and bottom are 3/4" sanded plywood.
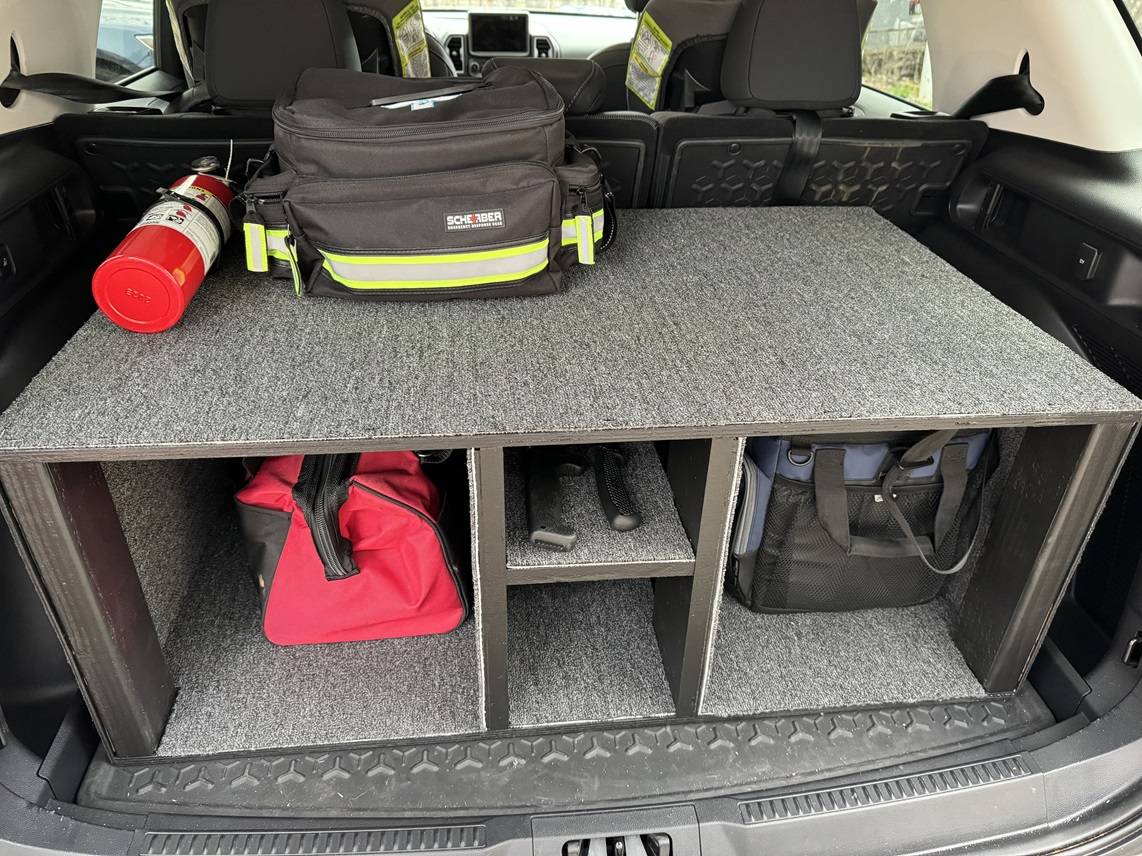
With the rear hatch closed and the glass open, I now have a flat surface, similar to what I could have had with the Cargo Management System. I figure the important "need to grab quickly" items would sit up top, and the "I'll use these things when I'm not in a hurry" items in the bottom.

I originally was going to just separate it down the middle, but figured I could add a divider instead to break up the space a bit. The divider was made using some sanded pine boards, then I used some leftover sanded plywood to make each compartment closed off.
I decided "why not make another shelf!" and added a small shelf to the center of the box. Not only did this provided extra divided storage, but it really provided some extra support to the overall frame.
And here is how it currently sits. It's not completely done, but it's working as intended. I ended up painting the entire box, inside and out, with Behr Premium black paint. I decided the paint alone wasn't great, so I went back to Home Depot and I got some cheap cut-to-order carpet that really made a difference (and kept everything from sliding around). The sides, and bottom of every compartment are completely carpet-lined, leaving the top and rear black in each compartment.
My next step will be adding some trim to cover the carpet edges (which I've cut, but haven't had a chance to paint and install yet). I will also be adding an iPad mount to the top so that I can fly my drone and the iPad mounted securely in the back.
For those that like dimensions: The overall box is 39" wide, 24" deep and 15" tall. The two large compartments are 14" wide, 24" deep and 14" tall (usable space). The center compartments are 7" wide, 24" deep, and (5" tall top/7.5" tall bottom).
Feel free to share your thoughts!
Using scrap wood that I had laying in my basement from a previous project, I jumped in and started throwing some ideas together.


I started with a box that would fit on the OEM mat. I wanted something that would fit without any other modifications, and something I could easily remove for the times that I needed to haul something larger. The corners are 2x4's, and the top and bottom are 3/4" sanded plywood.
With the rear hatch closed and the glass open, I now have a flat surface, similar to what I could have had with the Cargo Management System. I figure the important "need to grab quickly" items would sit up top, and the "I'll use these things when I'm not in a hurry" items in the bottom.


I originally was going to just separate it down the middle, but figured I could add a divider instead to break up the space a bit. The divider was made using some sanded pine boards, then I used some leftover sanded plywood to make each compartment closed off.

I decided "why not make another shelf!" and added a small shelf to the center of the box. Not only did this provided extra divided storage, but it really provided some extra support to the overall frame.
And here is how it currently sits. It's not completely done, but it's working as intended. I ended up painting the entire box, inside and out, with Behr Premium black paint. I decided the paint alone wasn't great, so I went back to Home Depot and I got some cheap cut-to-order carpet that really made a difference (and kept everything from sliding around). The sides, and bottom of every compartment are completely carpet-lined, leaving the top and rear black in each compartment.
My next step will be adding some trim to cover the carpet edges (which I've cut, but haven't had a chance to paint and install yet). I will also be adding an iPad mount to the top so that I can fly my drone and the iPad mounted securely in the back.
For those that like dimensions: The overall box is 39" wide, 24" deep and 15" tall. The two large compartments are 14" wide, 24" deep and 14" tall (usable space). The center compartments are 7" wide, 24" deep, and (5" tall top/7.5" tall bottom).
Feel free to share your thoughts!