
- First Name
- Mark
- Joined
- Oct 30, 2021
- Threads
- 119
- Messages
- 6,733
- Reaction score
- 13,156
- Location
- St. Jacob, IL
- Vehicle(s)
- 2021 Badlands | 2020 Escape
- Thread starter
- #1
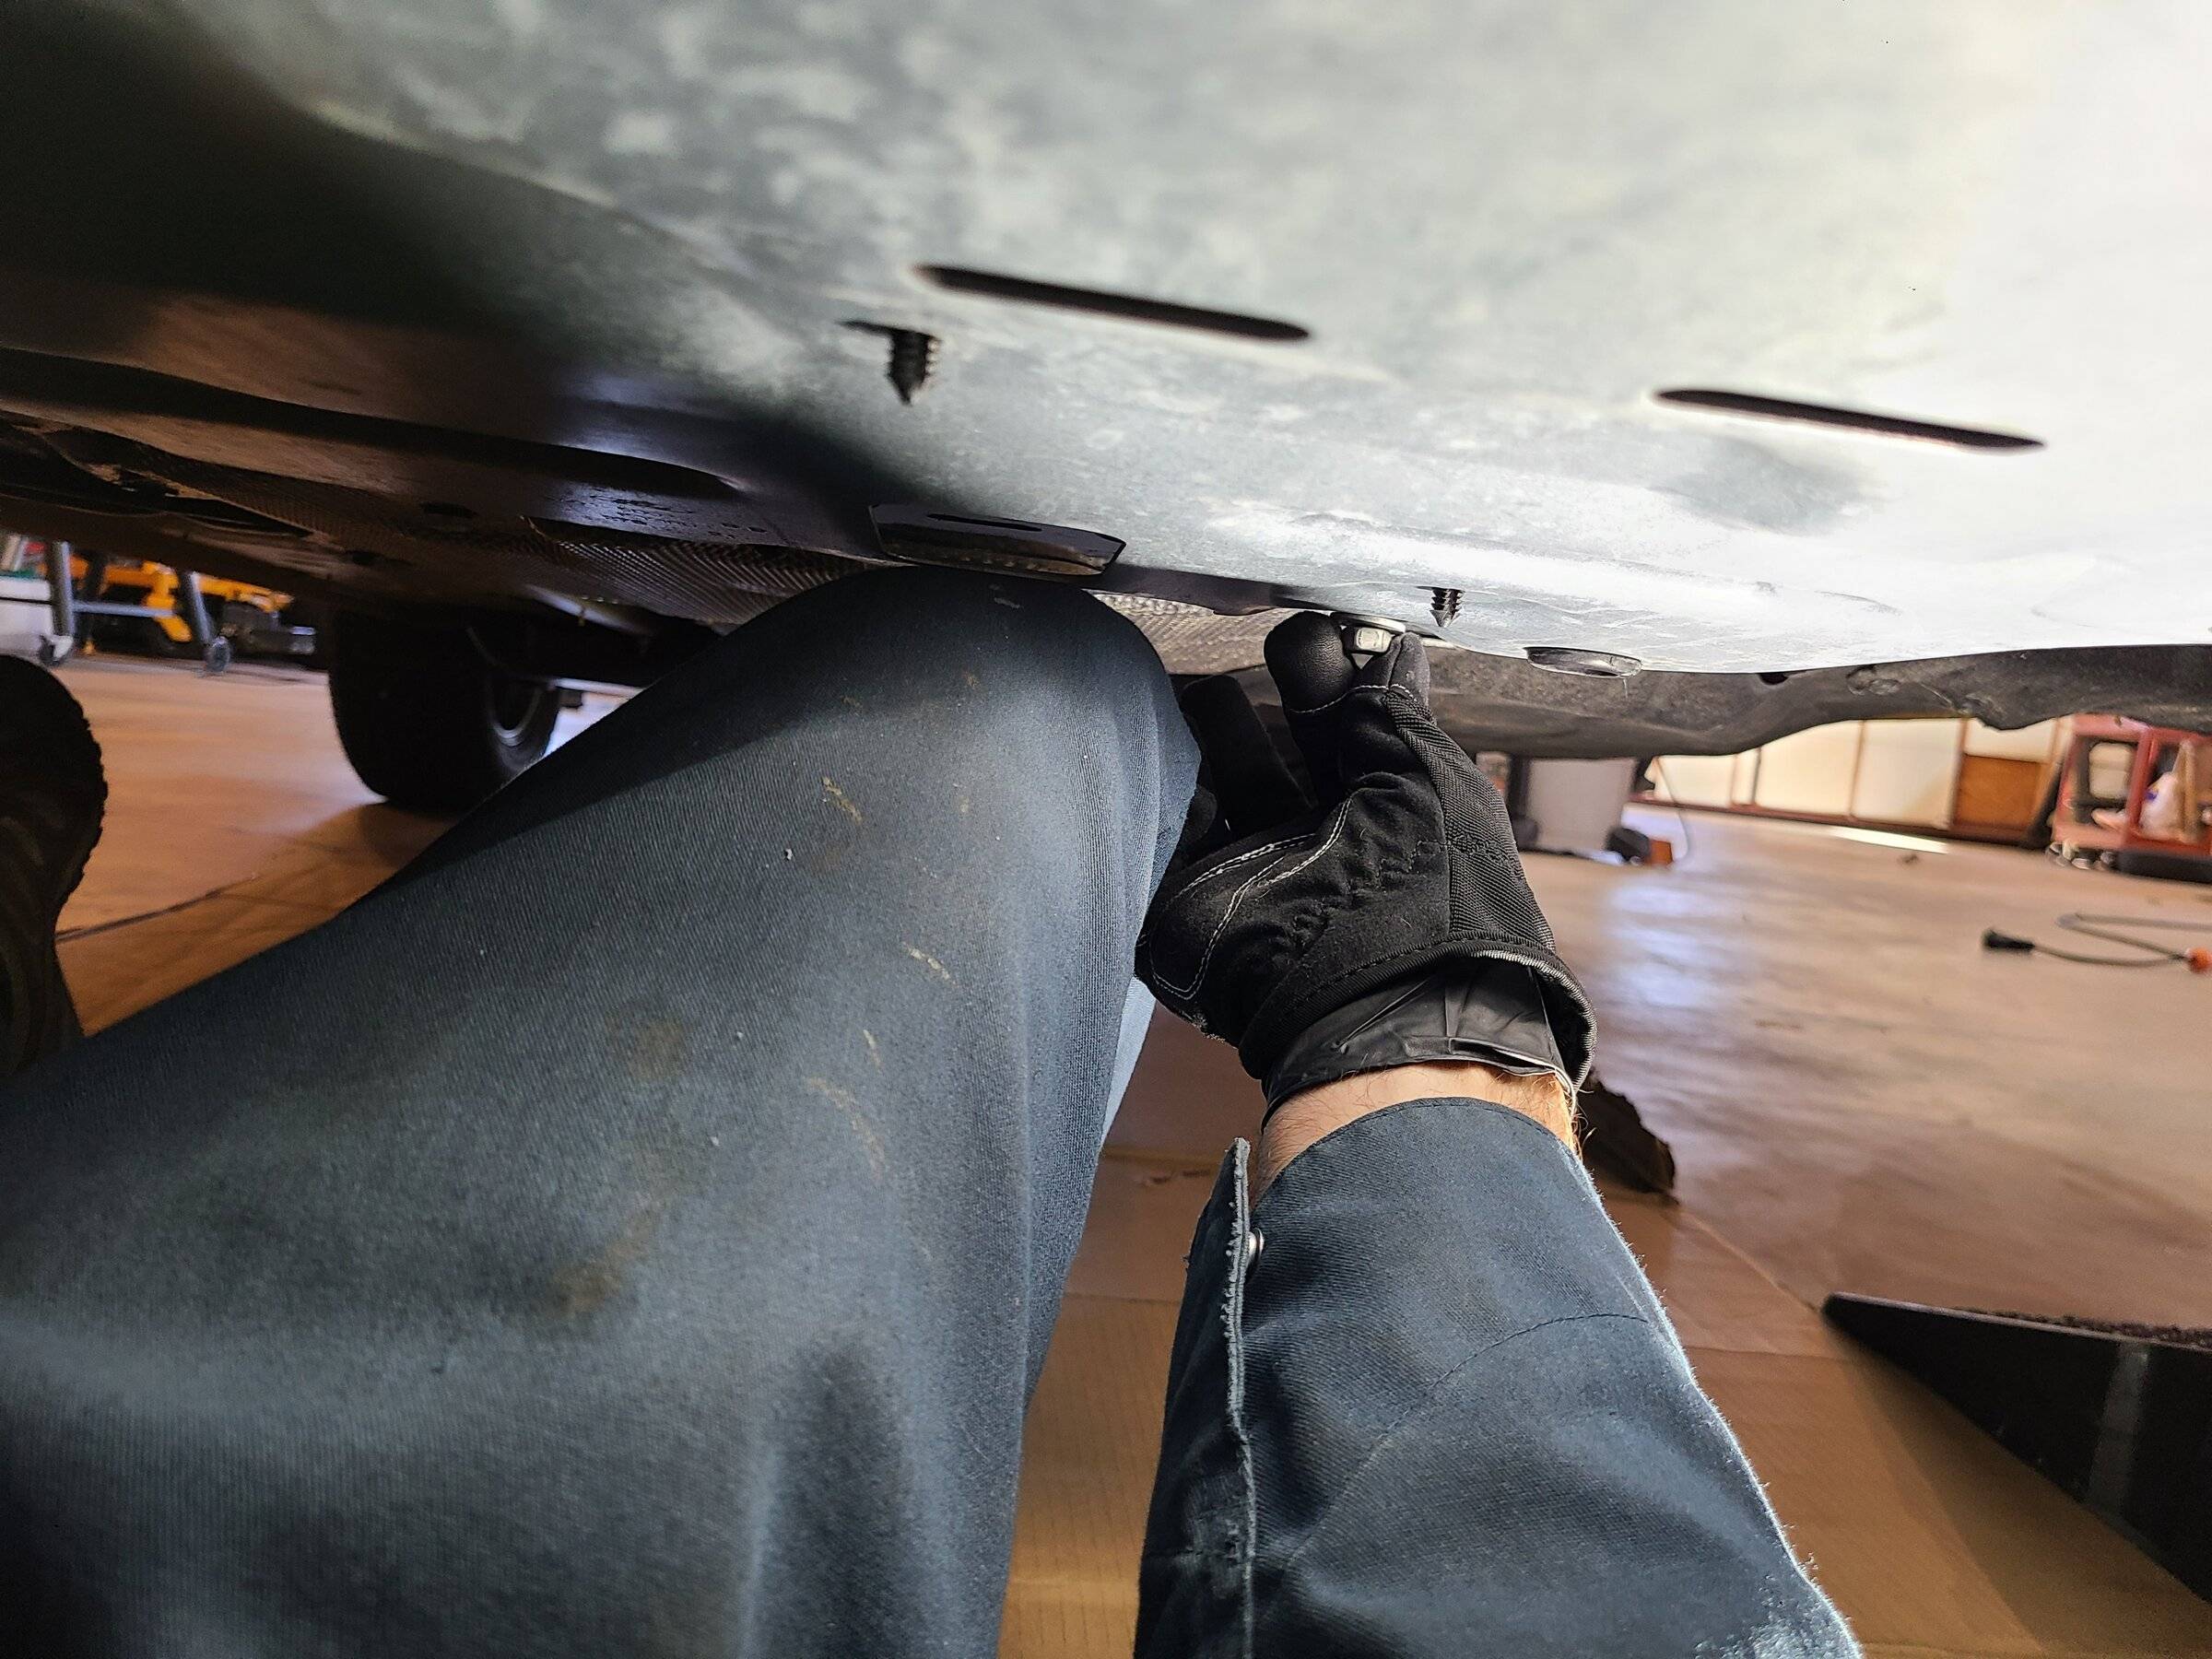
I usually change the oil on new cars after the recommended break-in interval, which for the Badlands is 1,000 miles. Others have posted procedures, so I'm not going to go into that other than to say the bash plate on the bottom is substantial. I removed all the bolts except for one in front and one in back, then used my knee to hold the back up while I removed the remaining two bolts.

*EDIT: As MaxVelocity points out in this post, the two holes in the back of the skid plate are slotted, so you don't have to remove the mounting bolts all the way to get the plate off. This also helps when reinstalling the plate. Leave the two aft bolts mostly screwed in and slide the plate onto them. The bolts will hold the back end of the plate up for you while you put the rest of the bolts in. I never noticed the holes were slotted!
After that, it's like changing the oil on any other vehicle.
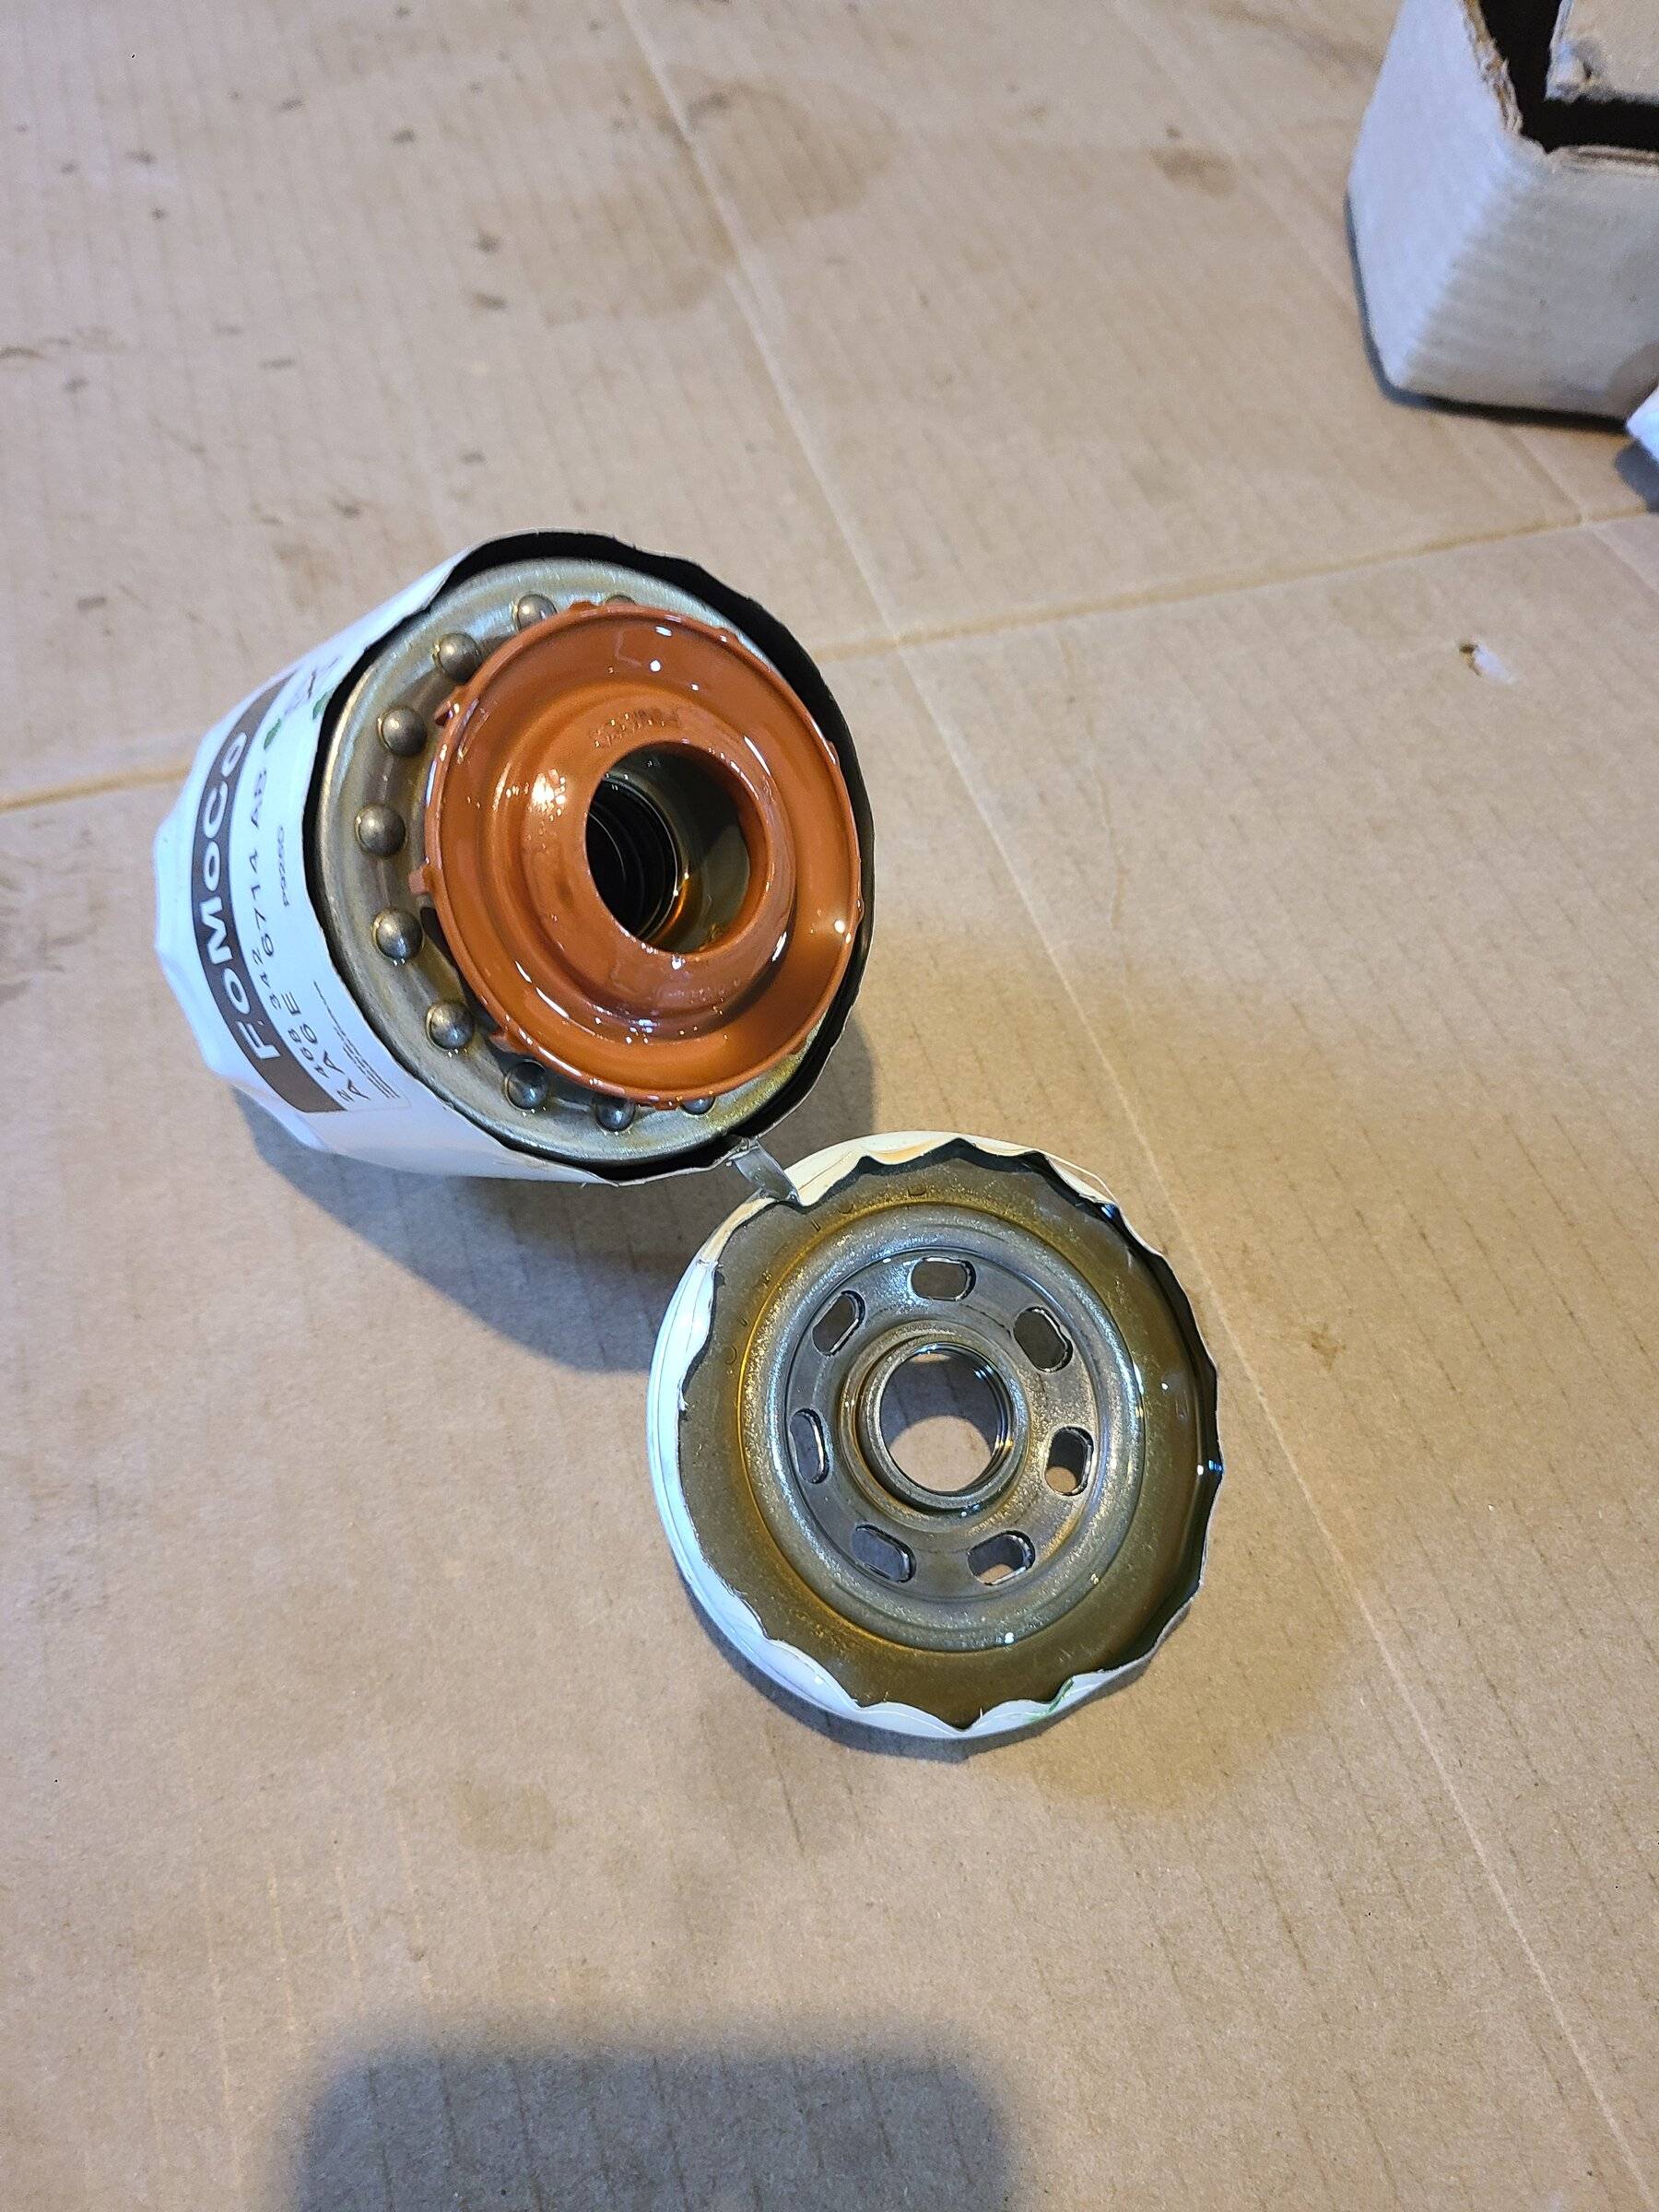
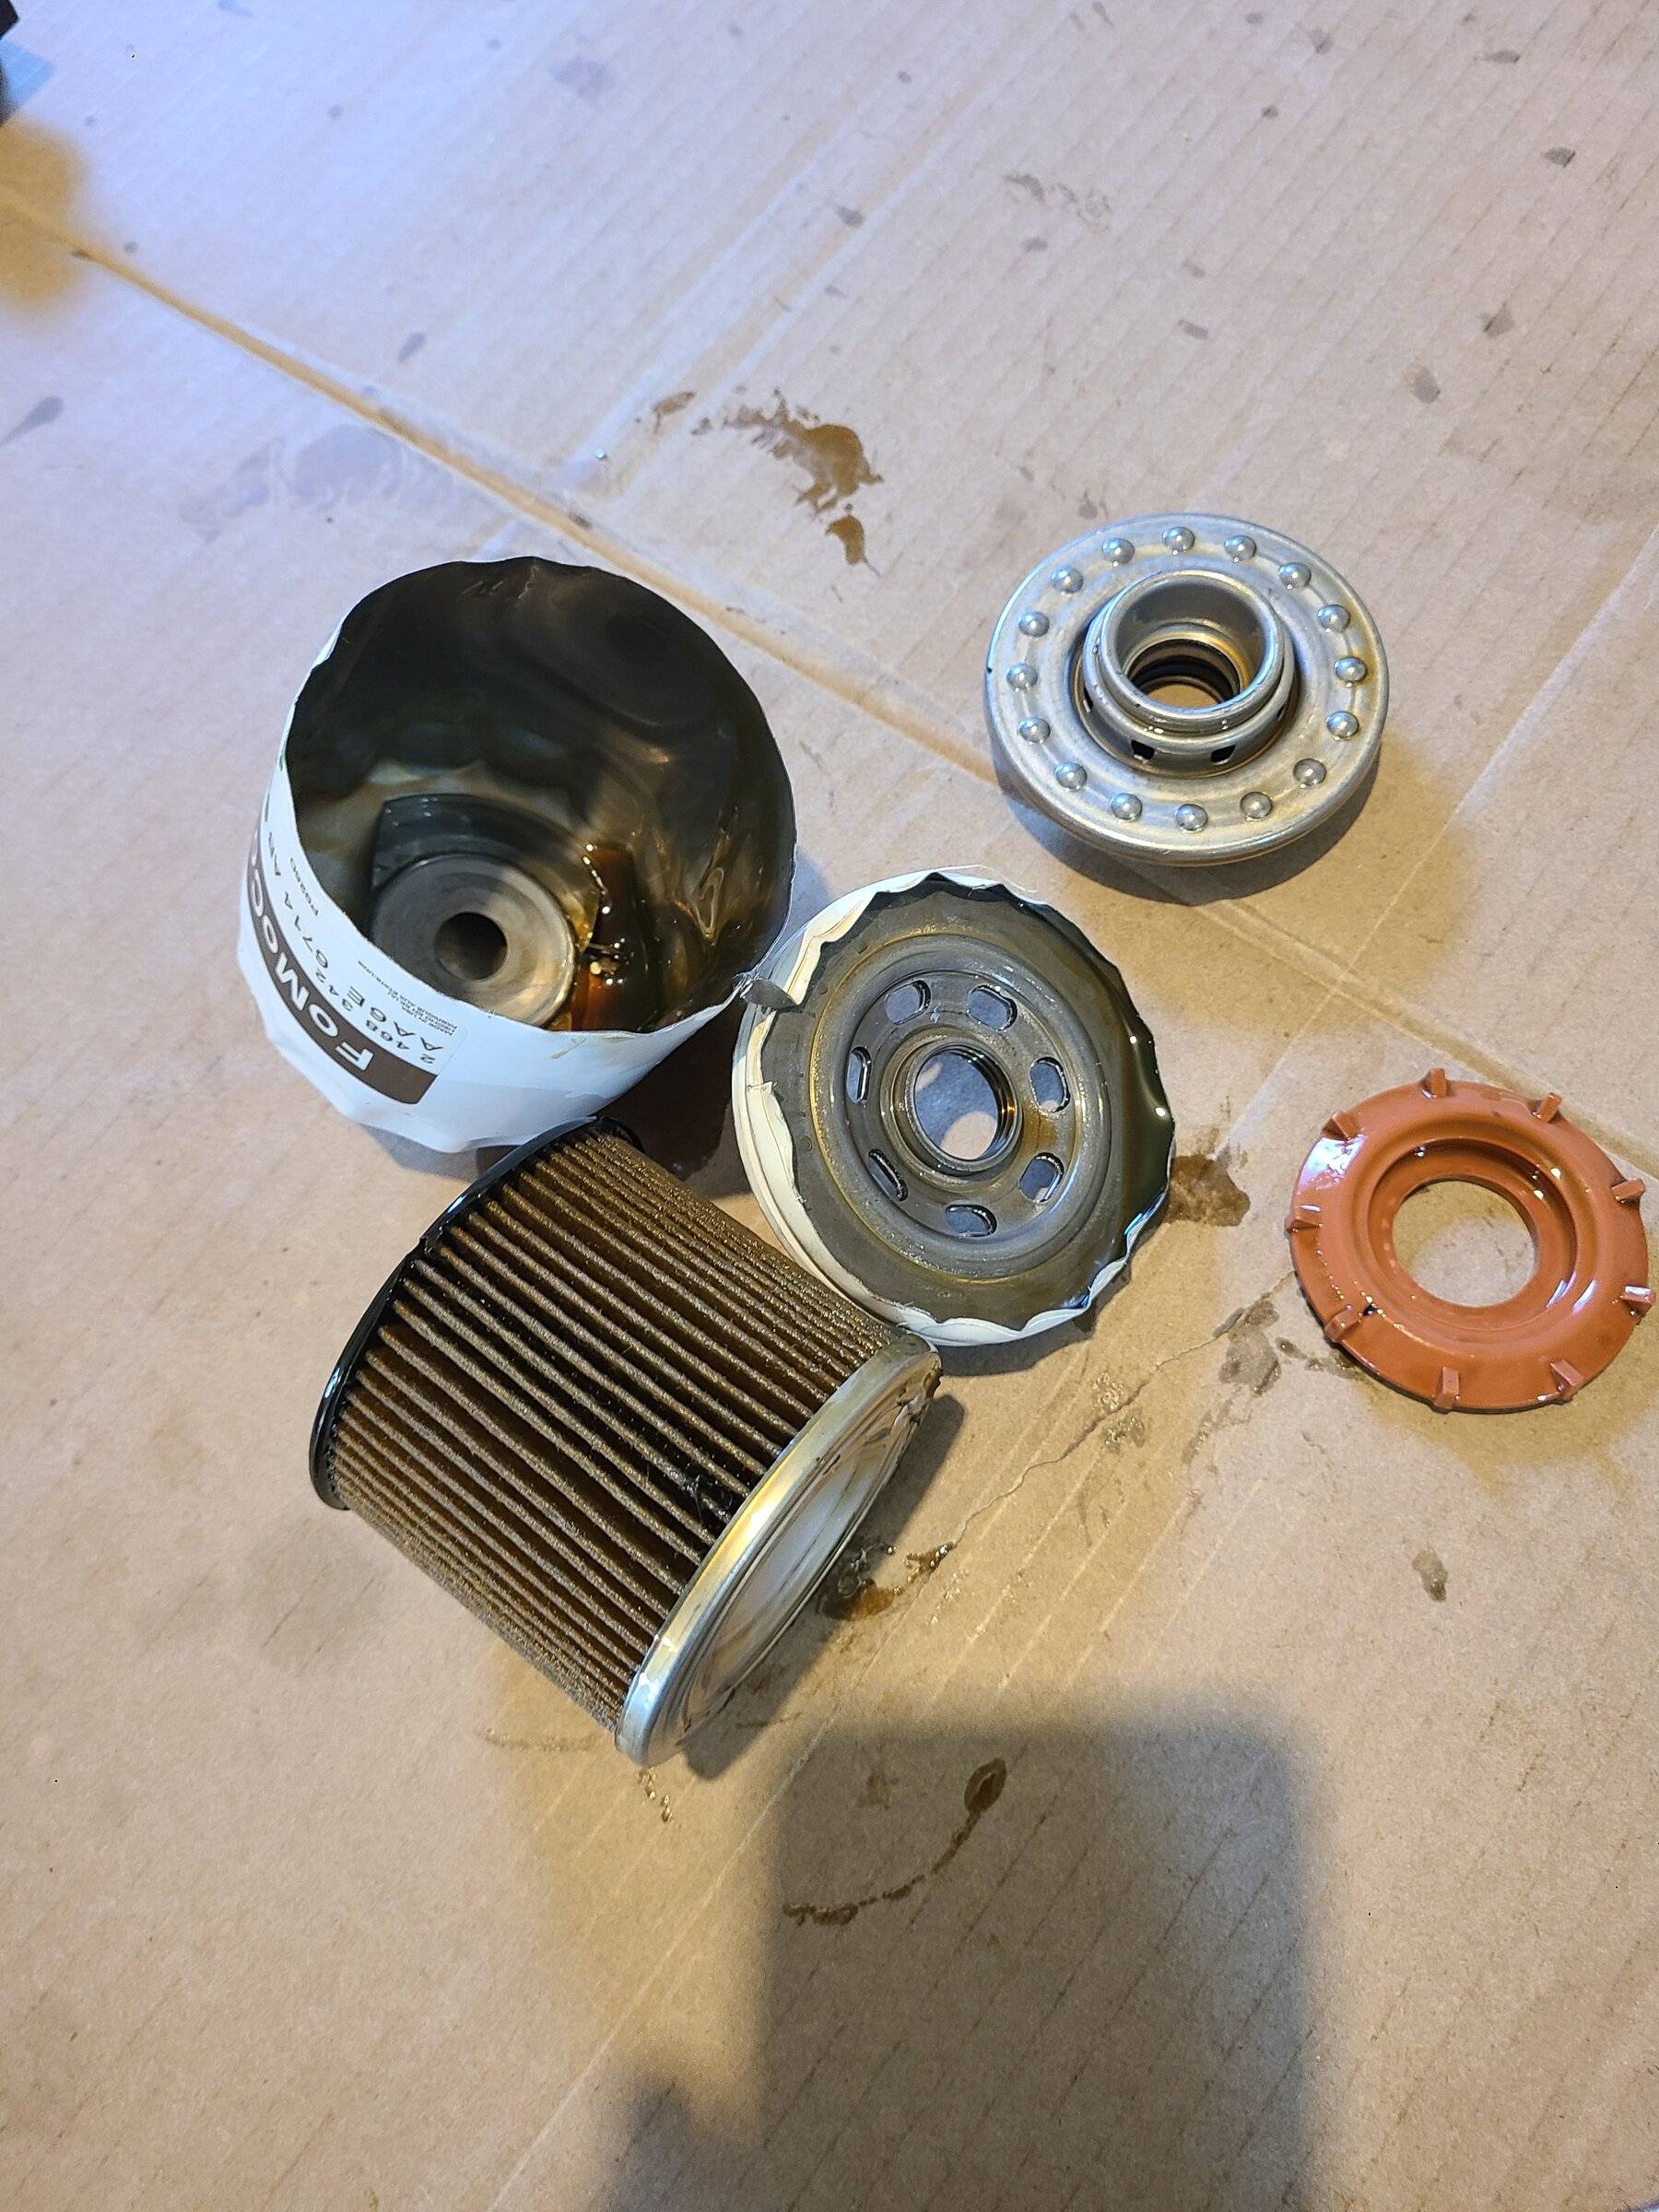
Something I always do on the first oil change is to inspect the oil filter. I use an oil filter cutter to get at the filter media. The series of photos below show the filter in various stages of dismantling. The first is what you see after you cut the end off the filter.

The rubber piece is the anti-drain check valve. It prevents unfiltered oil from draining back into the sump, bringing with it any debris caught by the filter.
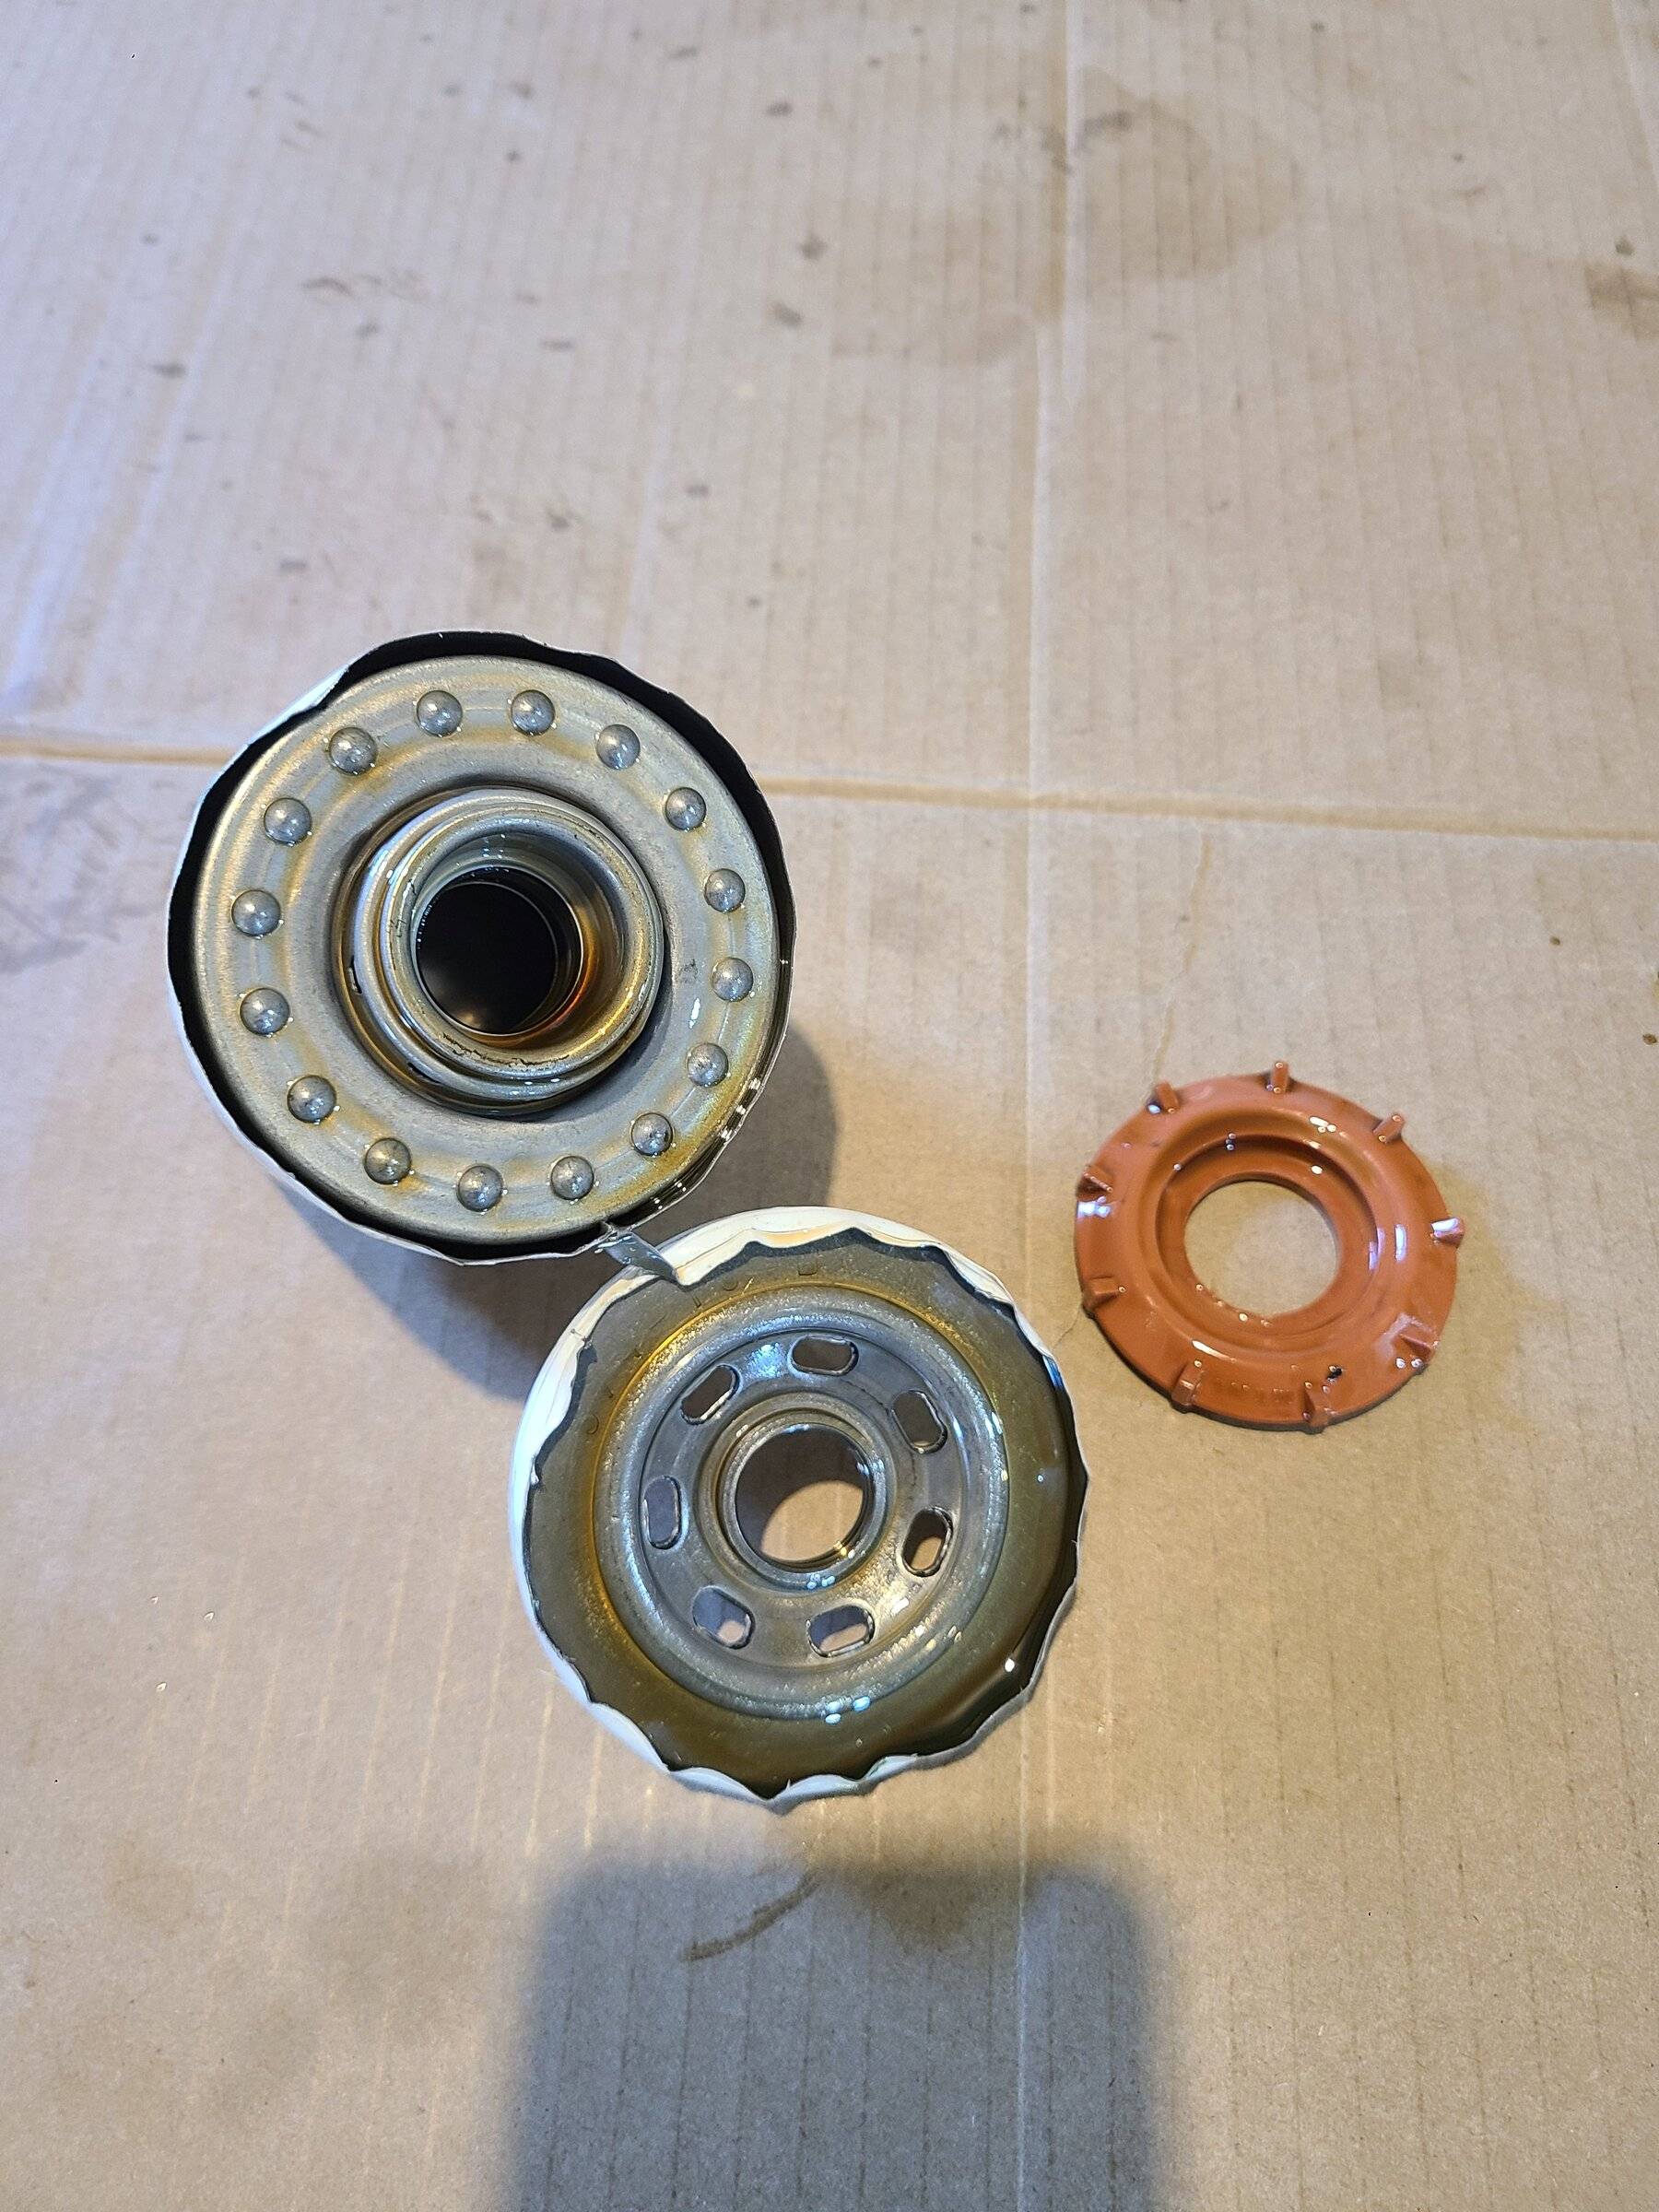
Below that is the media seal and the actual filter media. Oil flows into the filter from the engine, past the anti-drain check valve, around the media seal to the outside of the filter, then through the filter media (see below) before returning to the engine through the hole in the middle.
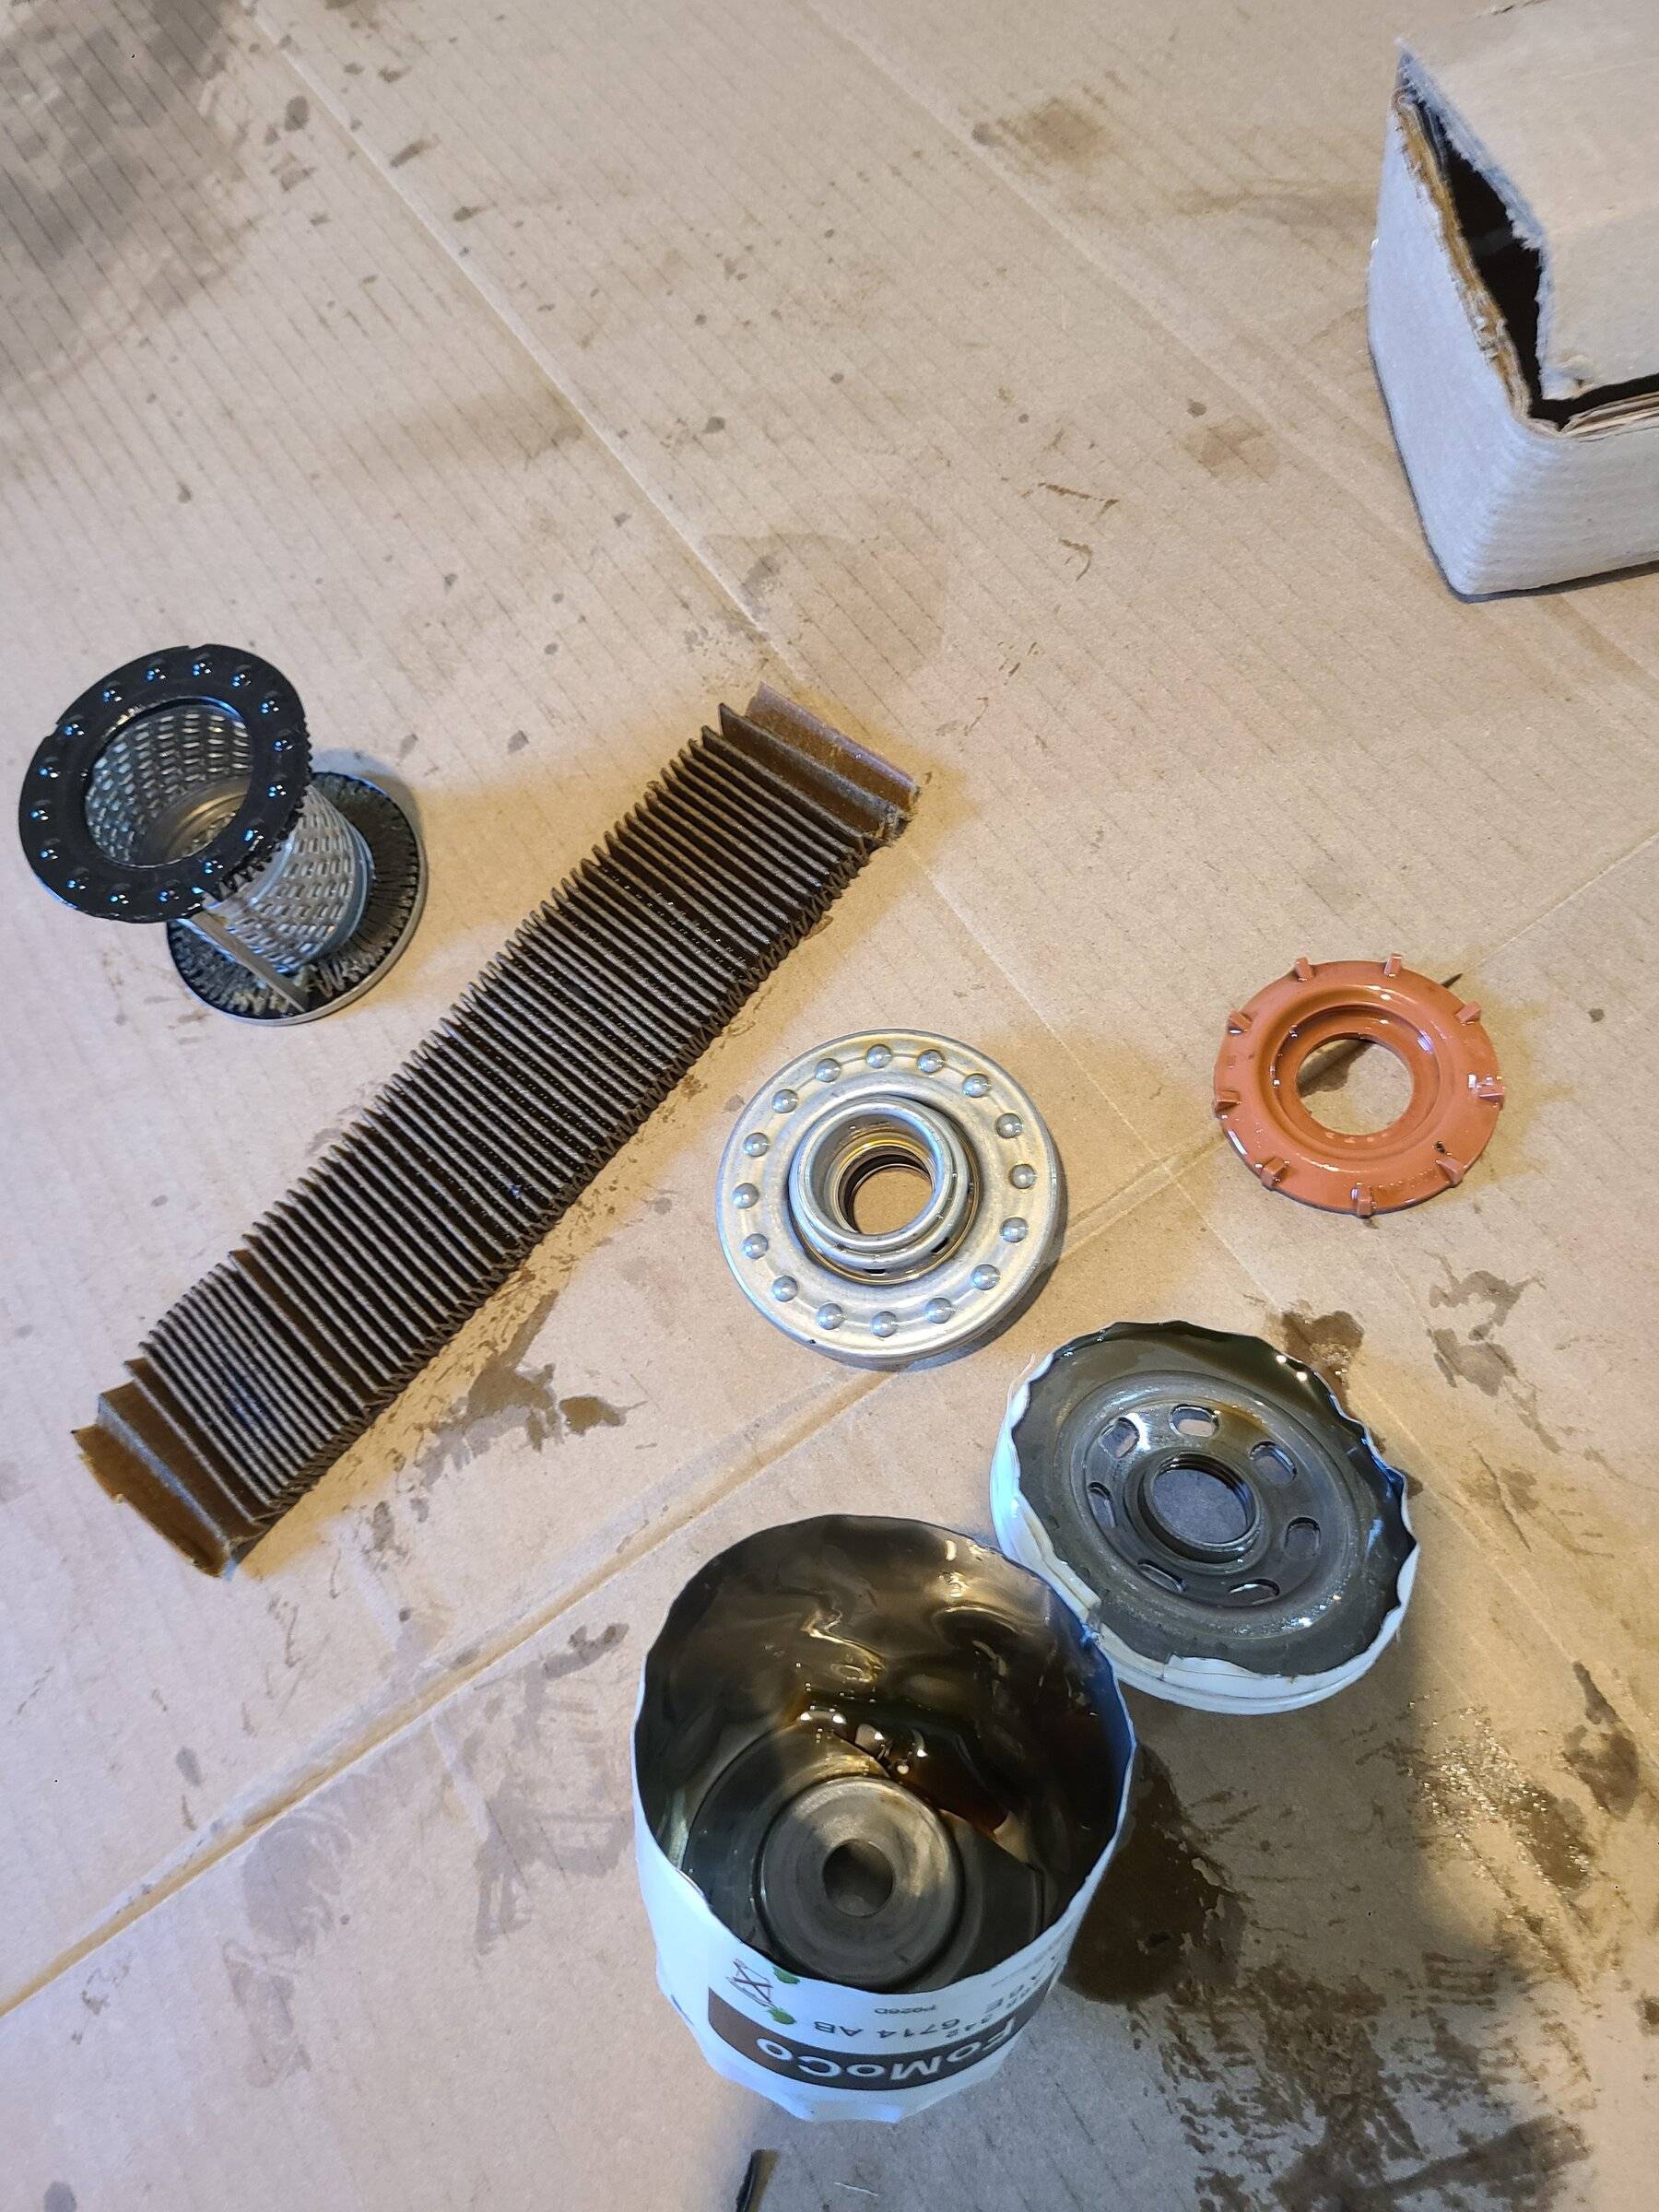
Below, you can see the filter media assembly after removal from the filter. The media itself is typically a paper material that allows oil under pressure to flow through, but not debris large enough to cause damage to internal engine parts.
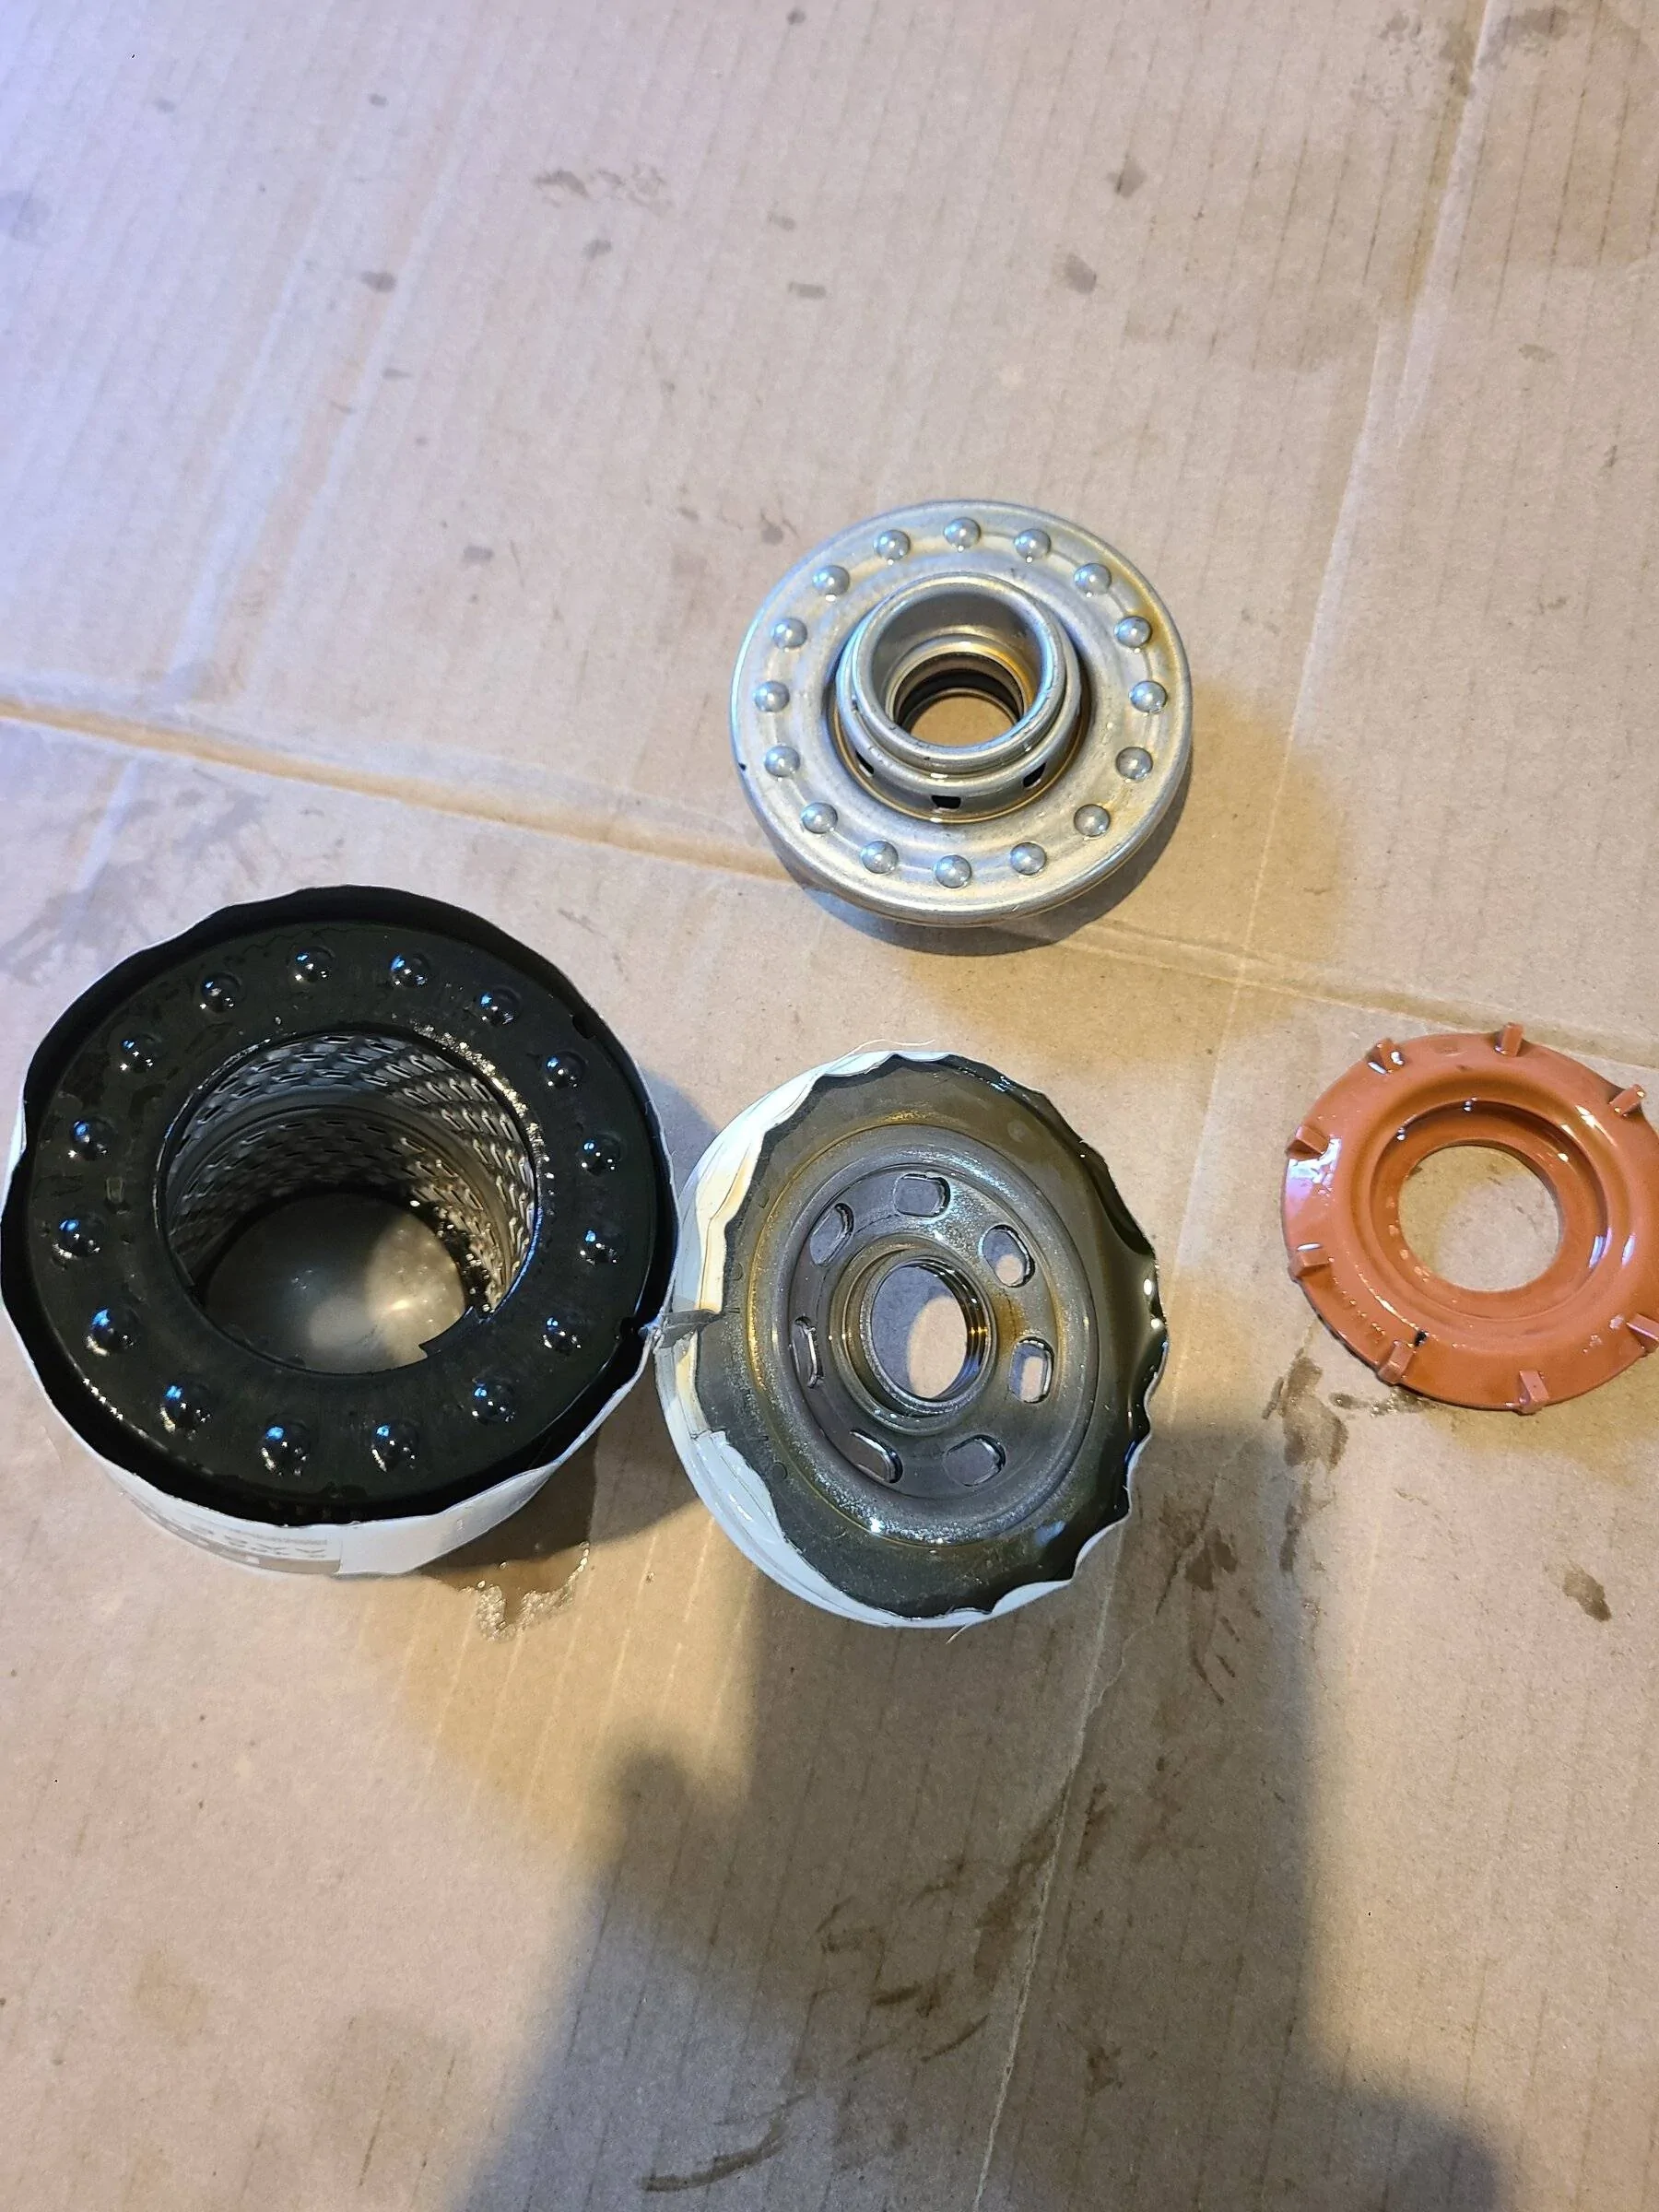
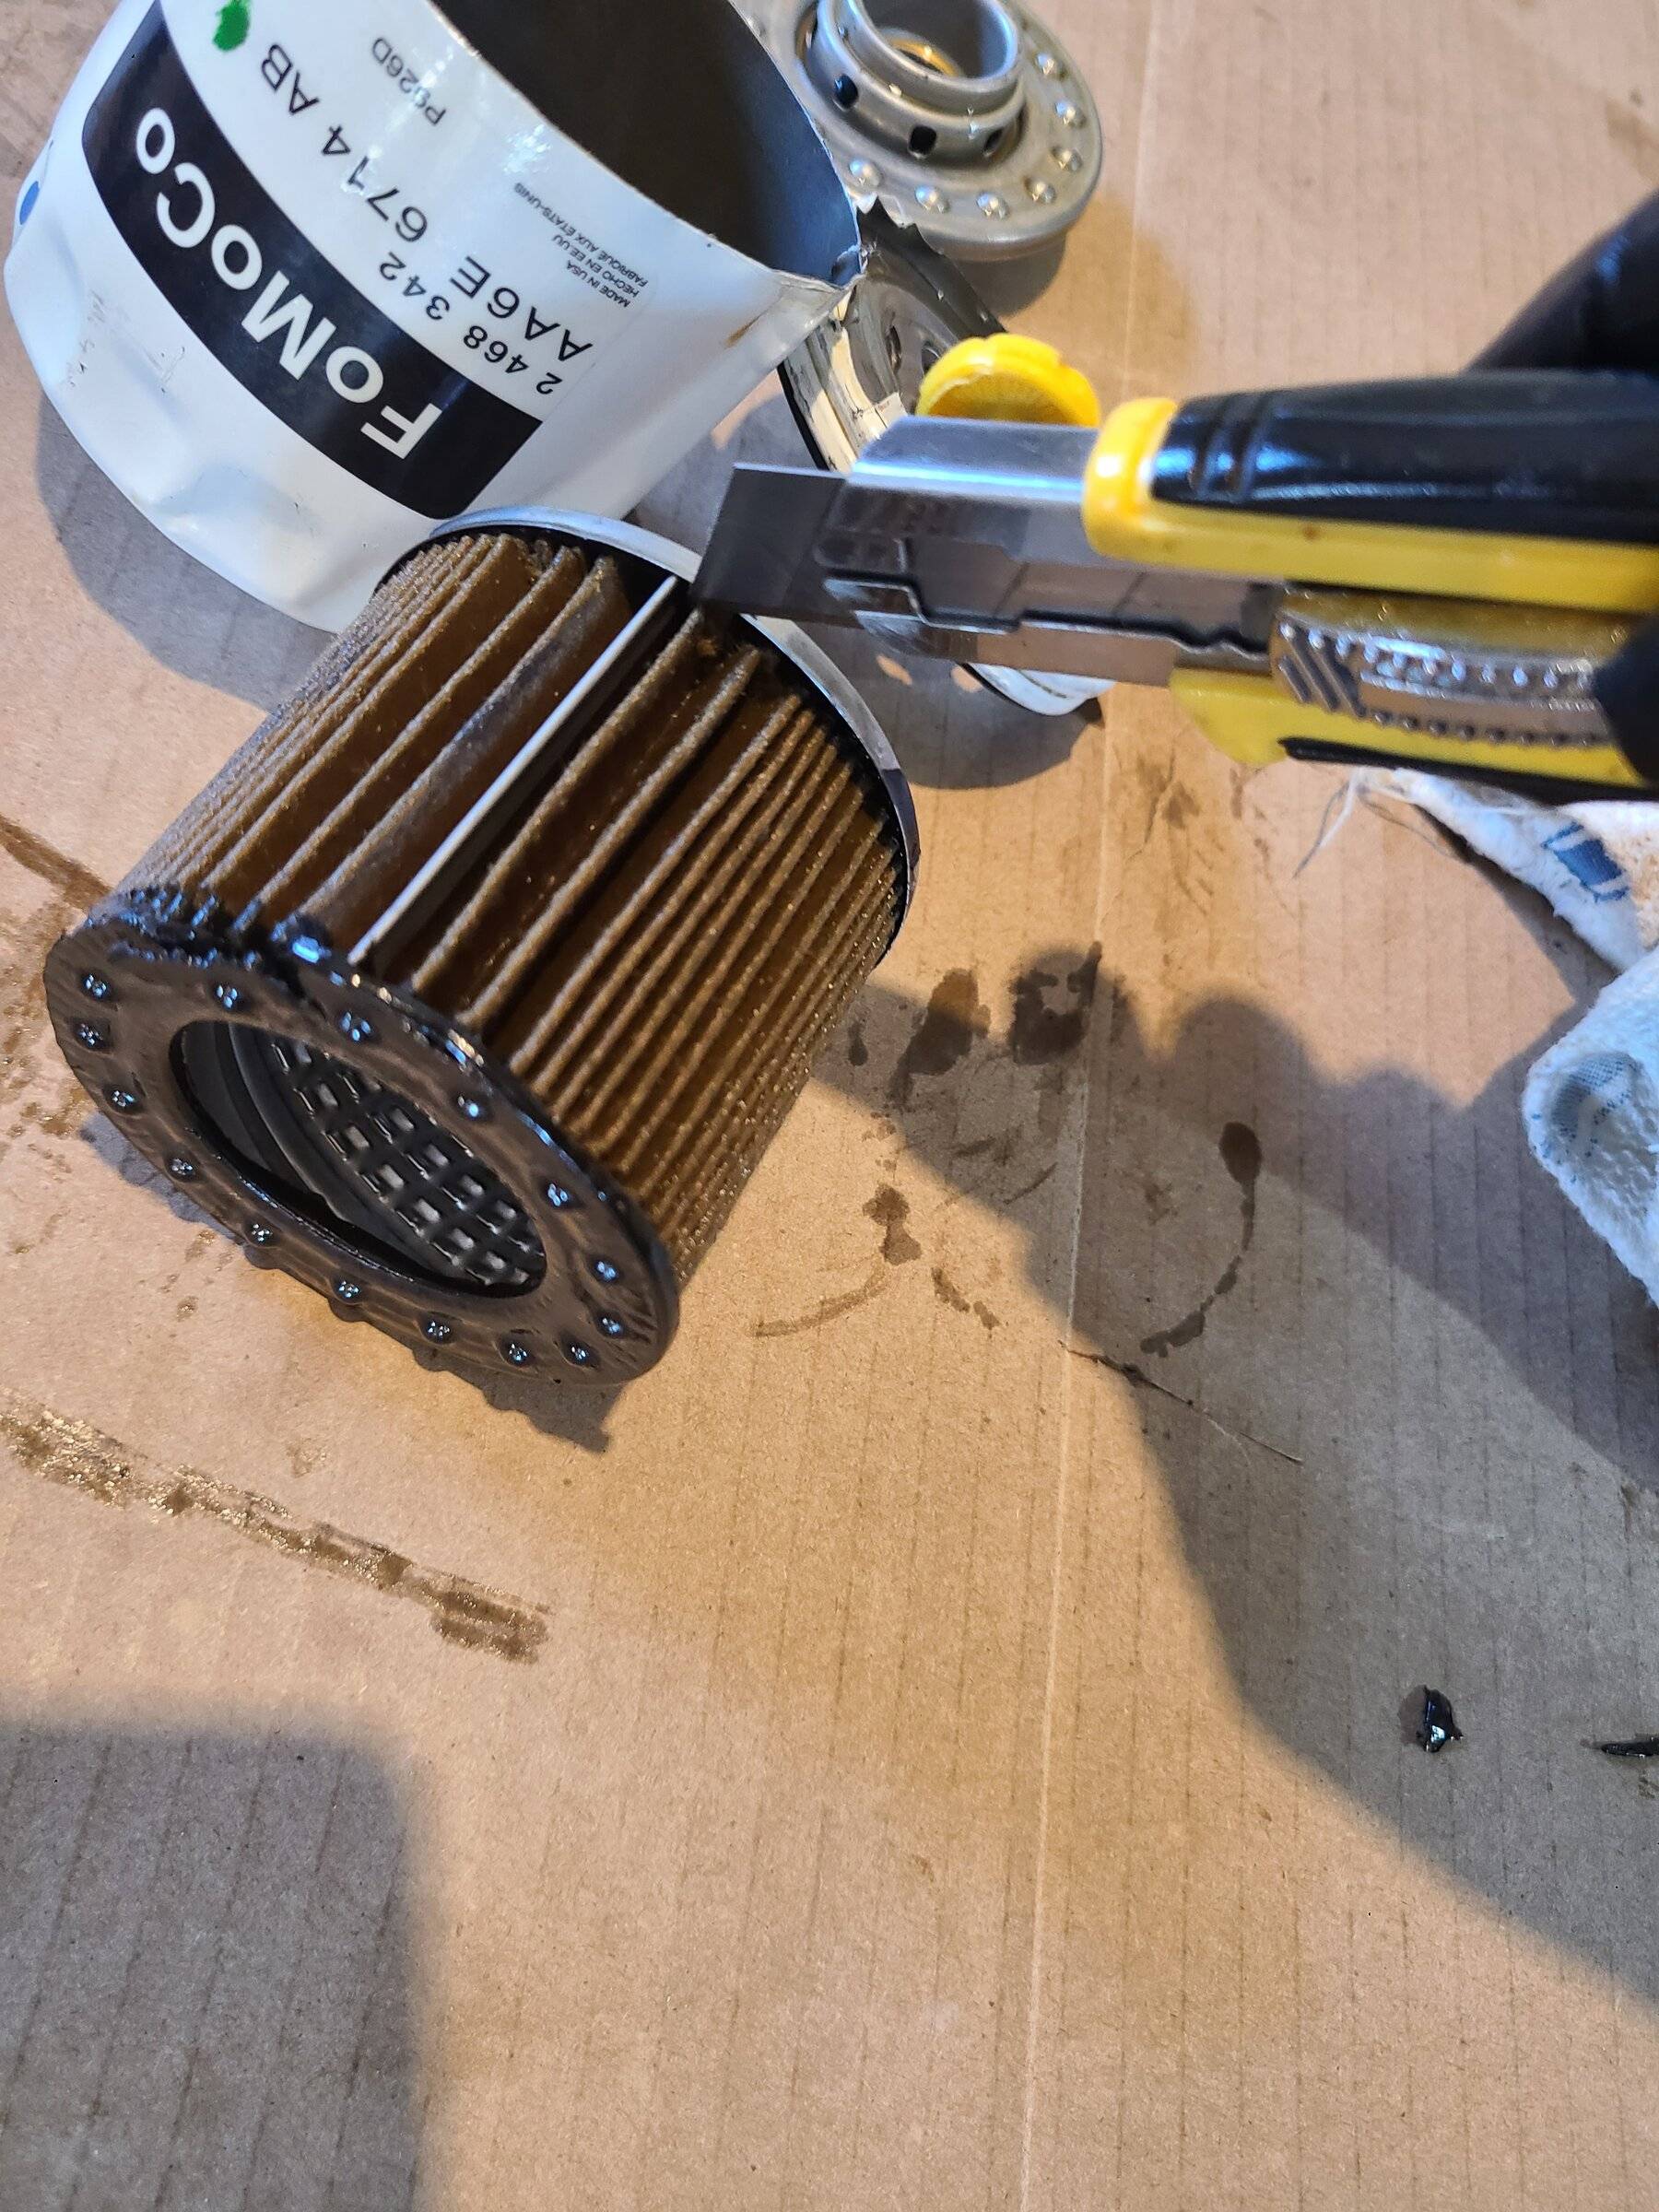
To inspect the media you have to cut it off the media assembly. Use a utility blade (carefully!) and cut around both ends of the medial assembly. After that you can remove the paper media and spread it open for inspection.
Below you can see the media removed from the media assembly. The assembly core is made out of metal to hold the media in place, otherwise the paper would just collapse in on itself under the pressure generated from the pumping oil.
After you spread out the media you can look in each of the pleats for debris. Remember, the oil flows from the outside of the filter inward, so you want to inspect the side of the media that faces outward. Note the small, metallic particle next to the tip of the pen and on the pleat to the right. There were a dozen or so particles like this throughout the filter.
It's not uncommon to see small bits of metal like this following engine break-in. What's more important is what they're made of. Use a magnet to determine if any of the particles are ferrous. Ferrous metal comes from bearings, cams, crankshaft, connecting rods, etc. None of the metal bits I found in the filter were ferrous (they were most likely bits of aluminum from piston skirts or left over debris from production), but if any had been I would have documented it, made a report to the dealership to get it on the car's permanent maintenance record, and changed the oil/inspected the filter after another 1,000 miles. A trend of ferrous metal particles in your filter would be troubling. Once out of break-in you really shouldn't see any significant wear on internal engine parts made from ferrous metals. In my case, I saw exactly what I expected to see. I usually inspect the filter every other change for the first four oil changes, and if I don't see anything alarming I go to every fourth oil change.
*EDIT: As MaxVelocity points out in this post, the two holes in the back of the skid plate are slotted, so you don't have to remove the mounting bolts all the way to get the plate off. This also helps when reinstalling the plate. Leave the two aft bolts mostly screwed in and slide the plate onto them. The bolts will hold the back end of the plate up for you while you put the rest of the bolts in. I never noticed the holes were slotted!
After that, it's like changing the oil on any other vehicle.
Something I always do on the first oil change is to inspect the oil filter. I use an oil filter cutter to get at the filter media. The series of photos below show the filter in various stages of dismantling. The first is what you see after you cut the end off the filter.
The rubber piece is the anti-drain check valve. It prevents unfiltered oil from draining back into the sump, bringing with it any debris caught by the filter.
Below that is the media seal and the actual filter media. Oil flows into the filter from the engine, past the anti-drain check valve, around the media seal to the outside of the filter, then through the filter media (see below) before returning to the engine through the hole in the middle.
Below, you can see the filter media assembly after removal from the filter. The media itself is typically a paper material that allows oil under pressure to flow through, but not debris large enough to cause damage to internal engine parts.
To inspect the media you have to cut it off the media assembly. Use a utility blade (carefully!) and cut around both ends of the medial assembly. After that you can remove the paper media and spread it open for inspection.
Below you can see the media removed from the media assembly. The assembly core is made out of metal to hold the media in place, otherwise the paper would just collapse in on itself under the pressure generated from the pumping oil.
After you spread out the media you can look in each of the pleats for debris. Remember, the oil flows from the outside of the filter inward, so you want to inspect the side of the media that faces outward. Note the small, metallic particle next to the tip of the pen and on the pleat to the right. There were a dozen or so particles like this throughout the filter.

It's not uncommon to see small bits of metal like this following engine break-in. What's more important is what they're made of. Use a magnet to determine if any of the particles are ferrous. Ferrous metal comes from bearings, cams, crankshaft, connecting rods, etc. None of the metal bits I found in the filter were ferrous (they were most likely bits of aluminum from piston skirts or left over debris from production), but if any had been I would have documented it, made a report to the dealership to get it on the car's permanent maintenance record, and changed the oil/inspected the filter after another 1,000 miles. A trend of ferrous metal particles in your filter would be troubling. Once out of break-in you really shouldn't see any significant wear on internal engine parts made from ferrous metals. In my case, I saw exactly what I expected to see. I usually inspect the filter every other change for the first four oil changes, and if I don't see anything alarming I go to every fourth oil change.
Last edited:


