- First Name
- Mark
- Joined
- Oct 30, 2021
- Threads
- 119
- Messages
- 6,733
- Reaction score
- 13,149
- Location
- St. Jacob, IL
- Vehicle(s)
- 2021 Badlands | 2020 Escape
- Thread starter
- #1
Yesterday I installed a set of helper springs from Air Lift. We plan to do some off road camping, so we'll need to carry everything needed in the back of the Badlands. With everything we plan to carry loaded, the back end of the Badlands sits significantly lower. Every inch the suspension sags takes away from suspension travel and ground clearance. These helper springs are meant to do exactly what their name implies—they help the primary springs to prevent suspension sag. They are essentially rubber air bladders mounted inside the coil springs that are inflated through a Schrader valve. One important note: The User Guide says these air springs do not increase the vehicle's maximum GVWR as established by the manufacturer, so the sole purpose is to prevent sag.
This is the kit Air Lift recommends for the Bronco Sport:
https://www.airliftcompany.com/shop/60858/
If you decide to purchase online be sure to shop around. These kits are available at wildly different prices. Also make sure you include shipping costs. One of the sites I checked offered this kit at a significantly lower price than any other, but after you included the $30 shipping charge (for UPS ground!) it was around the same as other discount sites. I ended up getting mine from Michigan Truck Spring.
Installation took about two hours, including time spent going through the installation instructions and planning. The instructions are pretty clear, and I think anyone with average mechanical skills could install it without too much difficulty. The kit includes all the components you need to either tee the air lines to a single Schrader valve and inflate both airbags to the same pressure, or to install a separate Schrader valve for each airbag. I opted for the latter to account for uneven loading.
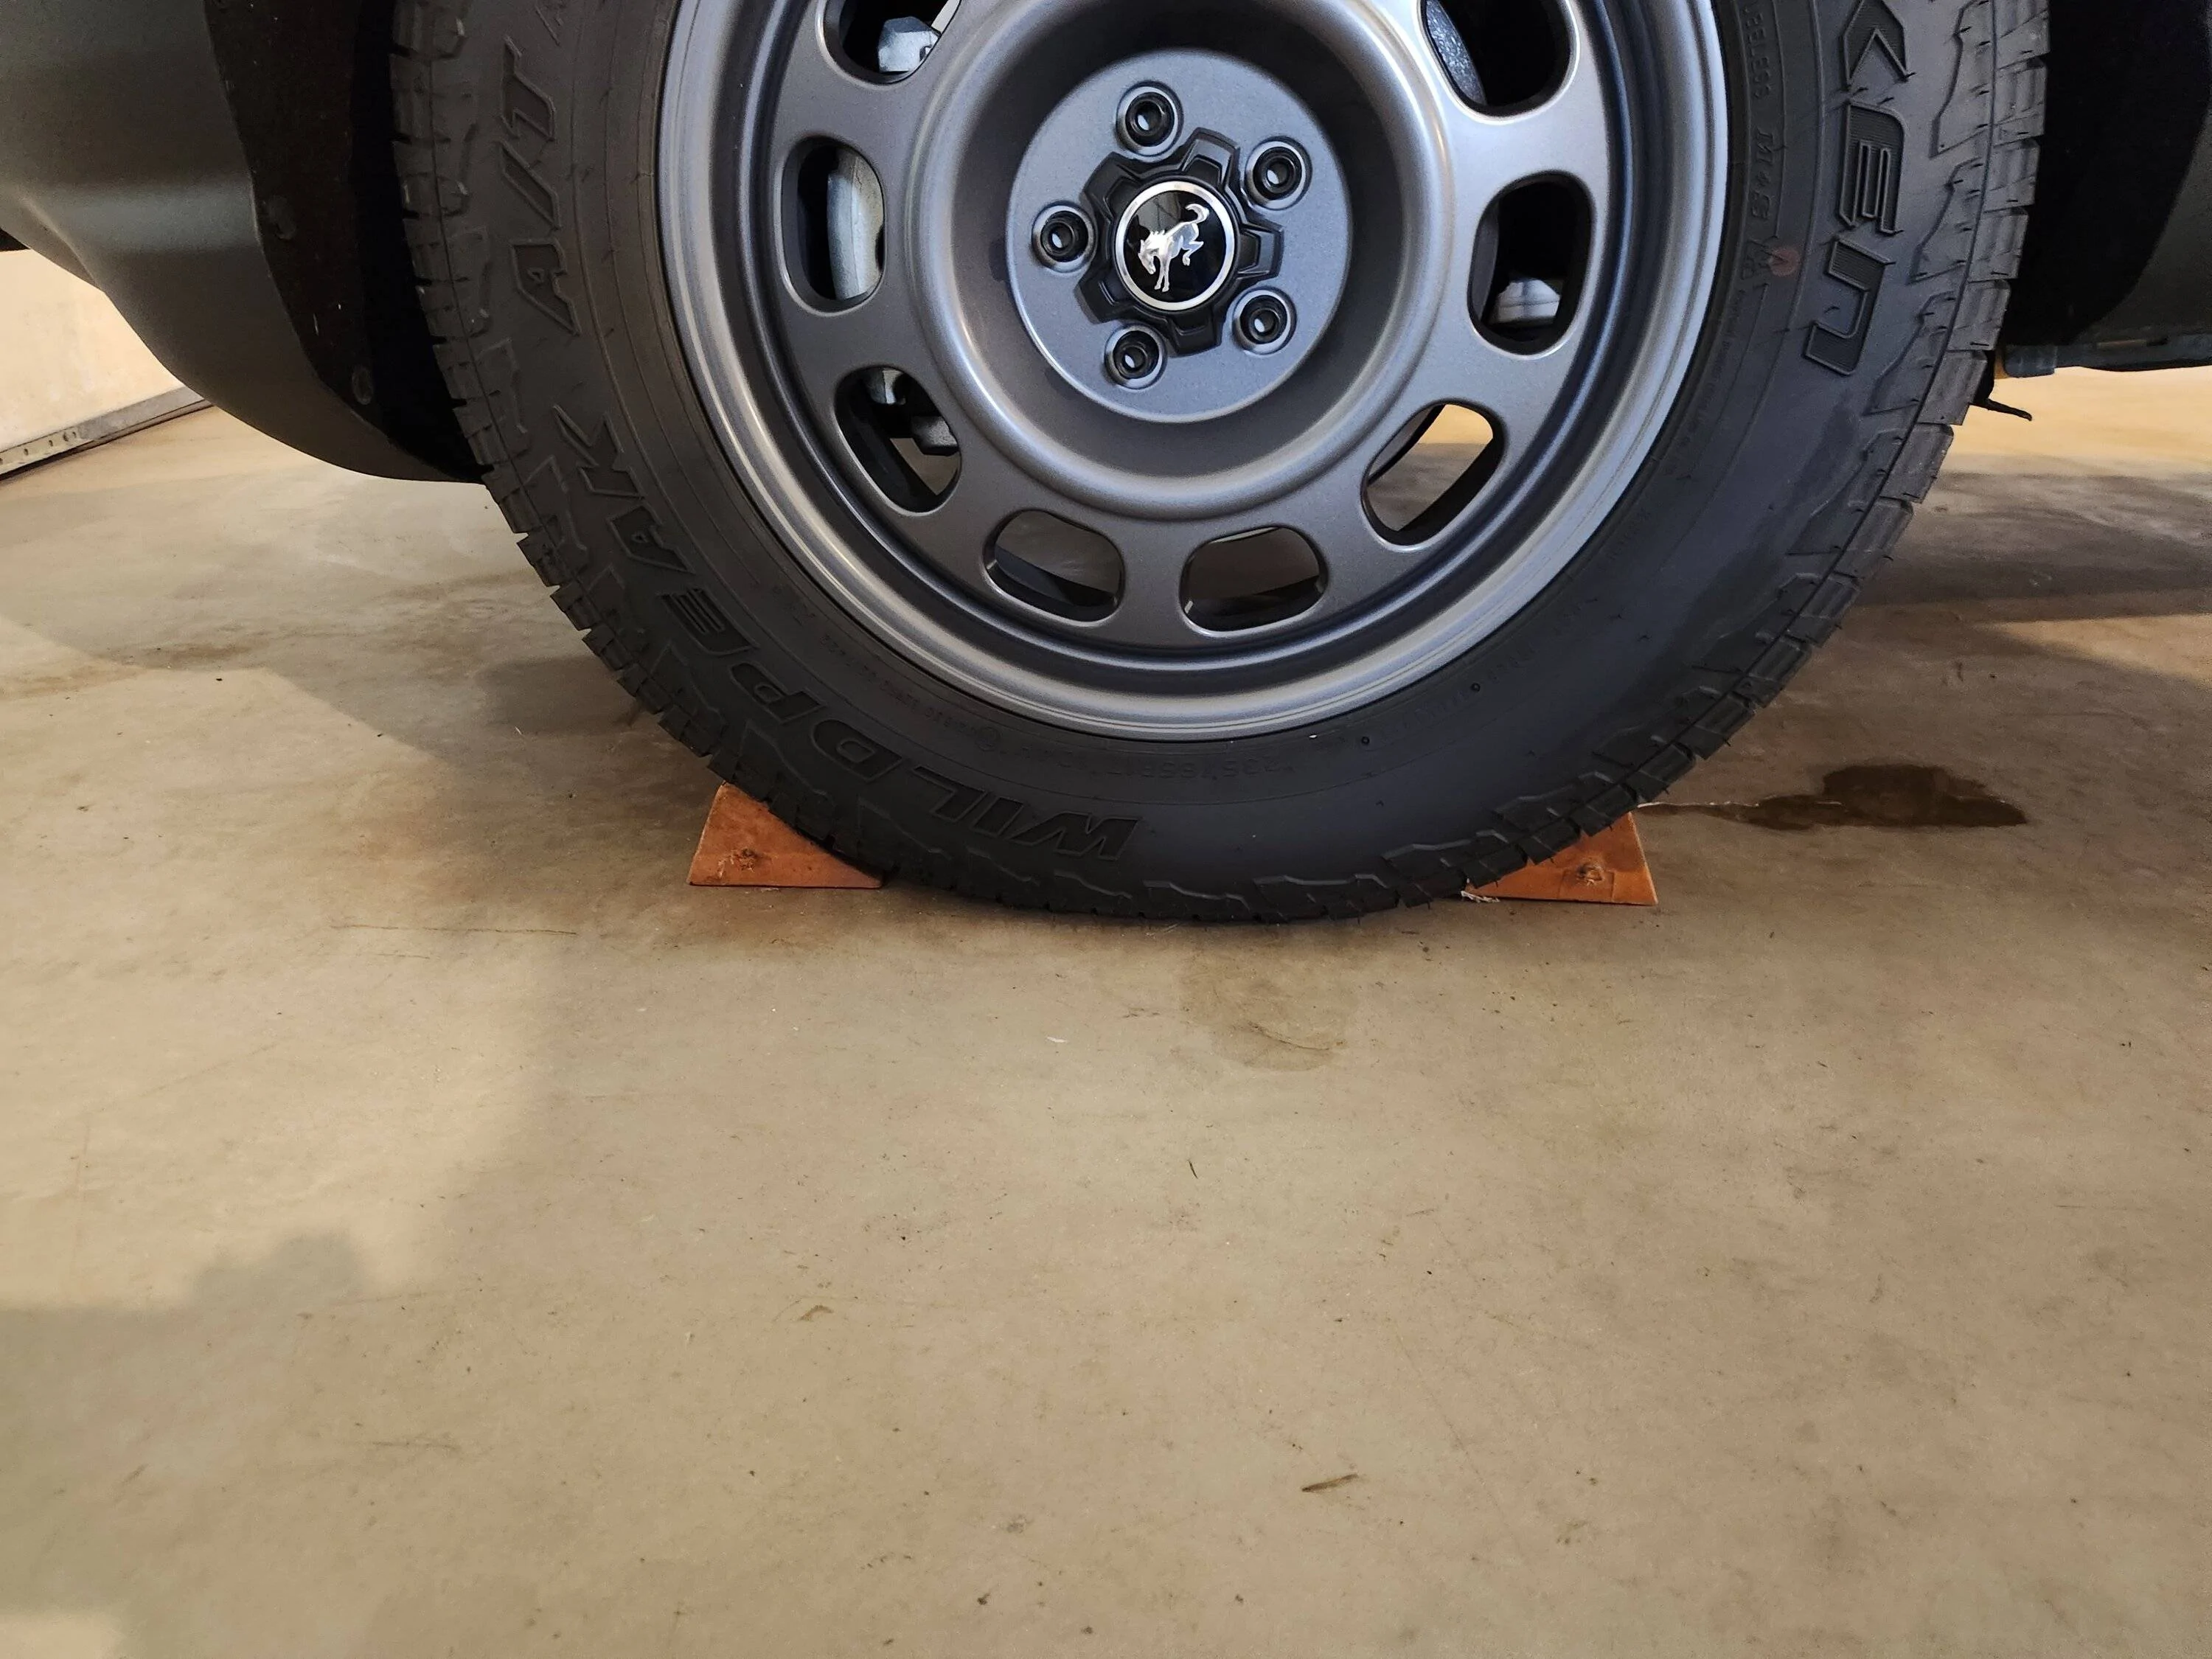
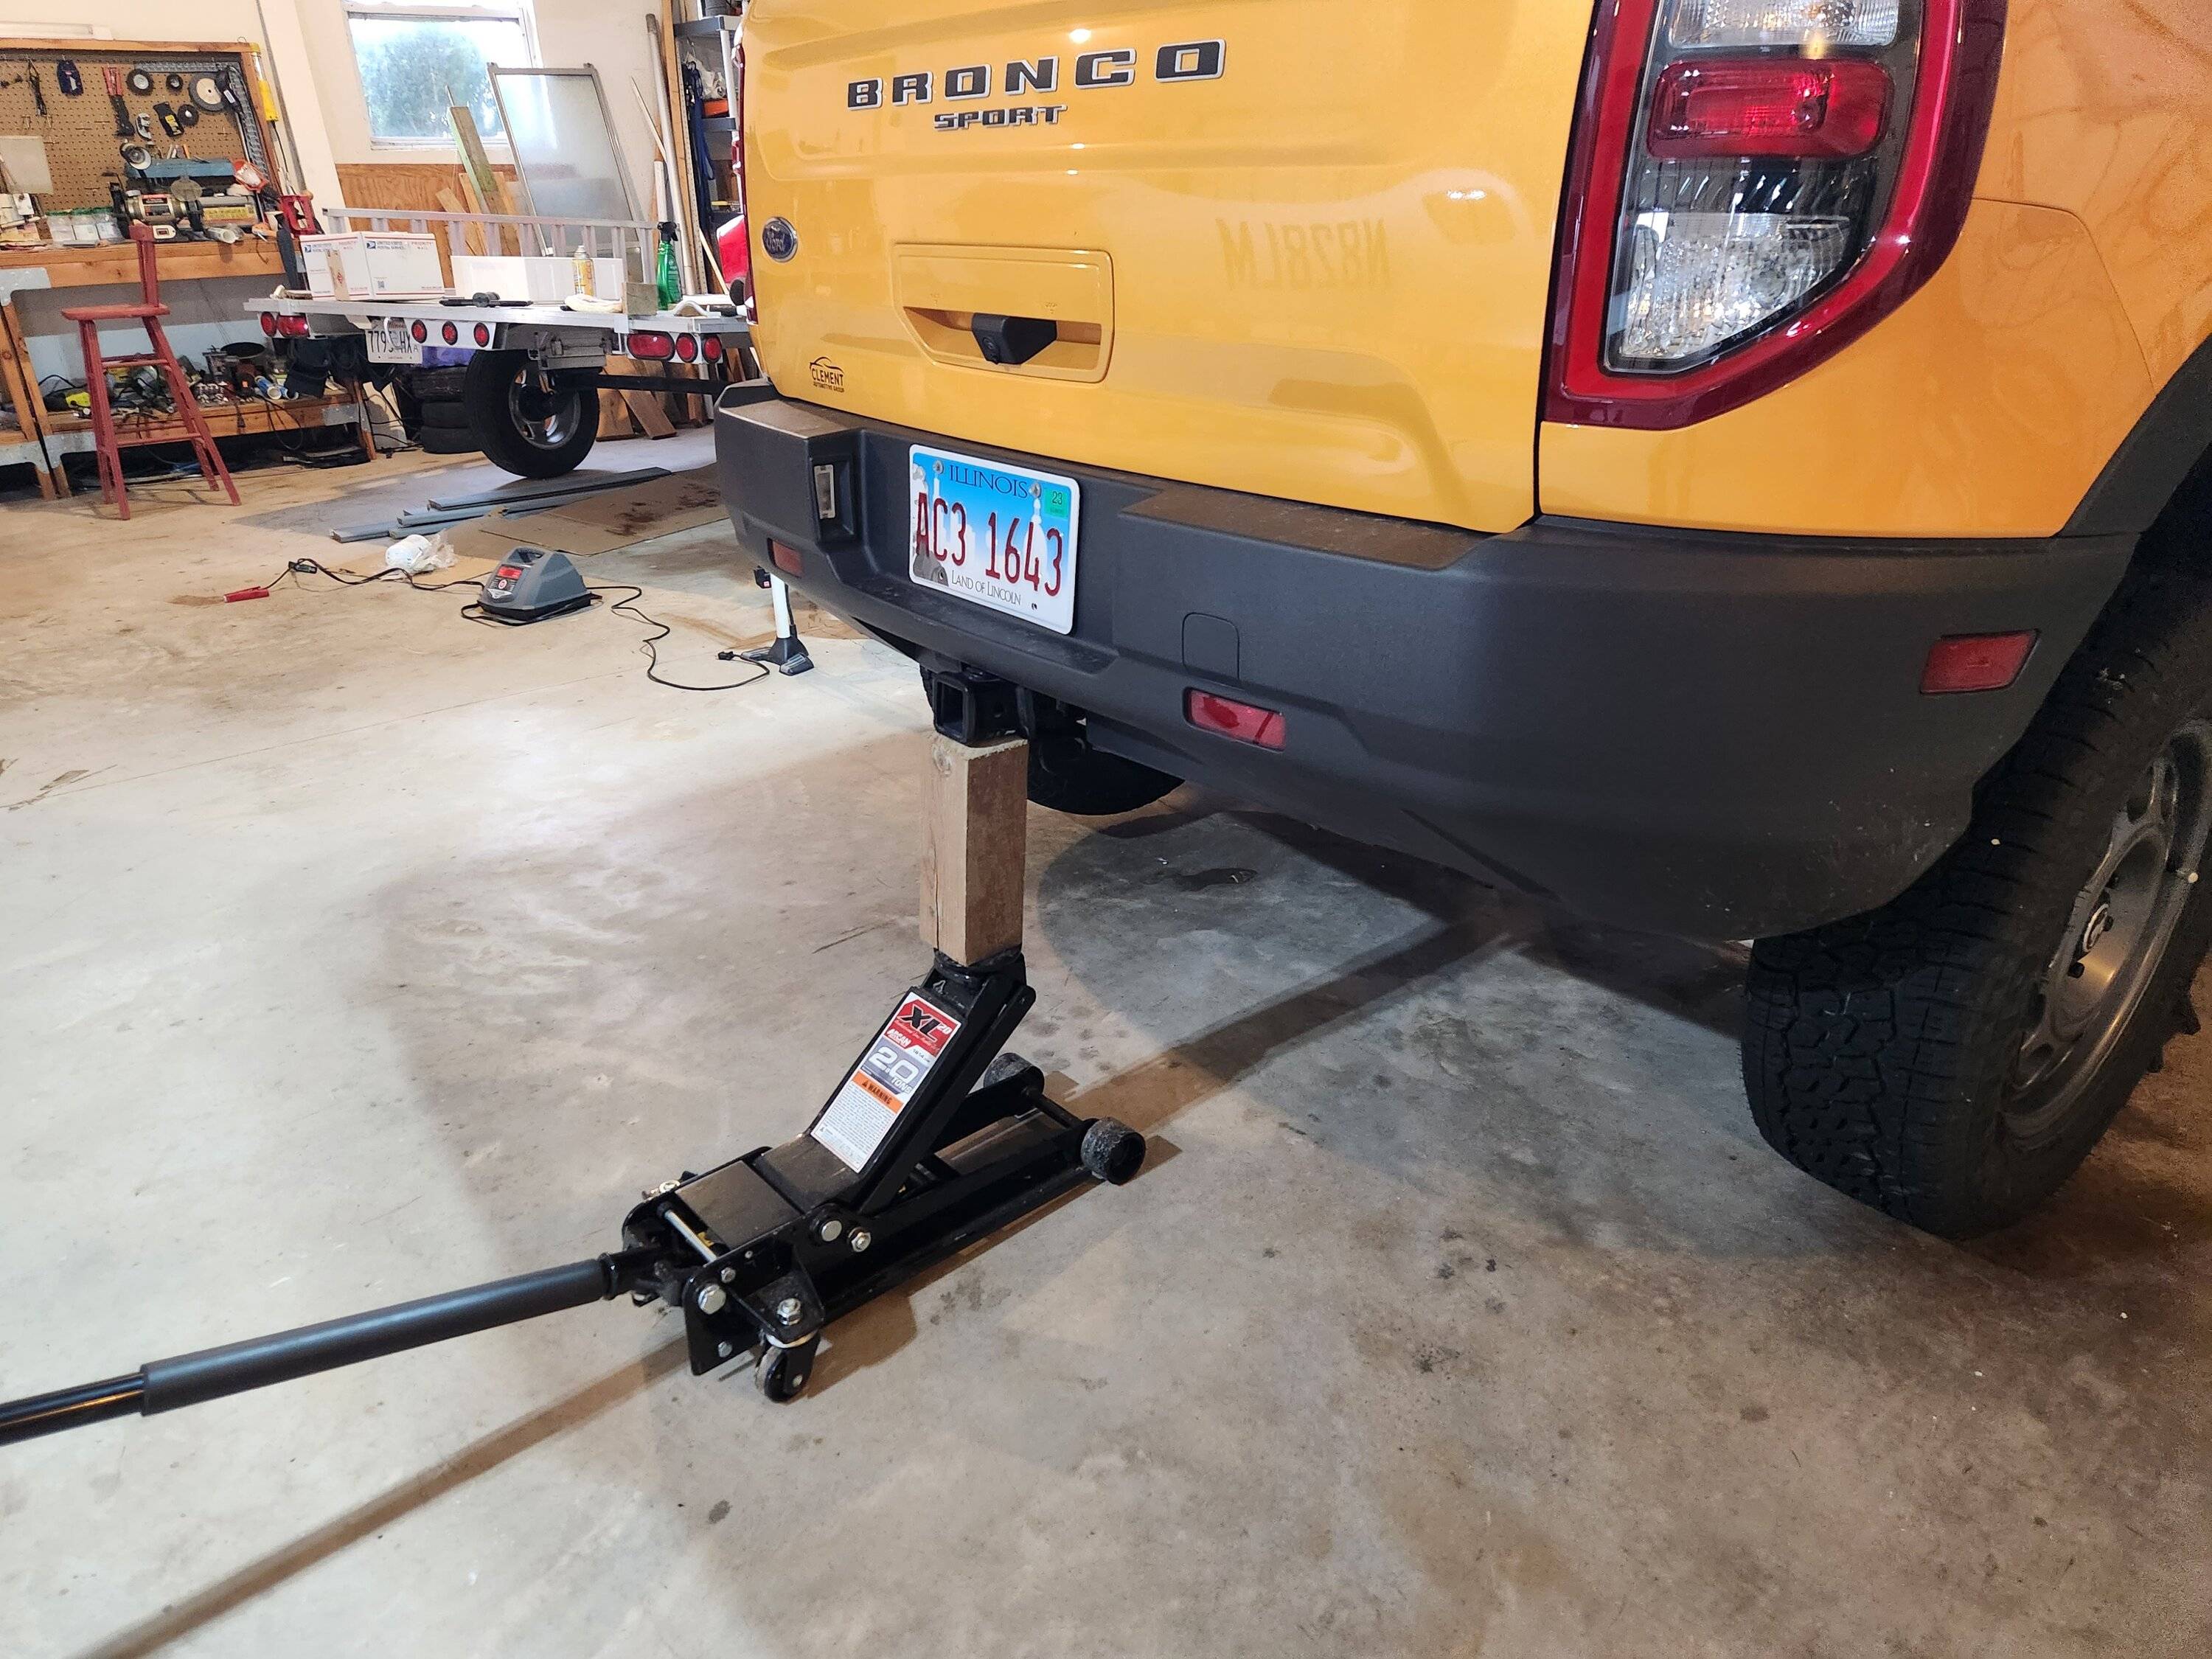
First things first; you have to jack up the back end so you can take the wheels off. You can jack up one side at a time, but I don't like working under a vehicle sitting on a jack. Instead, I jacked up the entire back end and placed a jack stand under the aft jacking points on each side. Be sure and chock the front wheels since you cannot use the parking brake.


Once you have the wheels off you can decide where to route the air lines. The airbag will sit inside the coil spring with the air line exiting a hole in the bottom of the spring mount. The instructions don't really tell you where to route the lines (there is a recommended location for the Schrader valve which I chose not to use), but it does include a warning to stay away from heat sources. My first idea was to run the lines to the back bumper and install the Schrader valves there. If you look underneath your car you'll see the exhaust system takes up almost all the room between the rear axle and the bumper. Routing the lines away from all the hot exhaust parts back there seemed like too much trouble. Additionally, the Schrader valves would have to mount in the plastic fascia covering the bumper, which is not a very sturdy option. I decided to use the brake line support tab welded to the frame in each wheel well. It's solidly mounted, and plenty big enough to drill the 5/16" hole required to mount the Schrader valve.
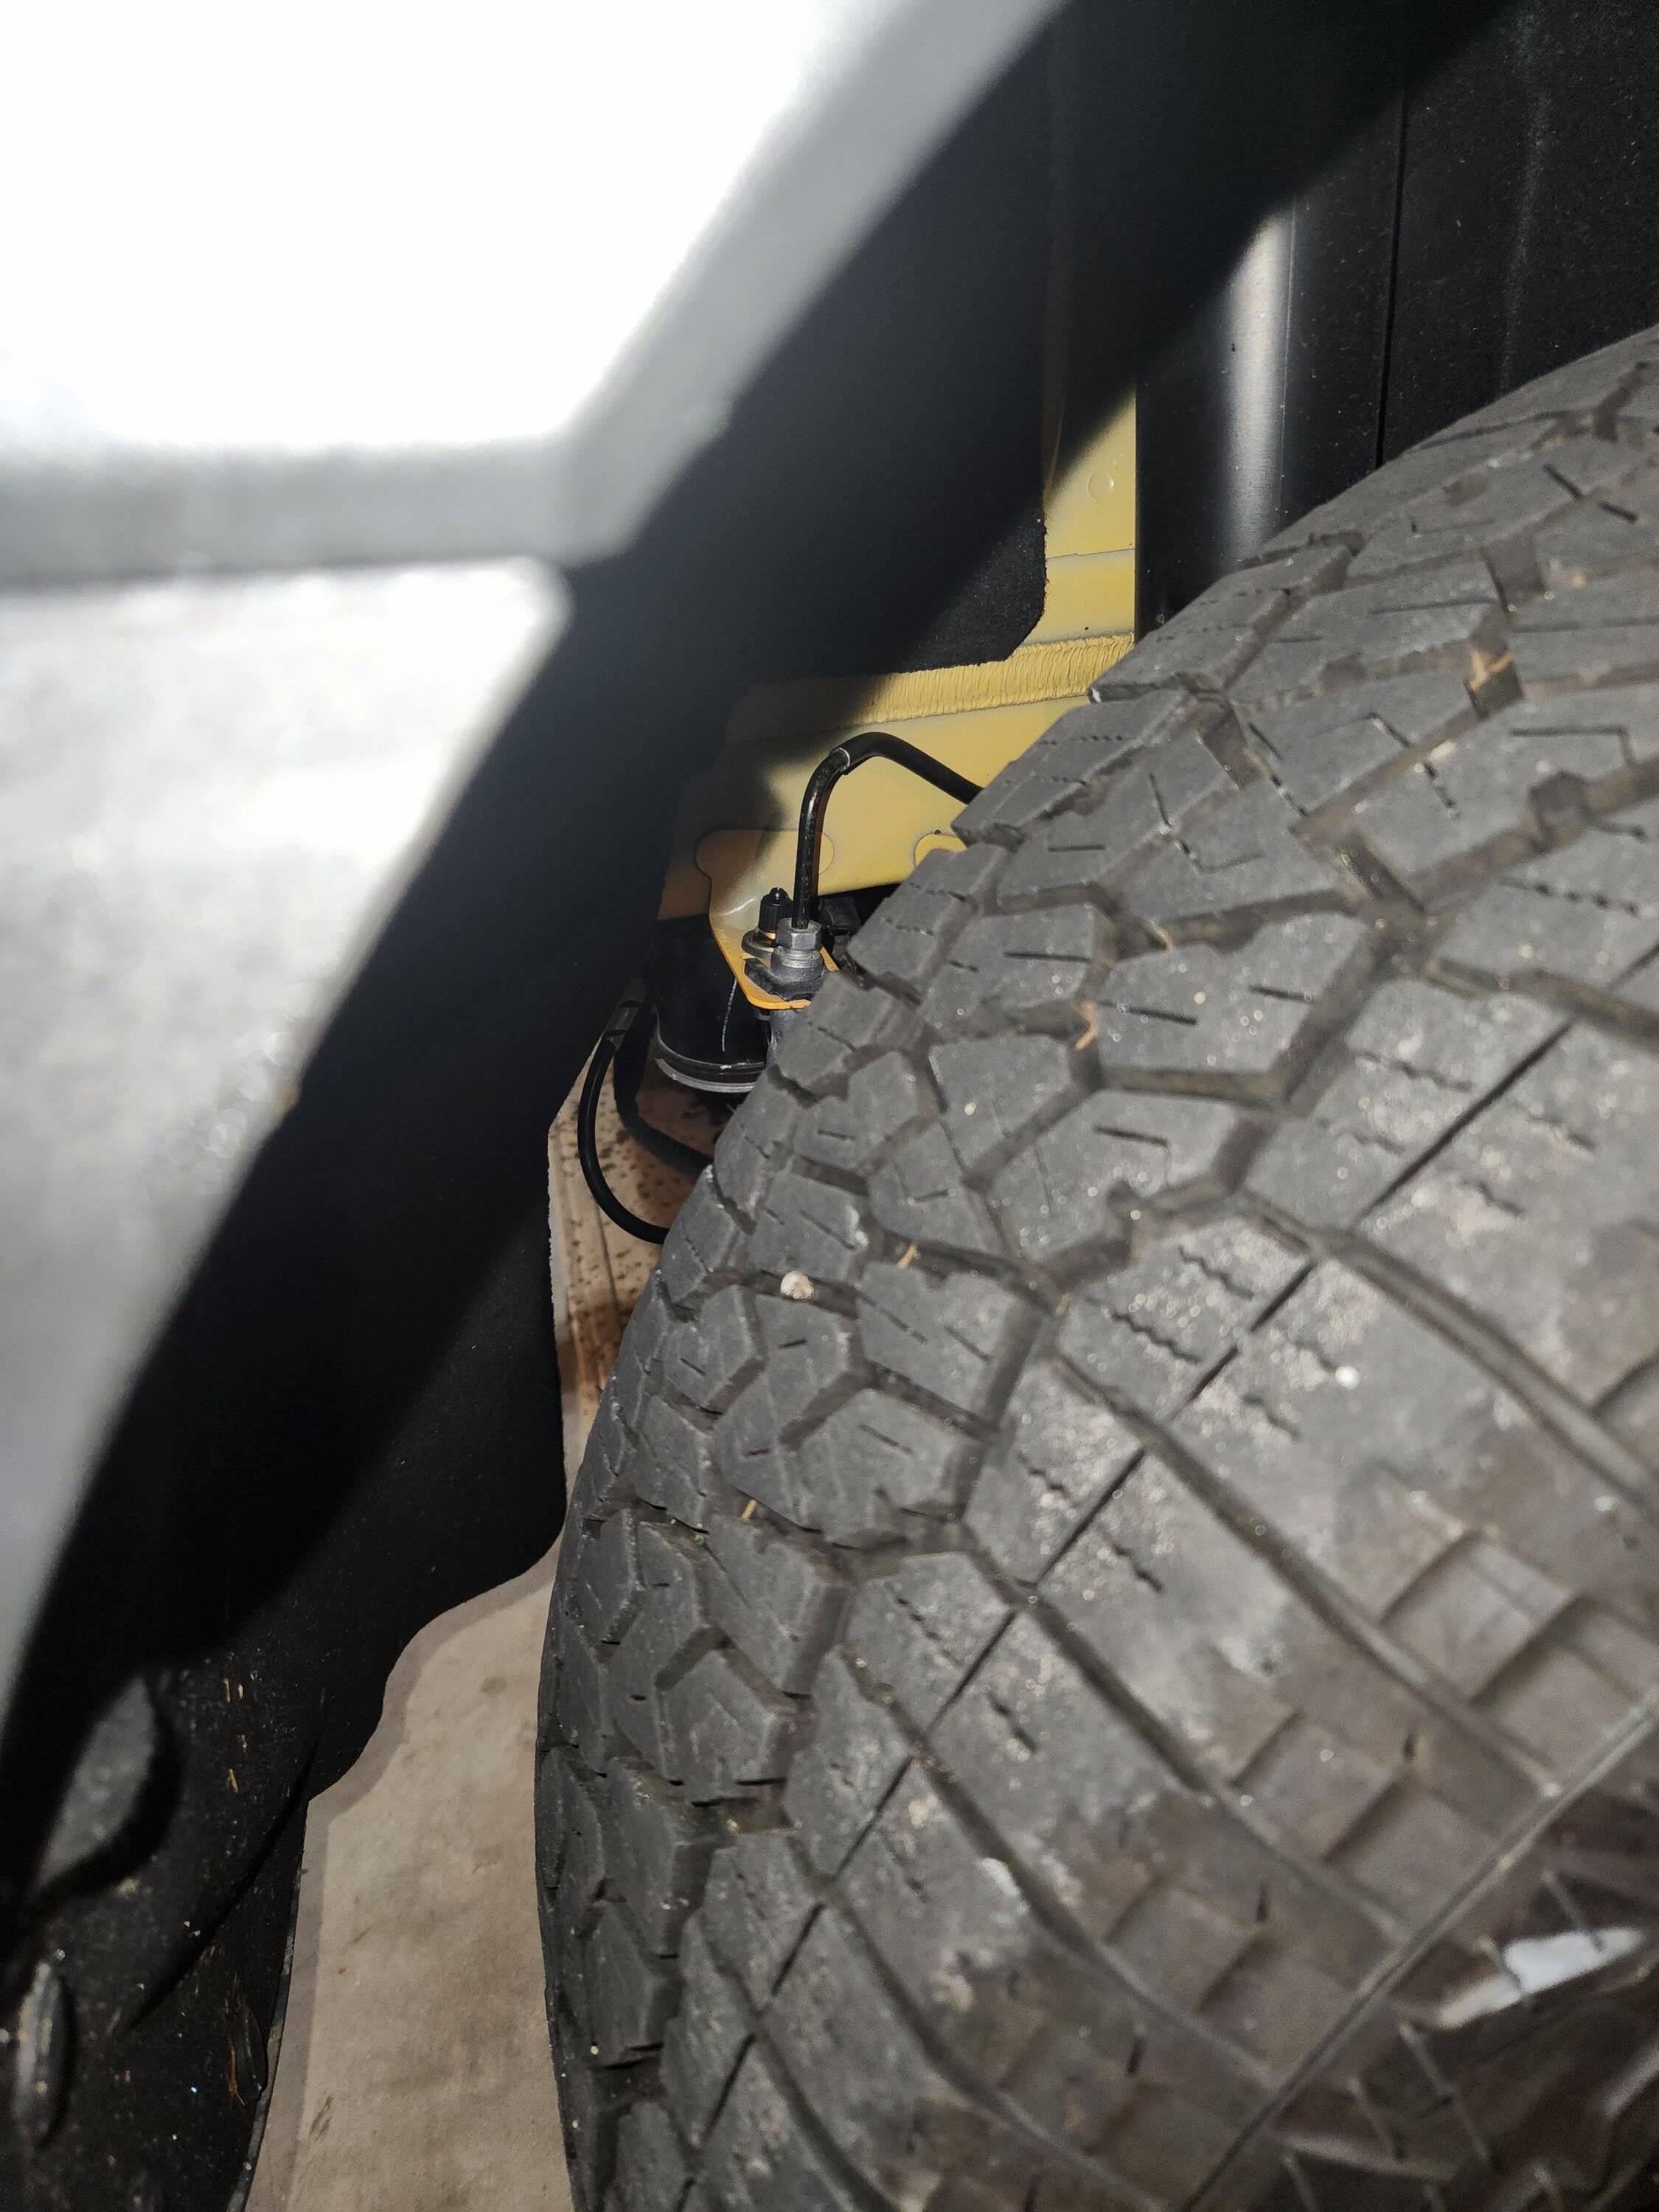
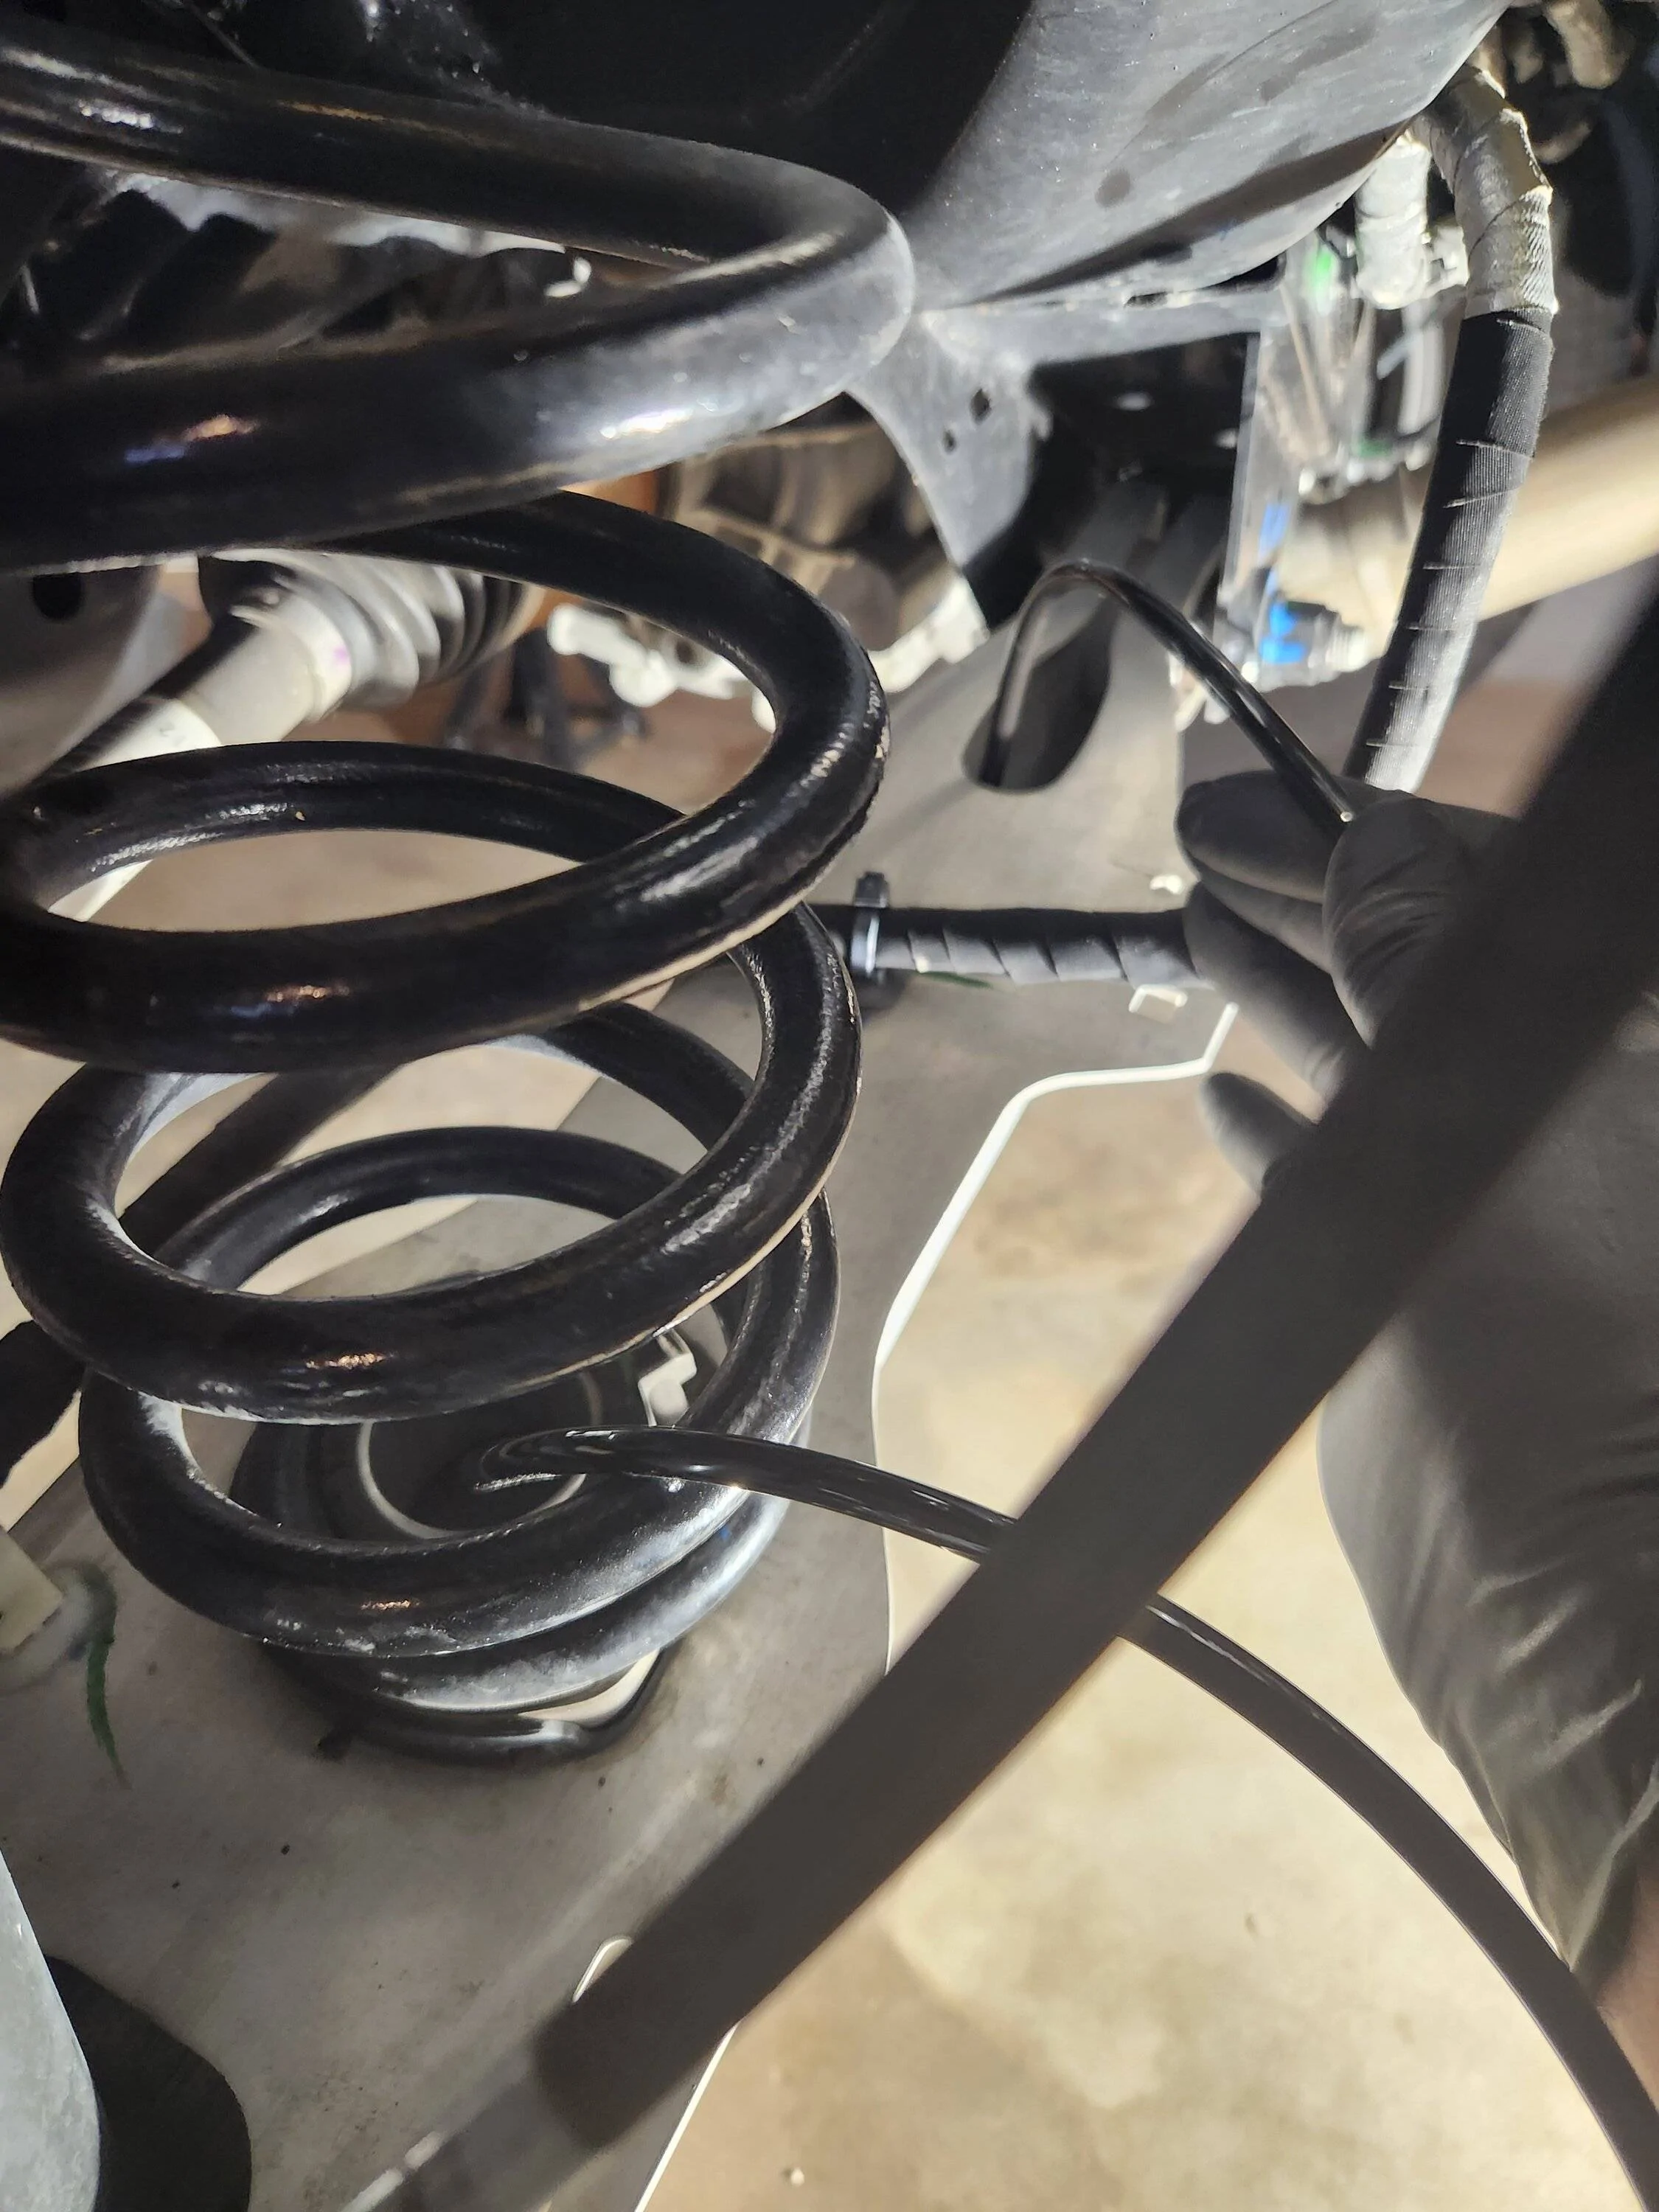
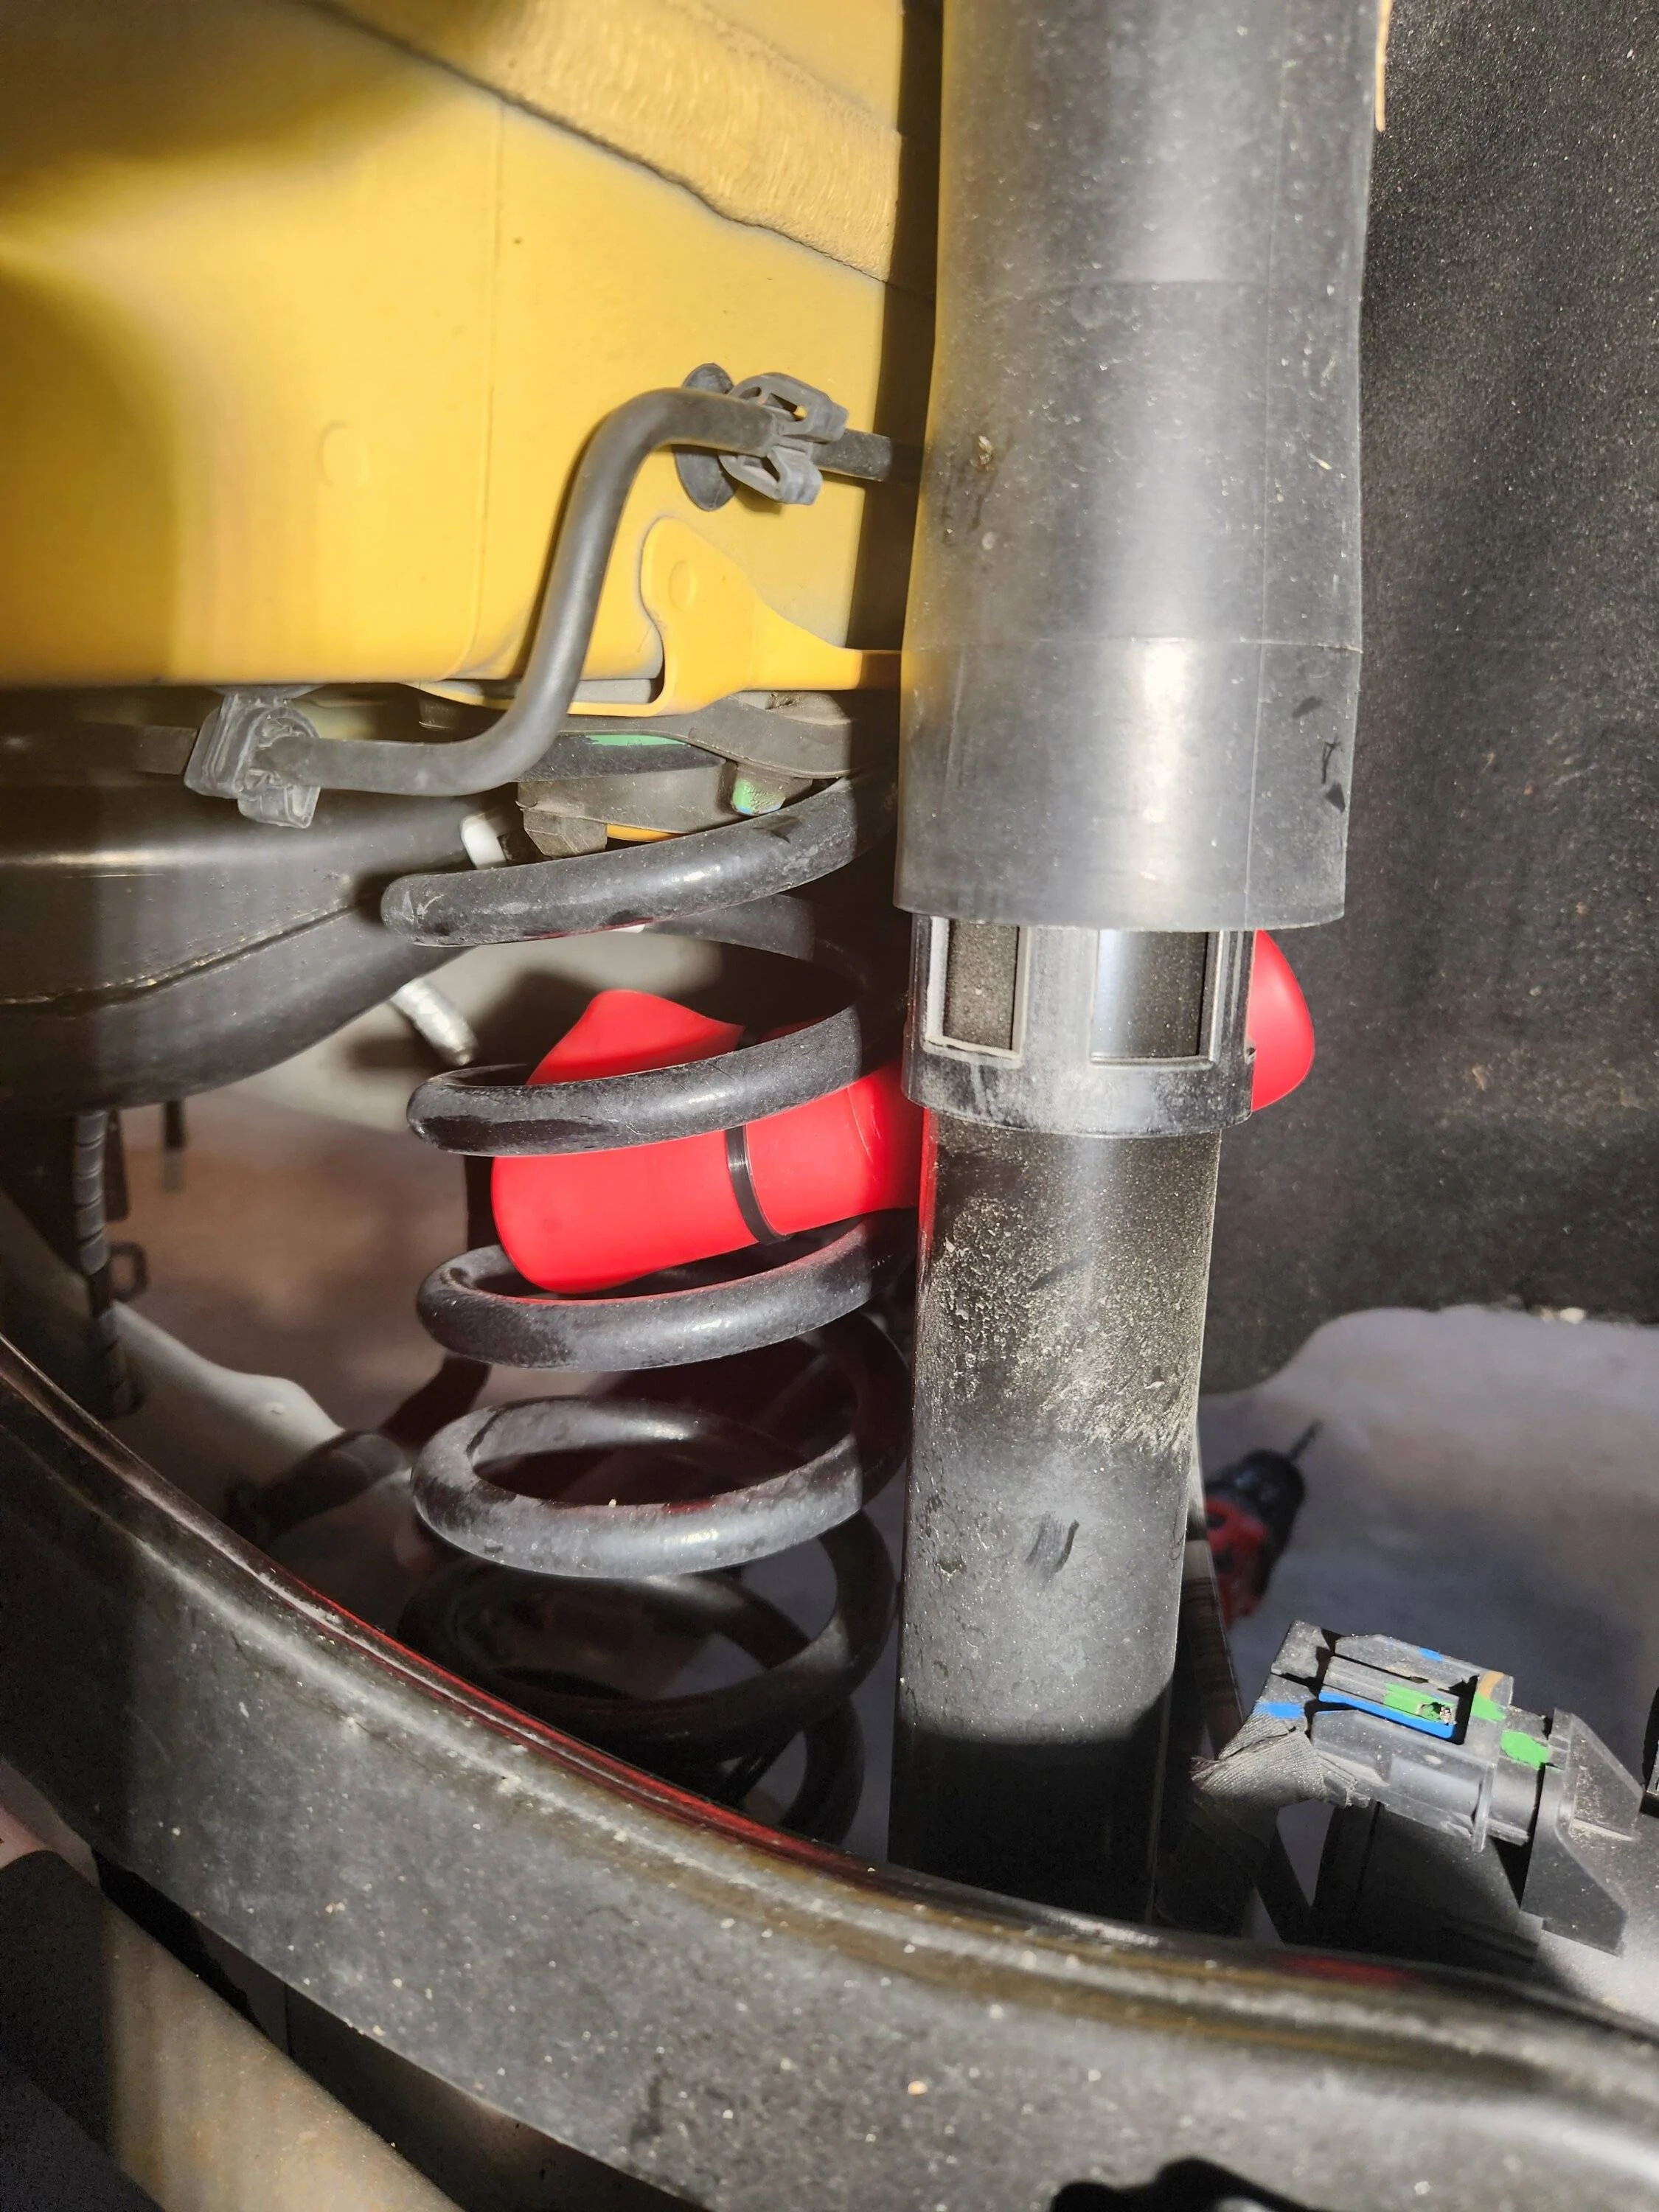
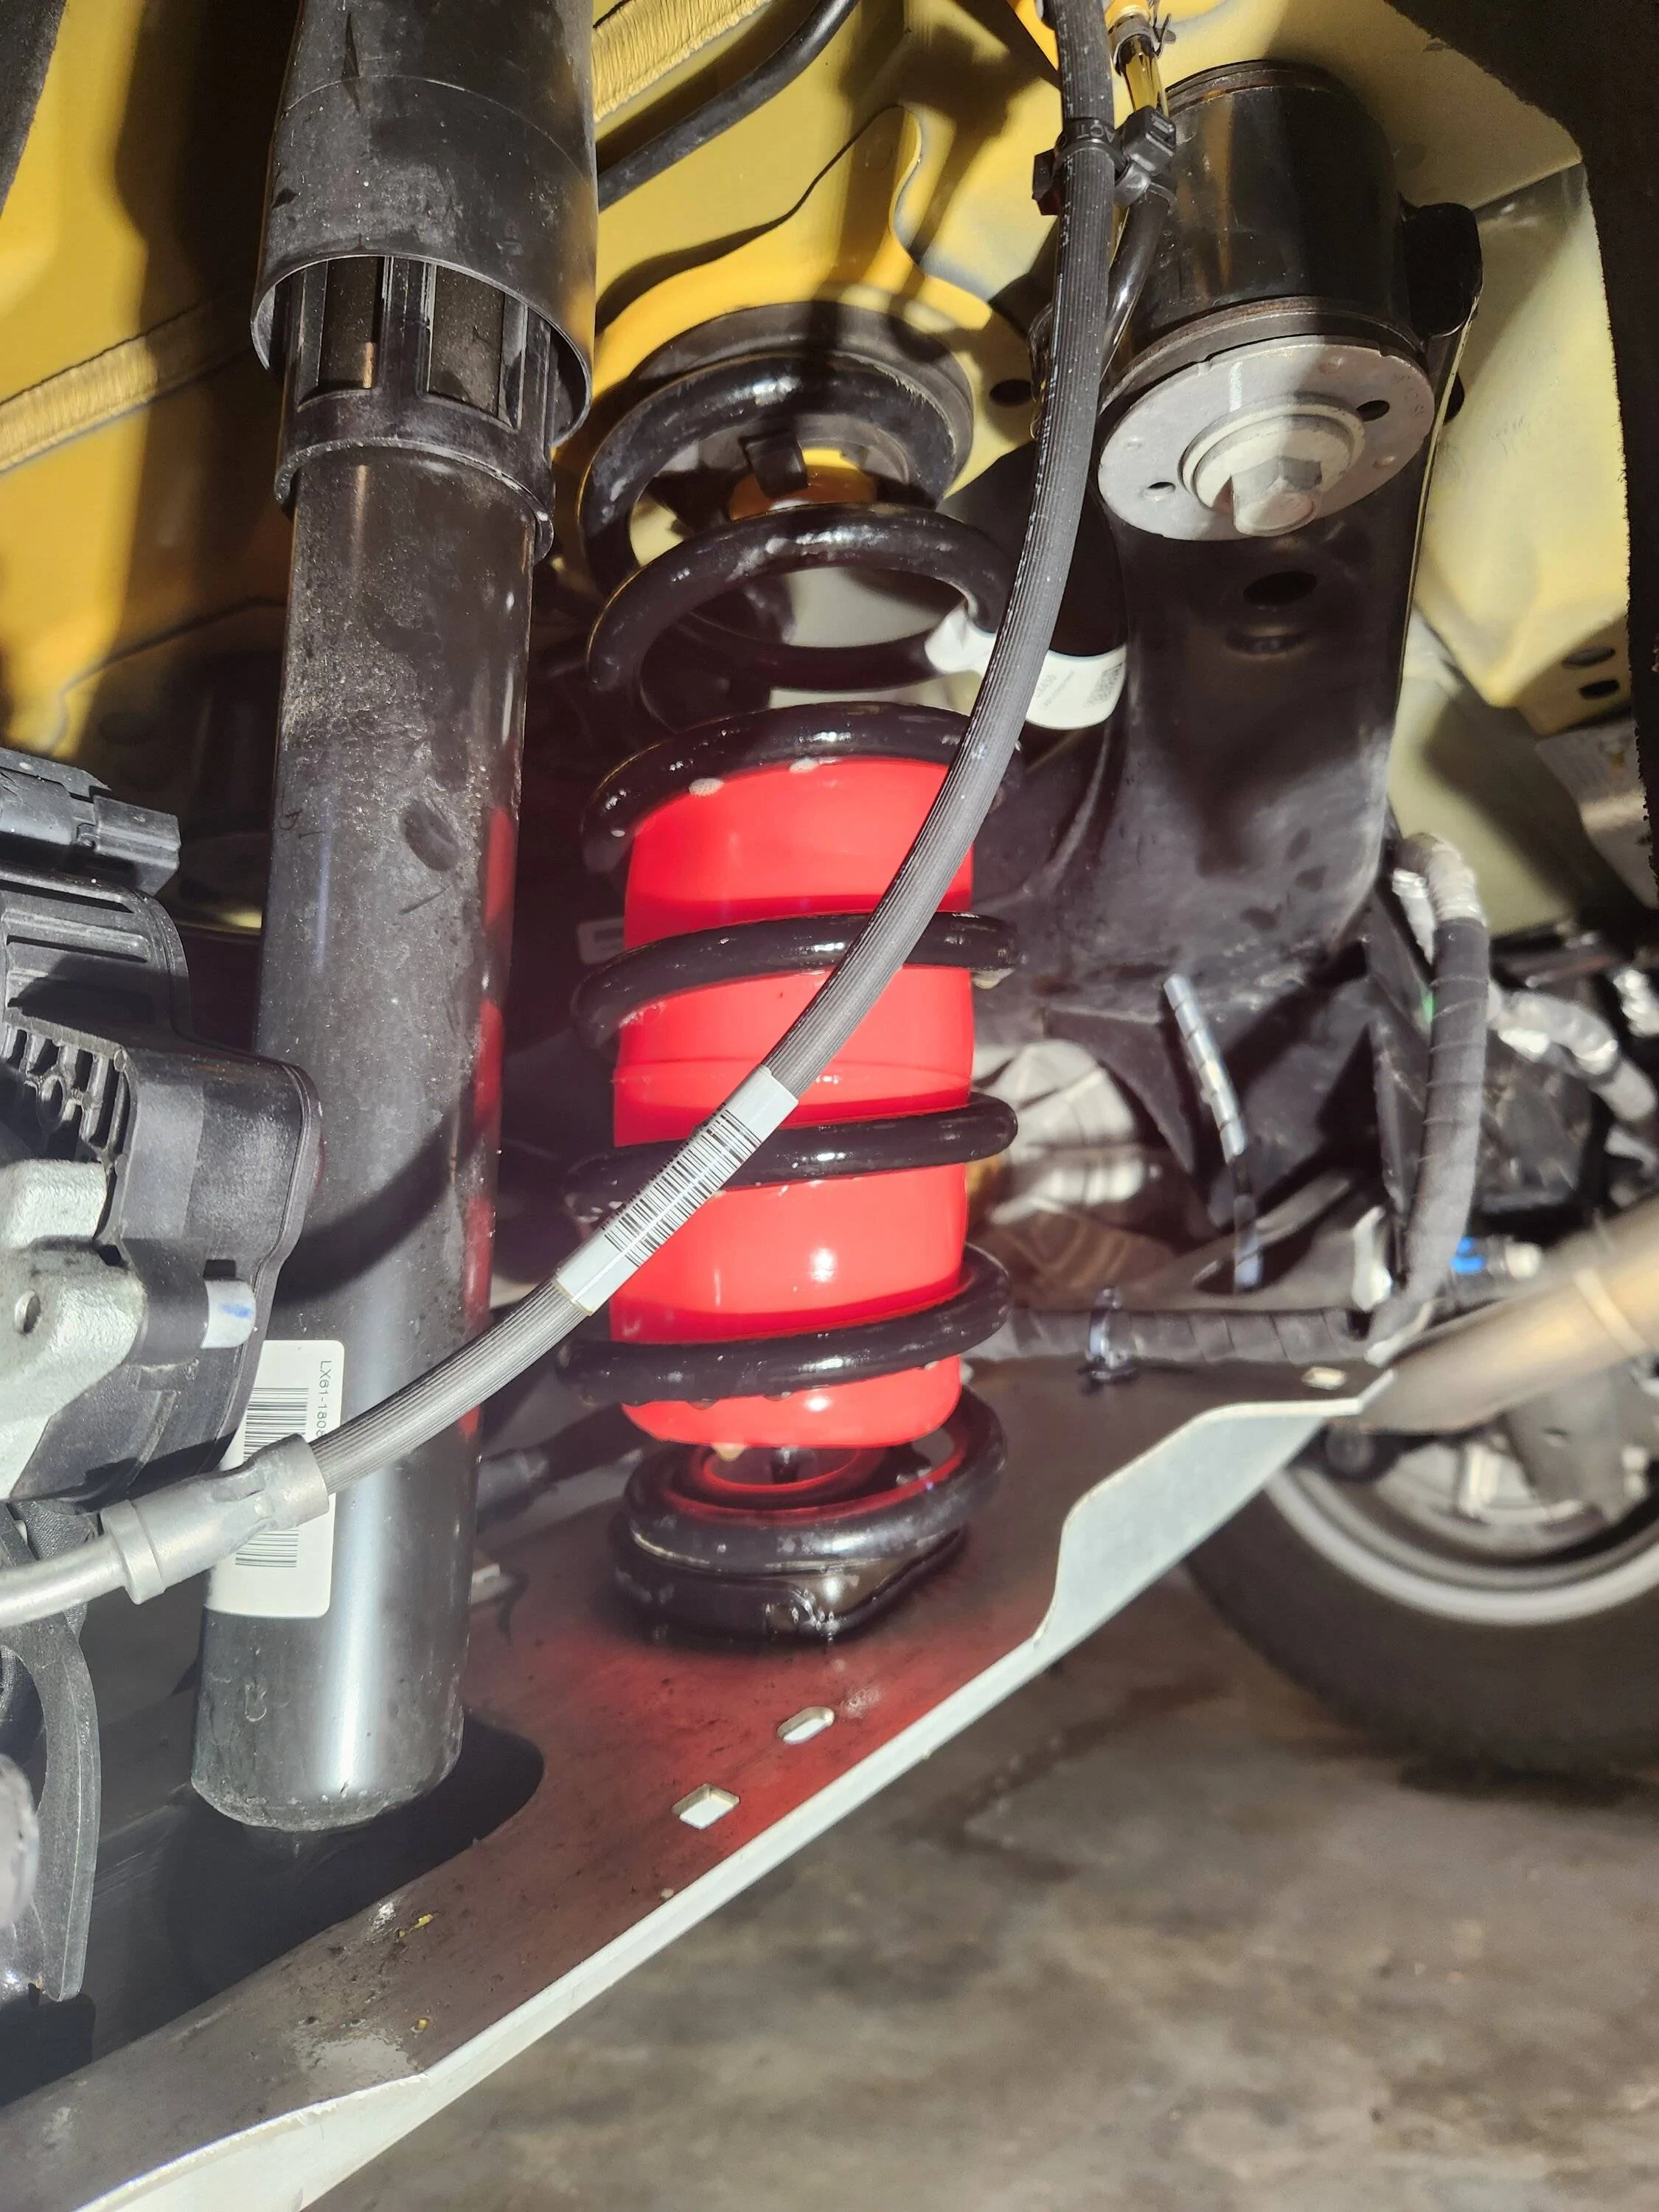
That decision made, air line routing became super simple. I ran the line through the hole in the bottom spring mount on the lower control arm, then internally through the lower control arm inboard to the pivot point, then up through the inboard hole on the lower control arm. The photo below was taken from behind the rear axle looking inboard on the driver's side. You can see the black air line going in the hole at the bottom of the spring mount, and out the hole near the pivot point.
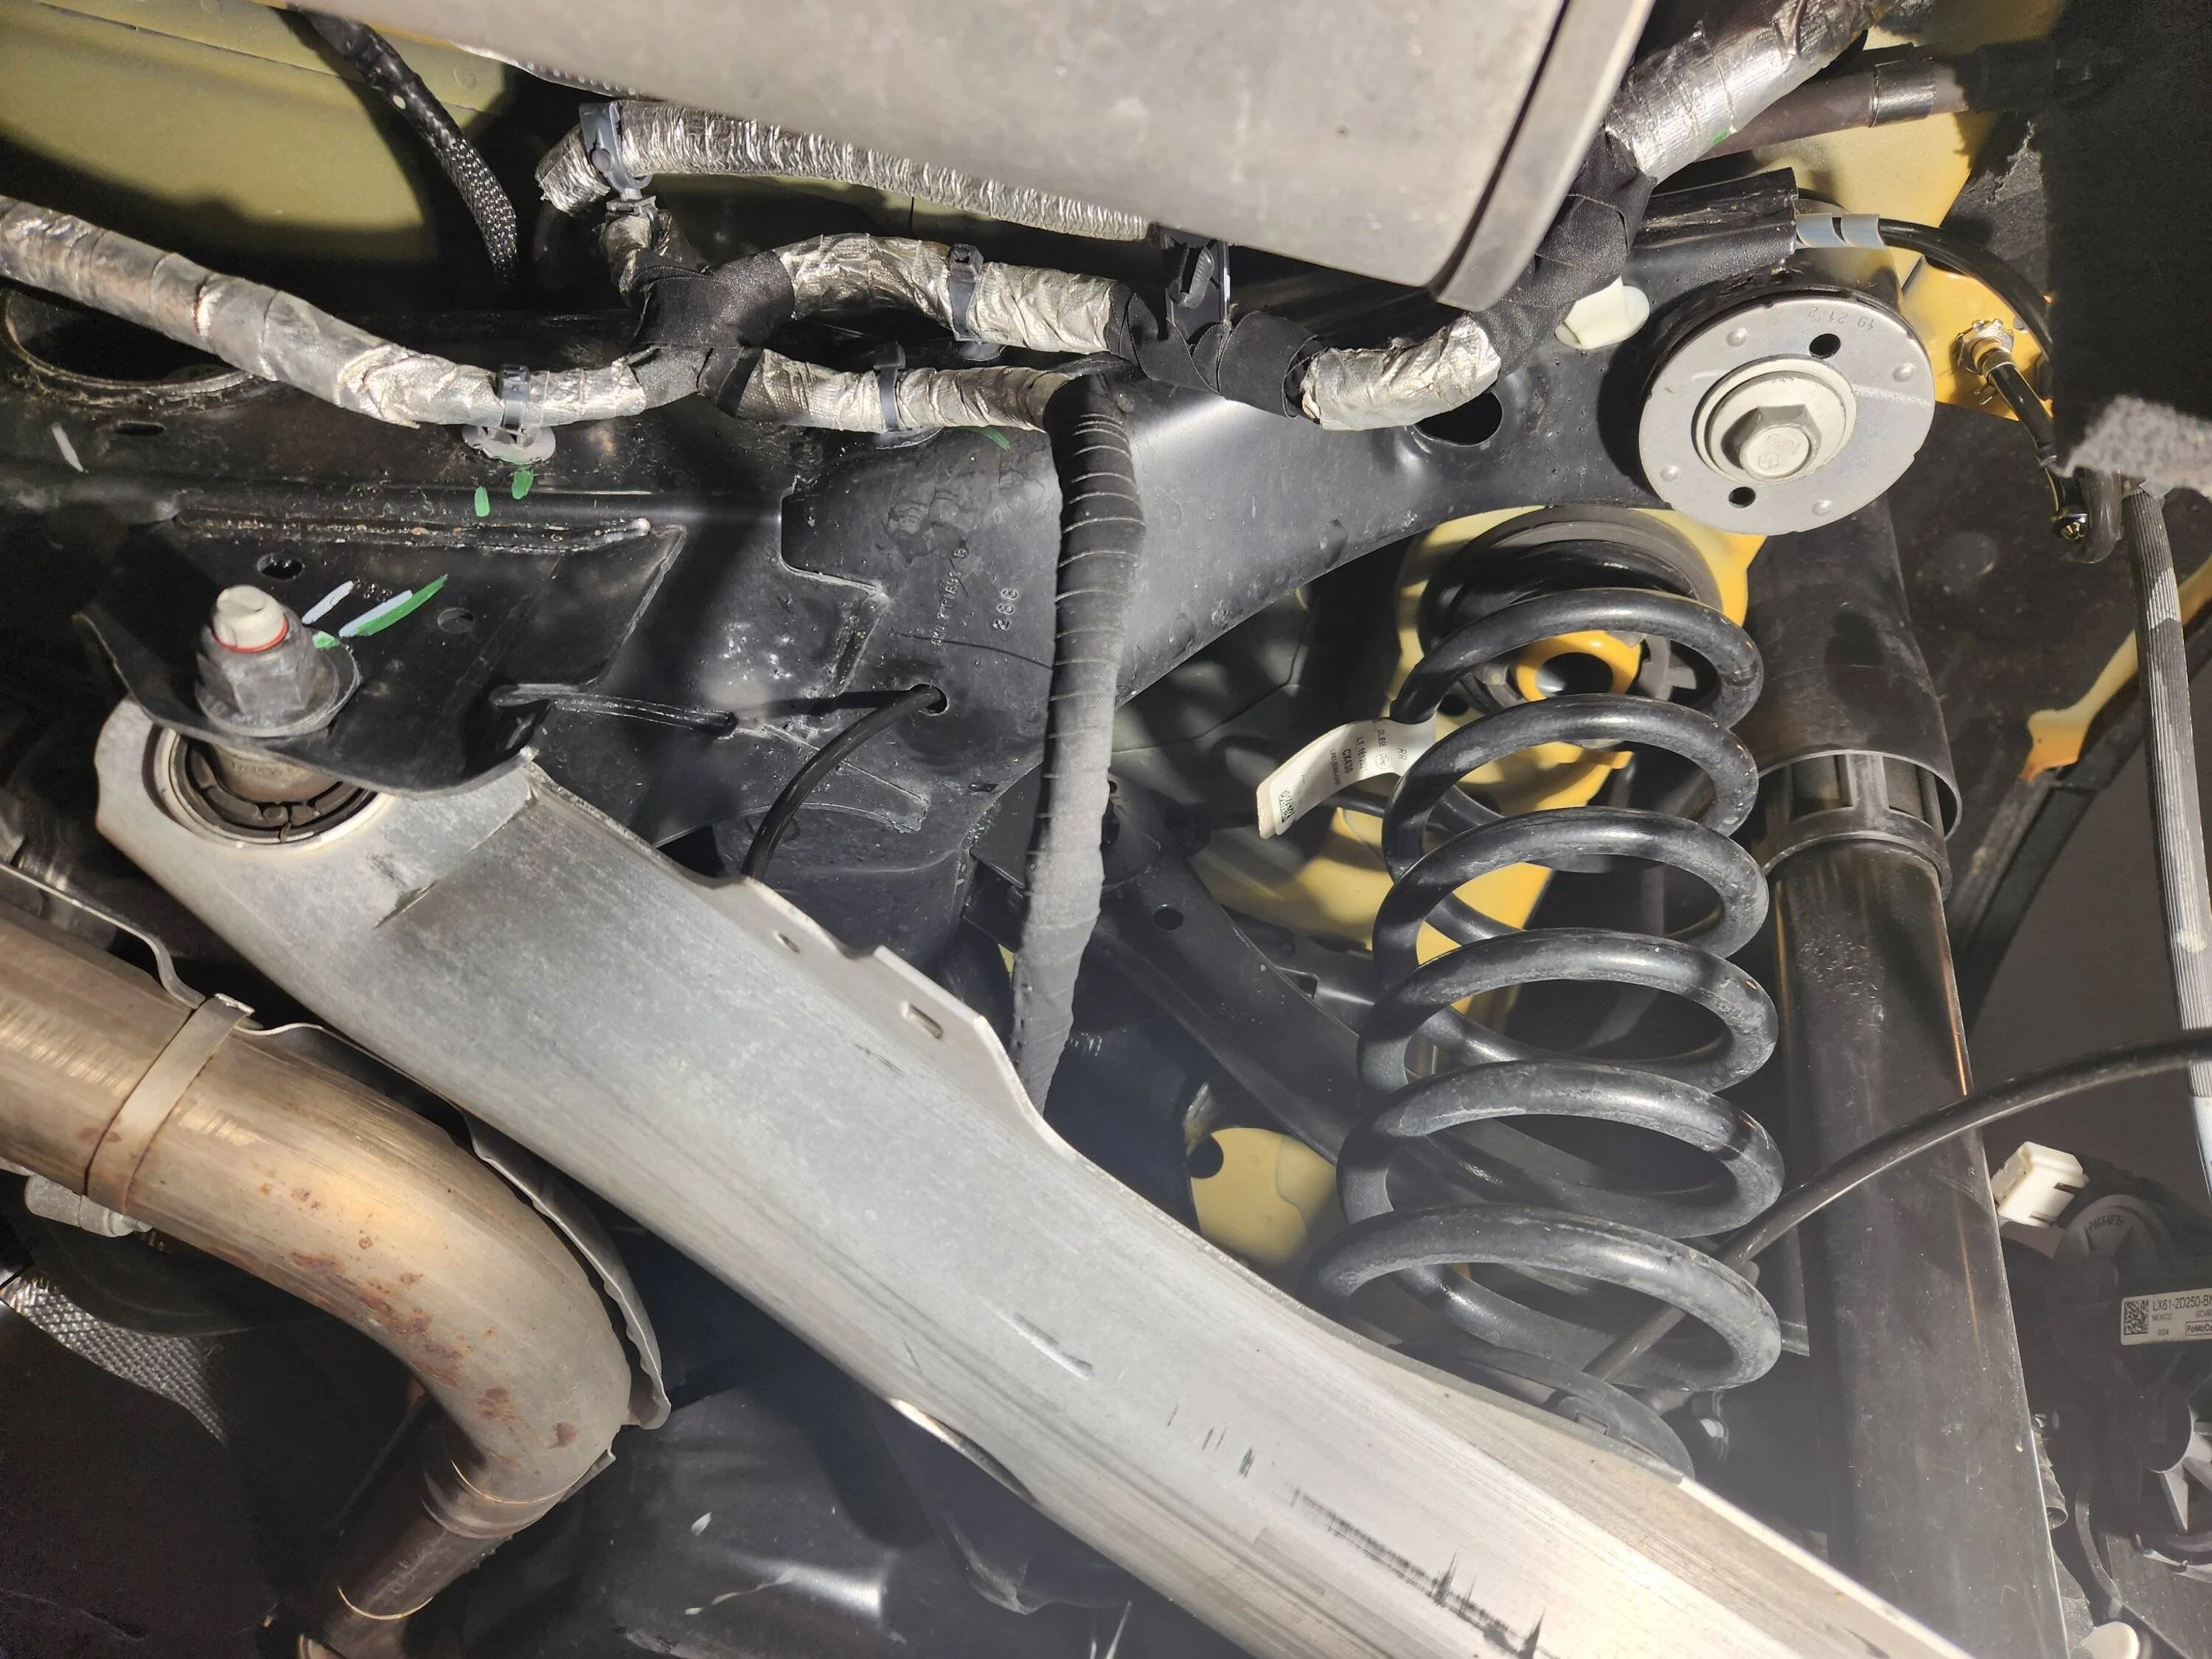
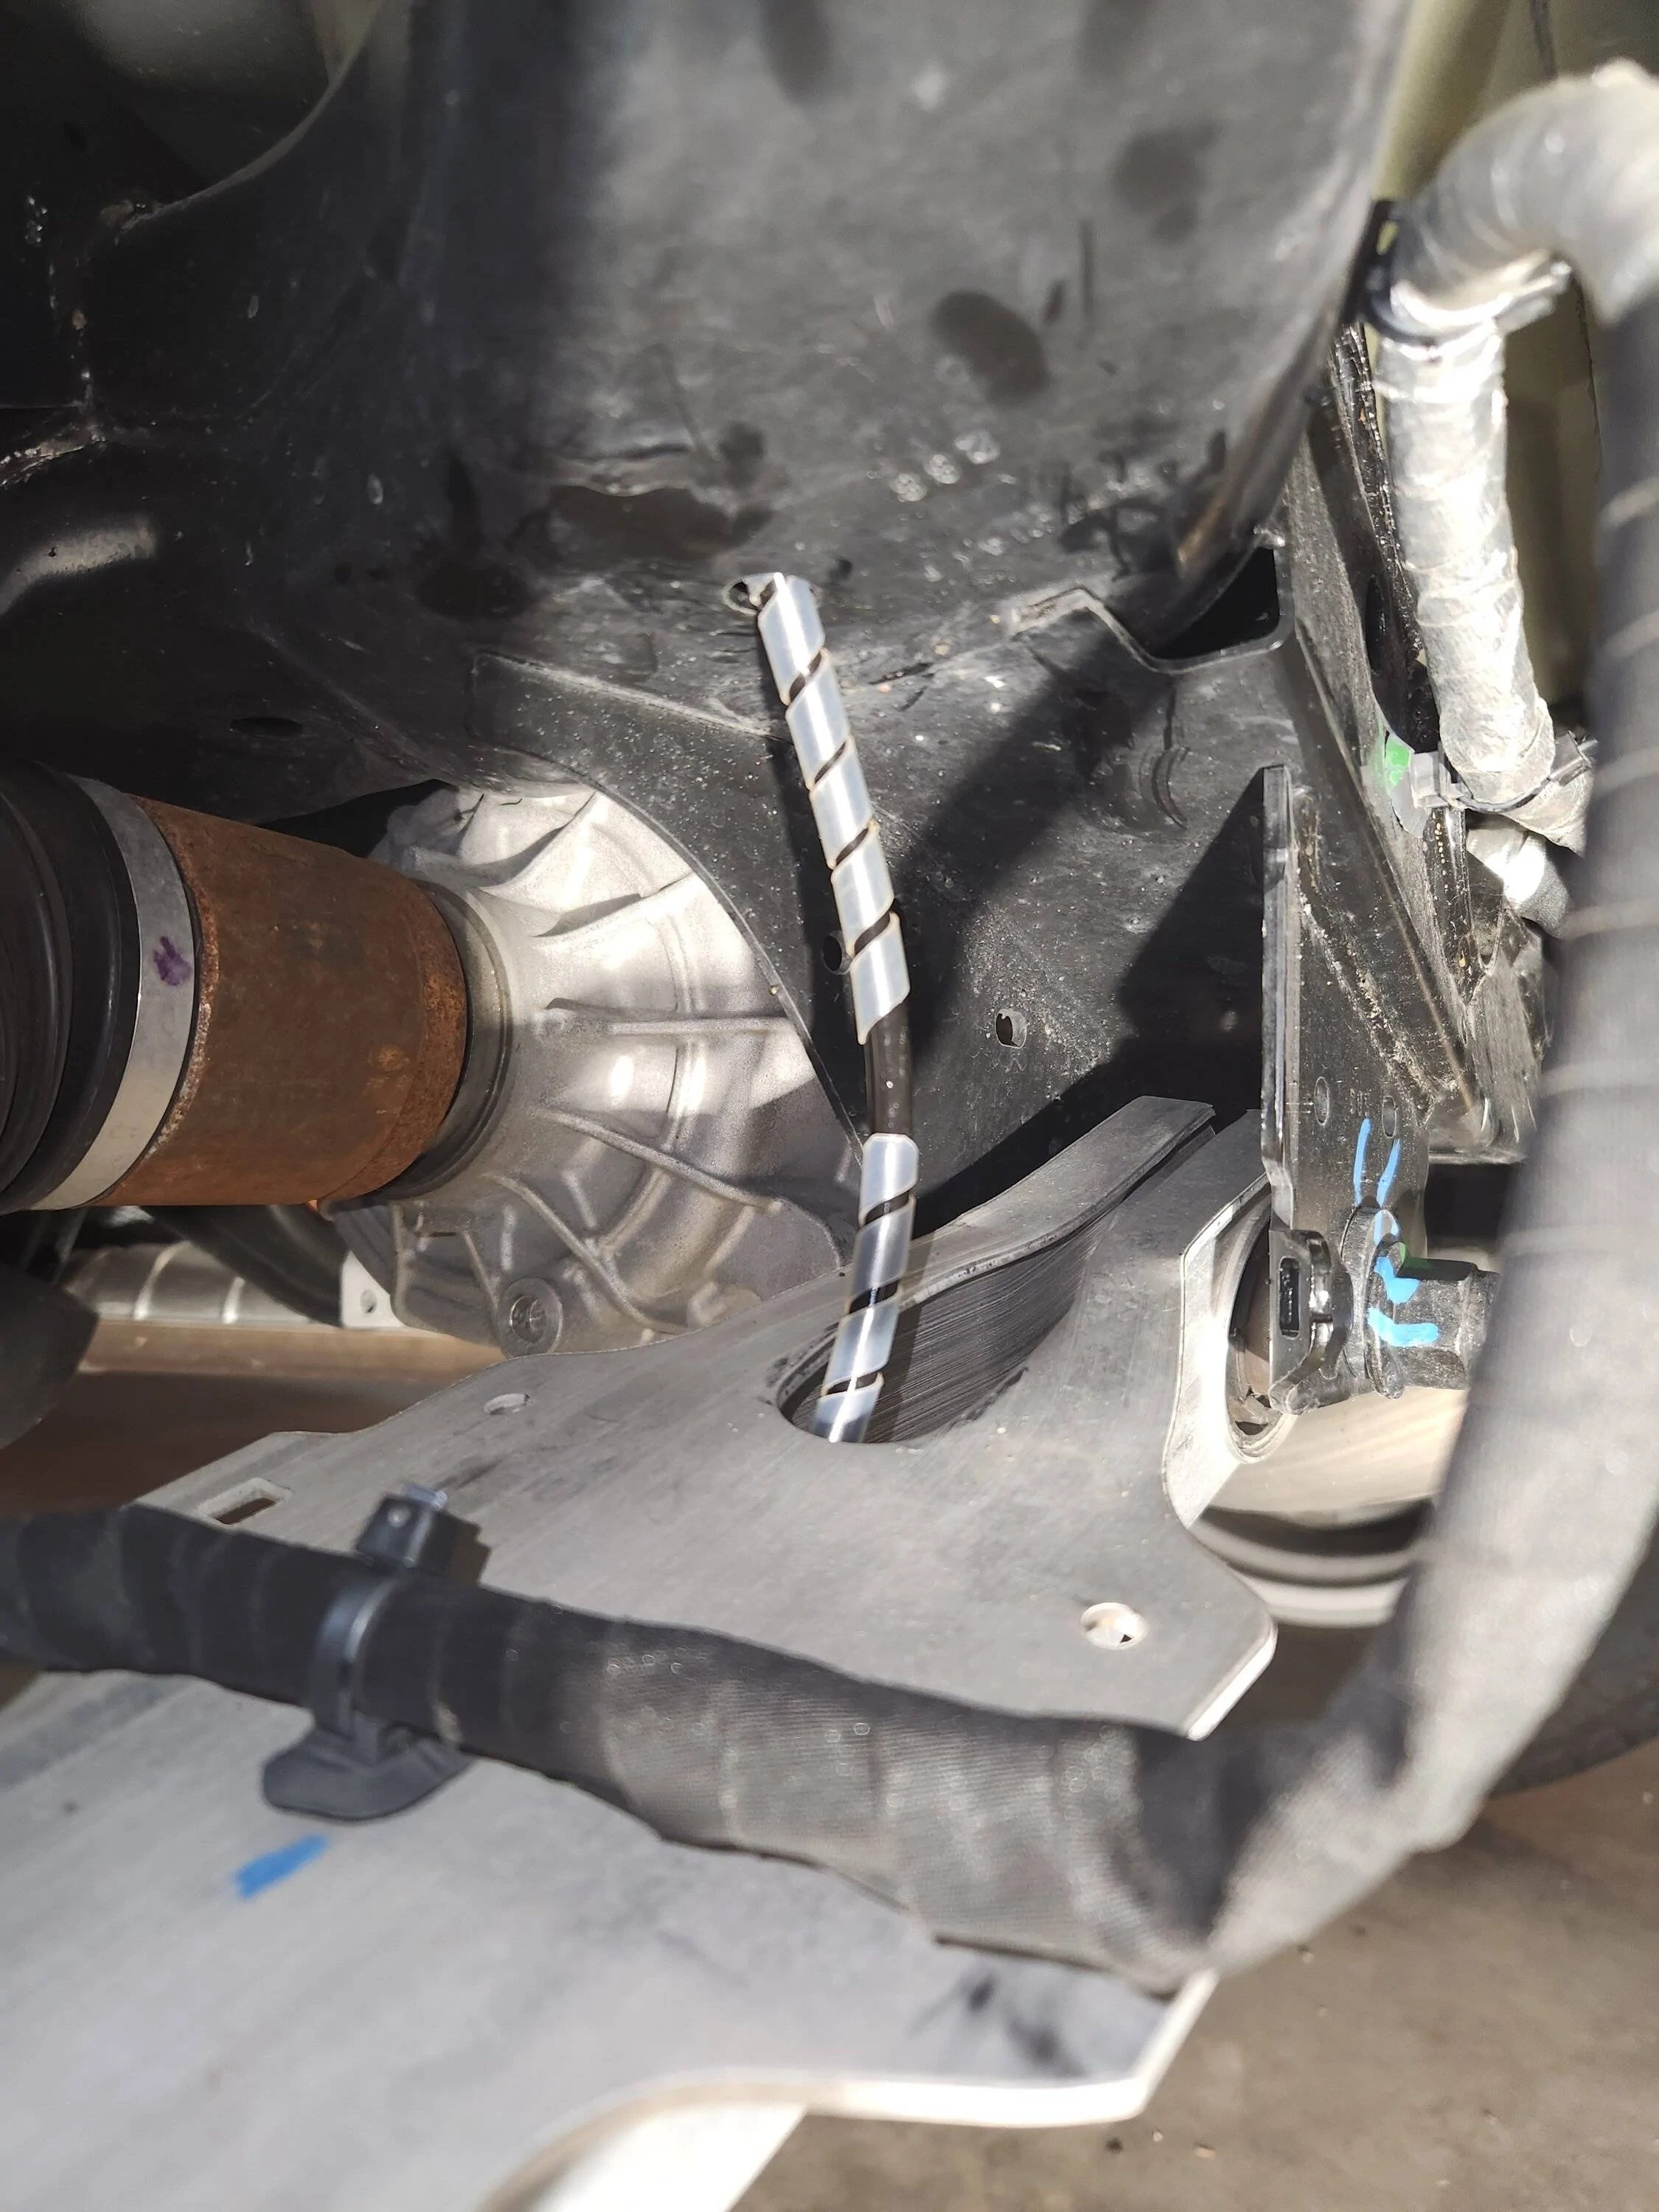
From there, I went up into a hole in the upper control arm, then outboard back toward the spring before exiting through a slot on the upper control arm mount weldment. The pic below left was taken from in front of the control arms looking aft on the driver's side. You can see the air line entering through the spring mount on the lower control arm, coming out the inboard hole near the pivot point, then going up in the the upper control arm before exiting the slot at the top mount. Note the spiral wrap on the air line where it exits the upper control arm mount. You'll see in later pics I installed this everywhere the air line contacts an edge to prevent abrasion. This spiral wrap is not included with the kit. The pic below right is from behind the control arms looking inboard/forward; it's a better view of the air line routing between the control arms.
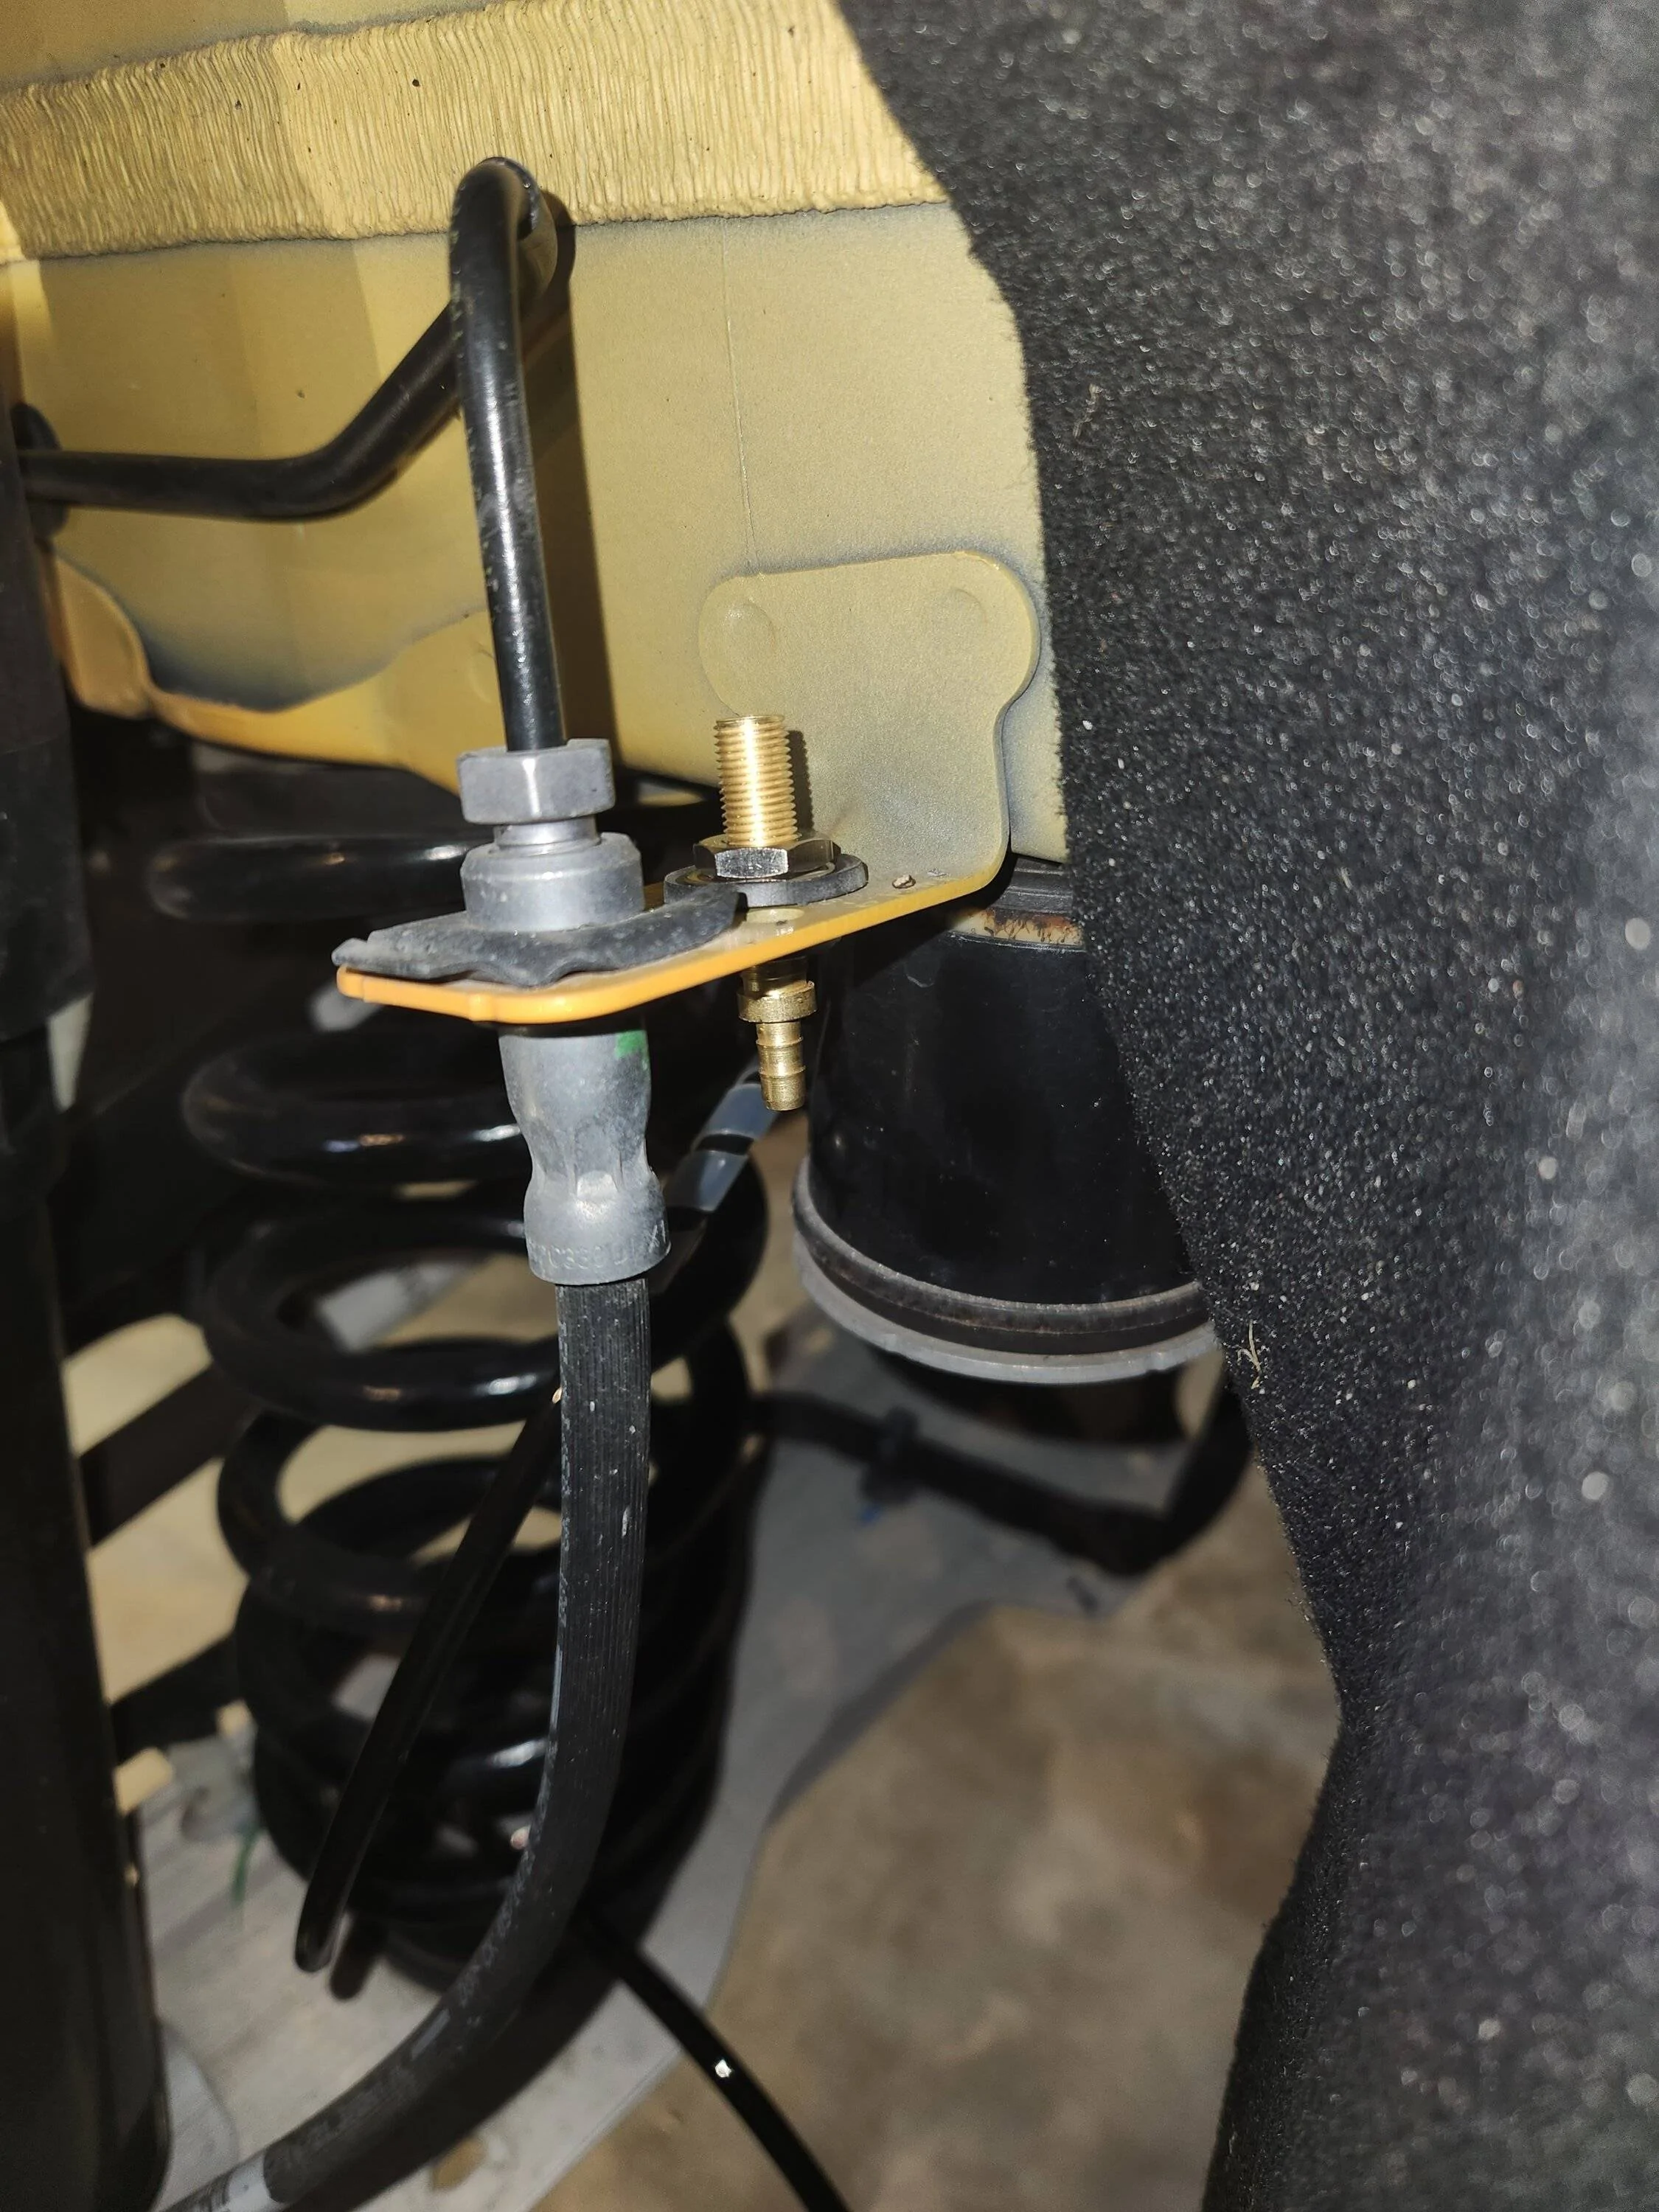
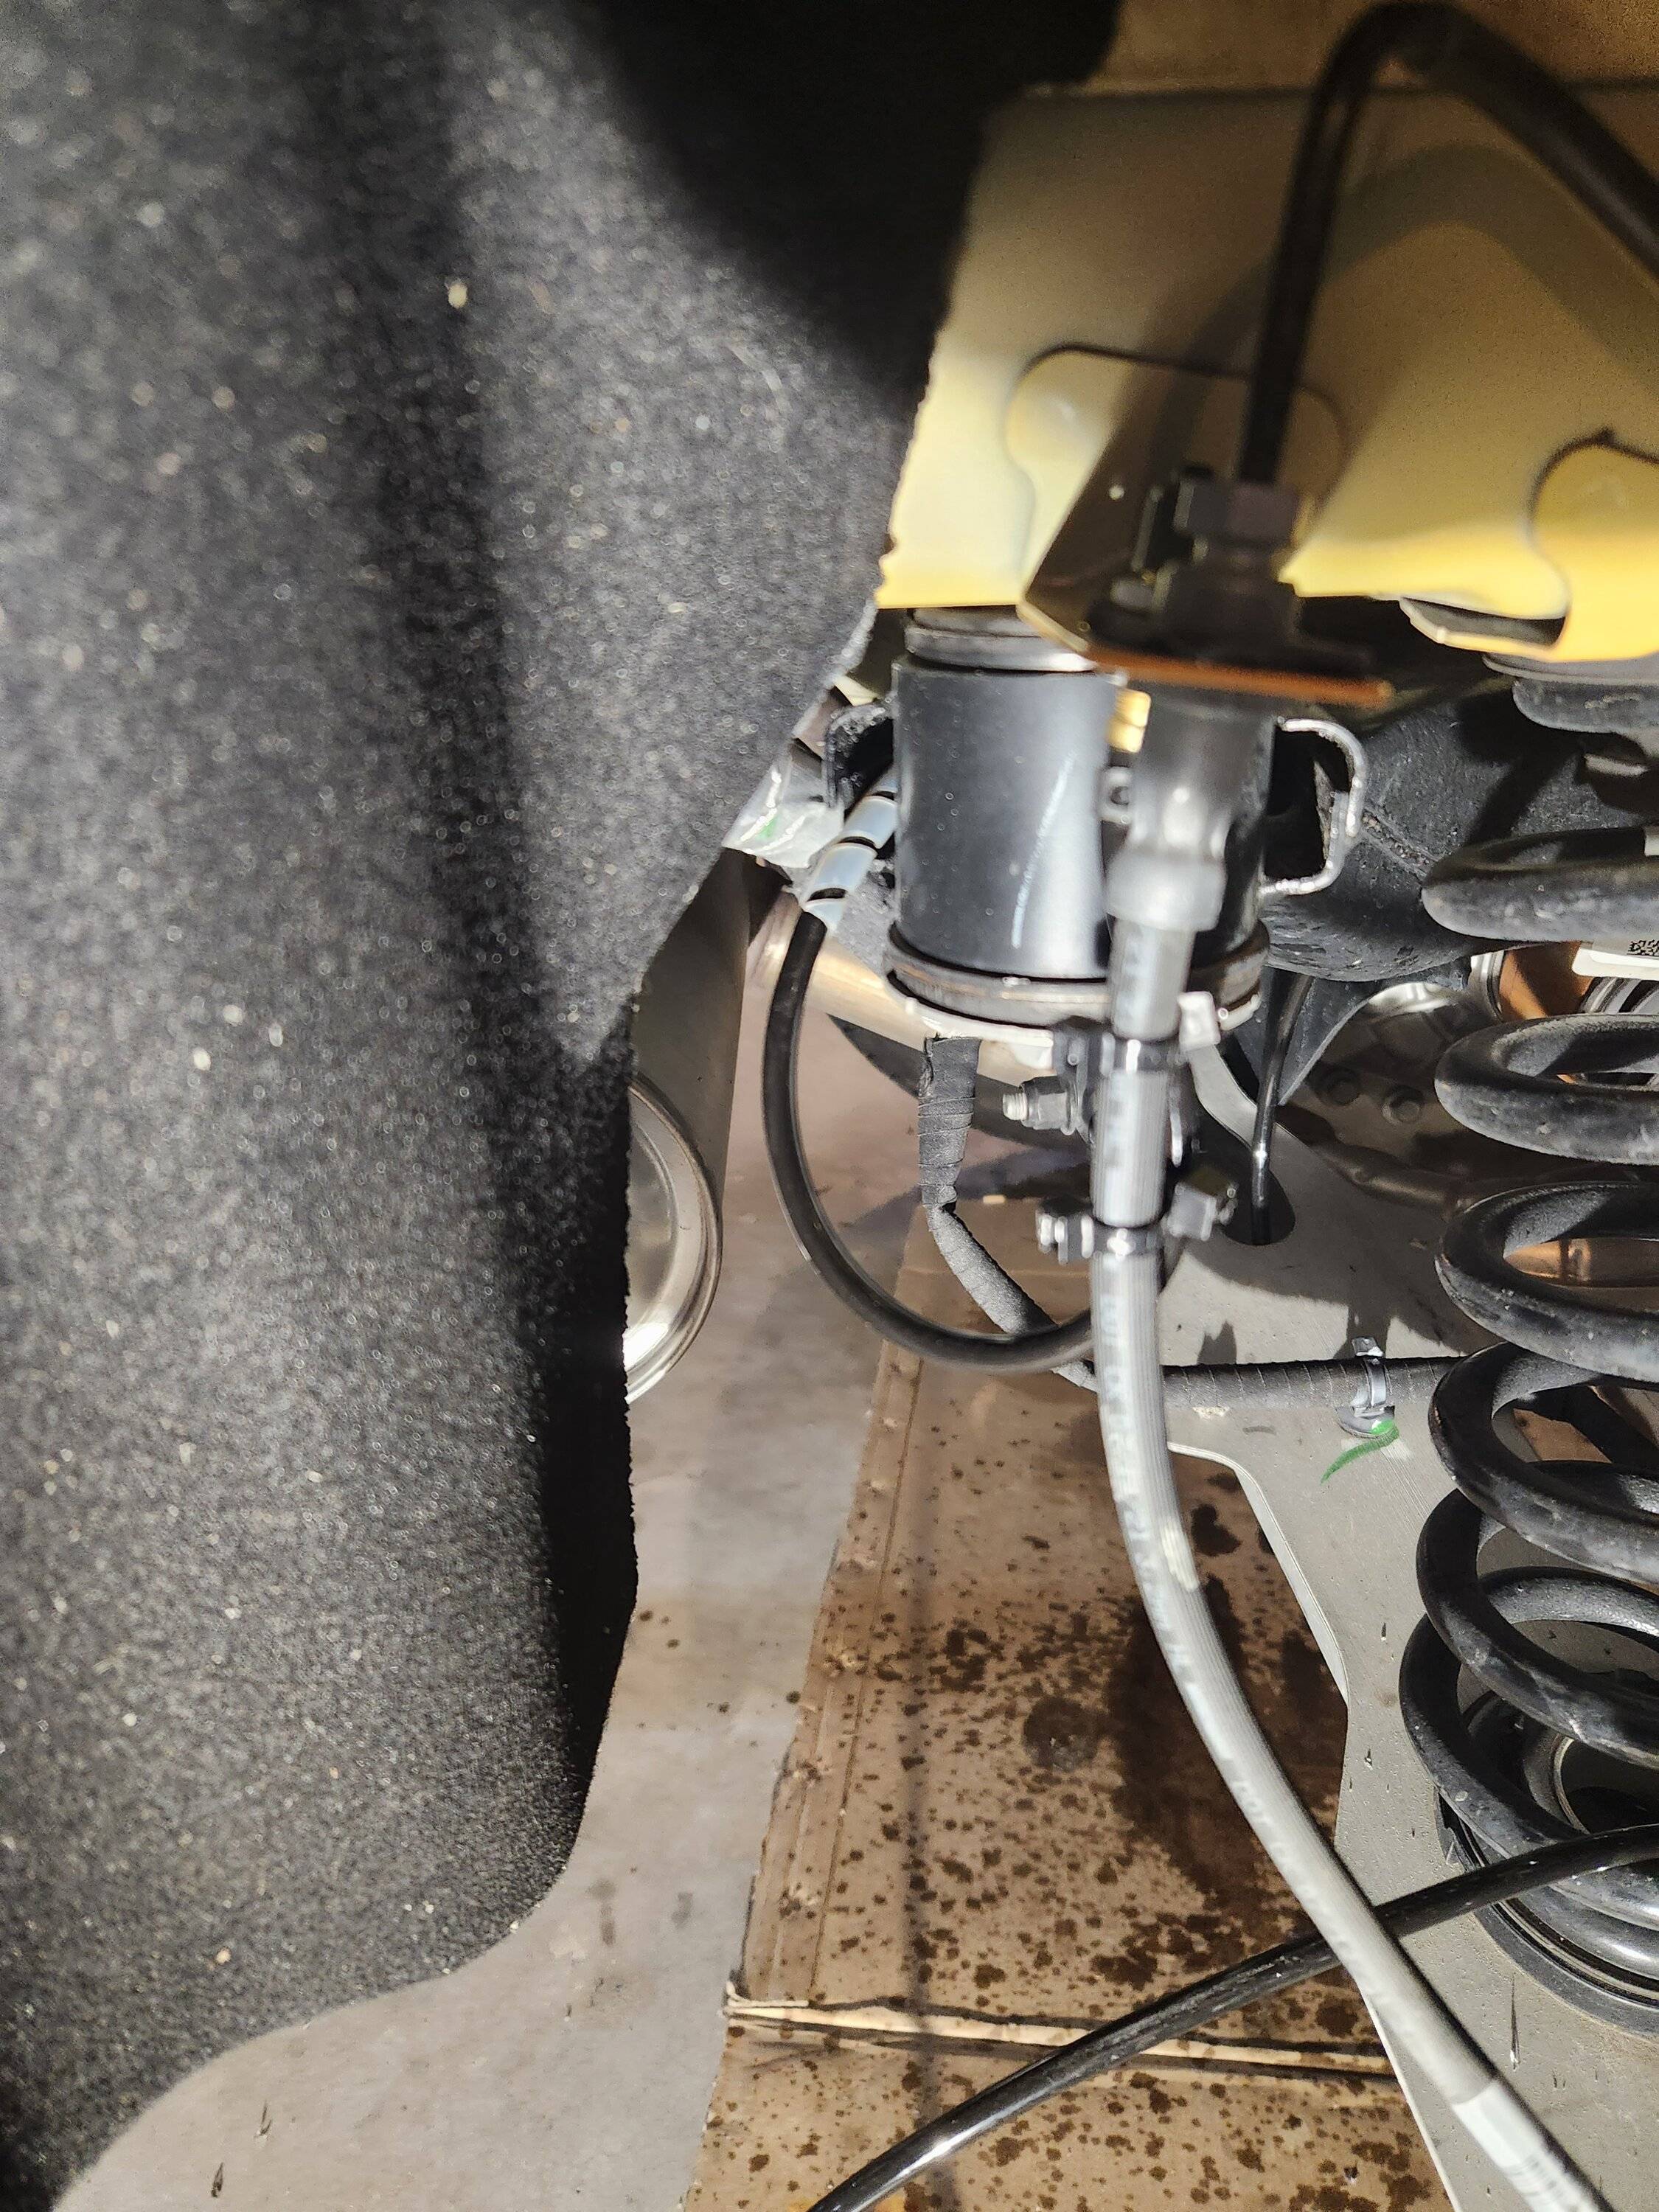
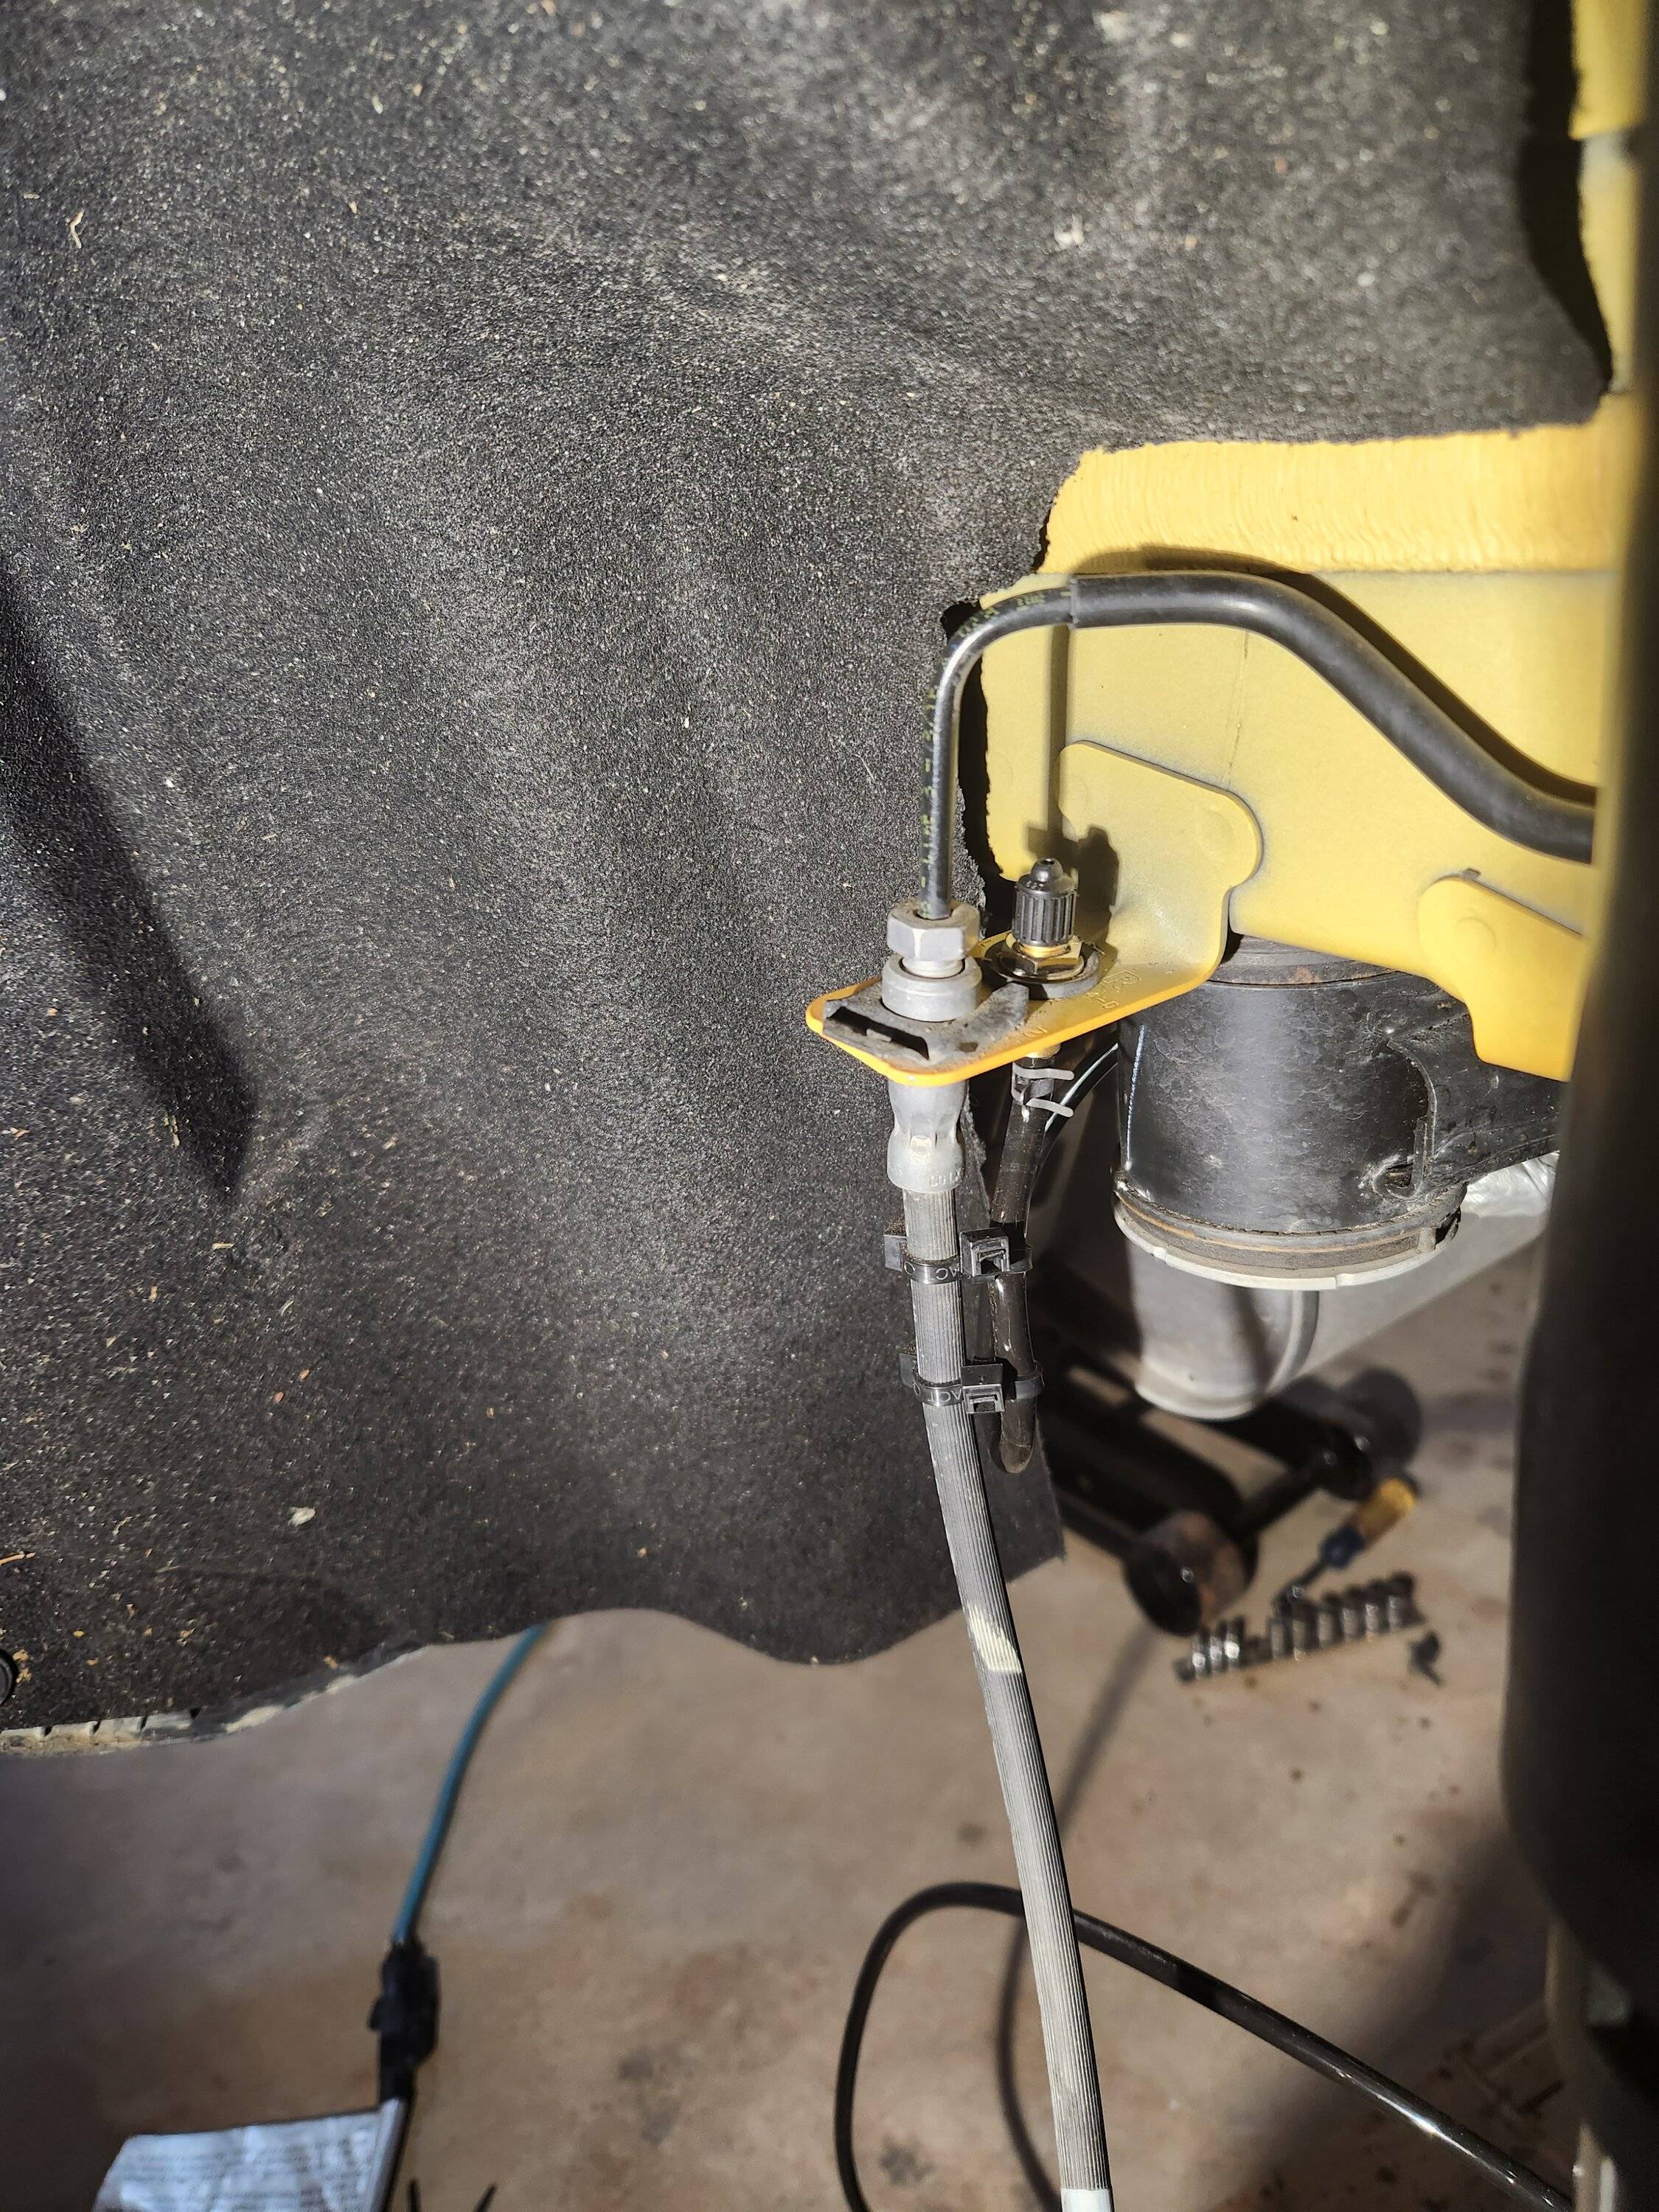
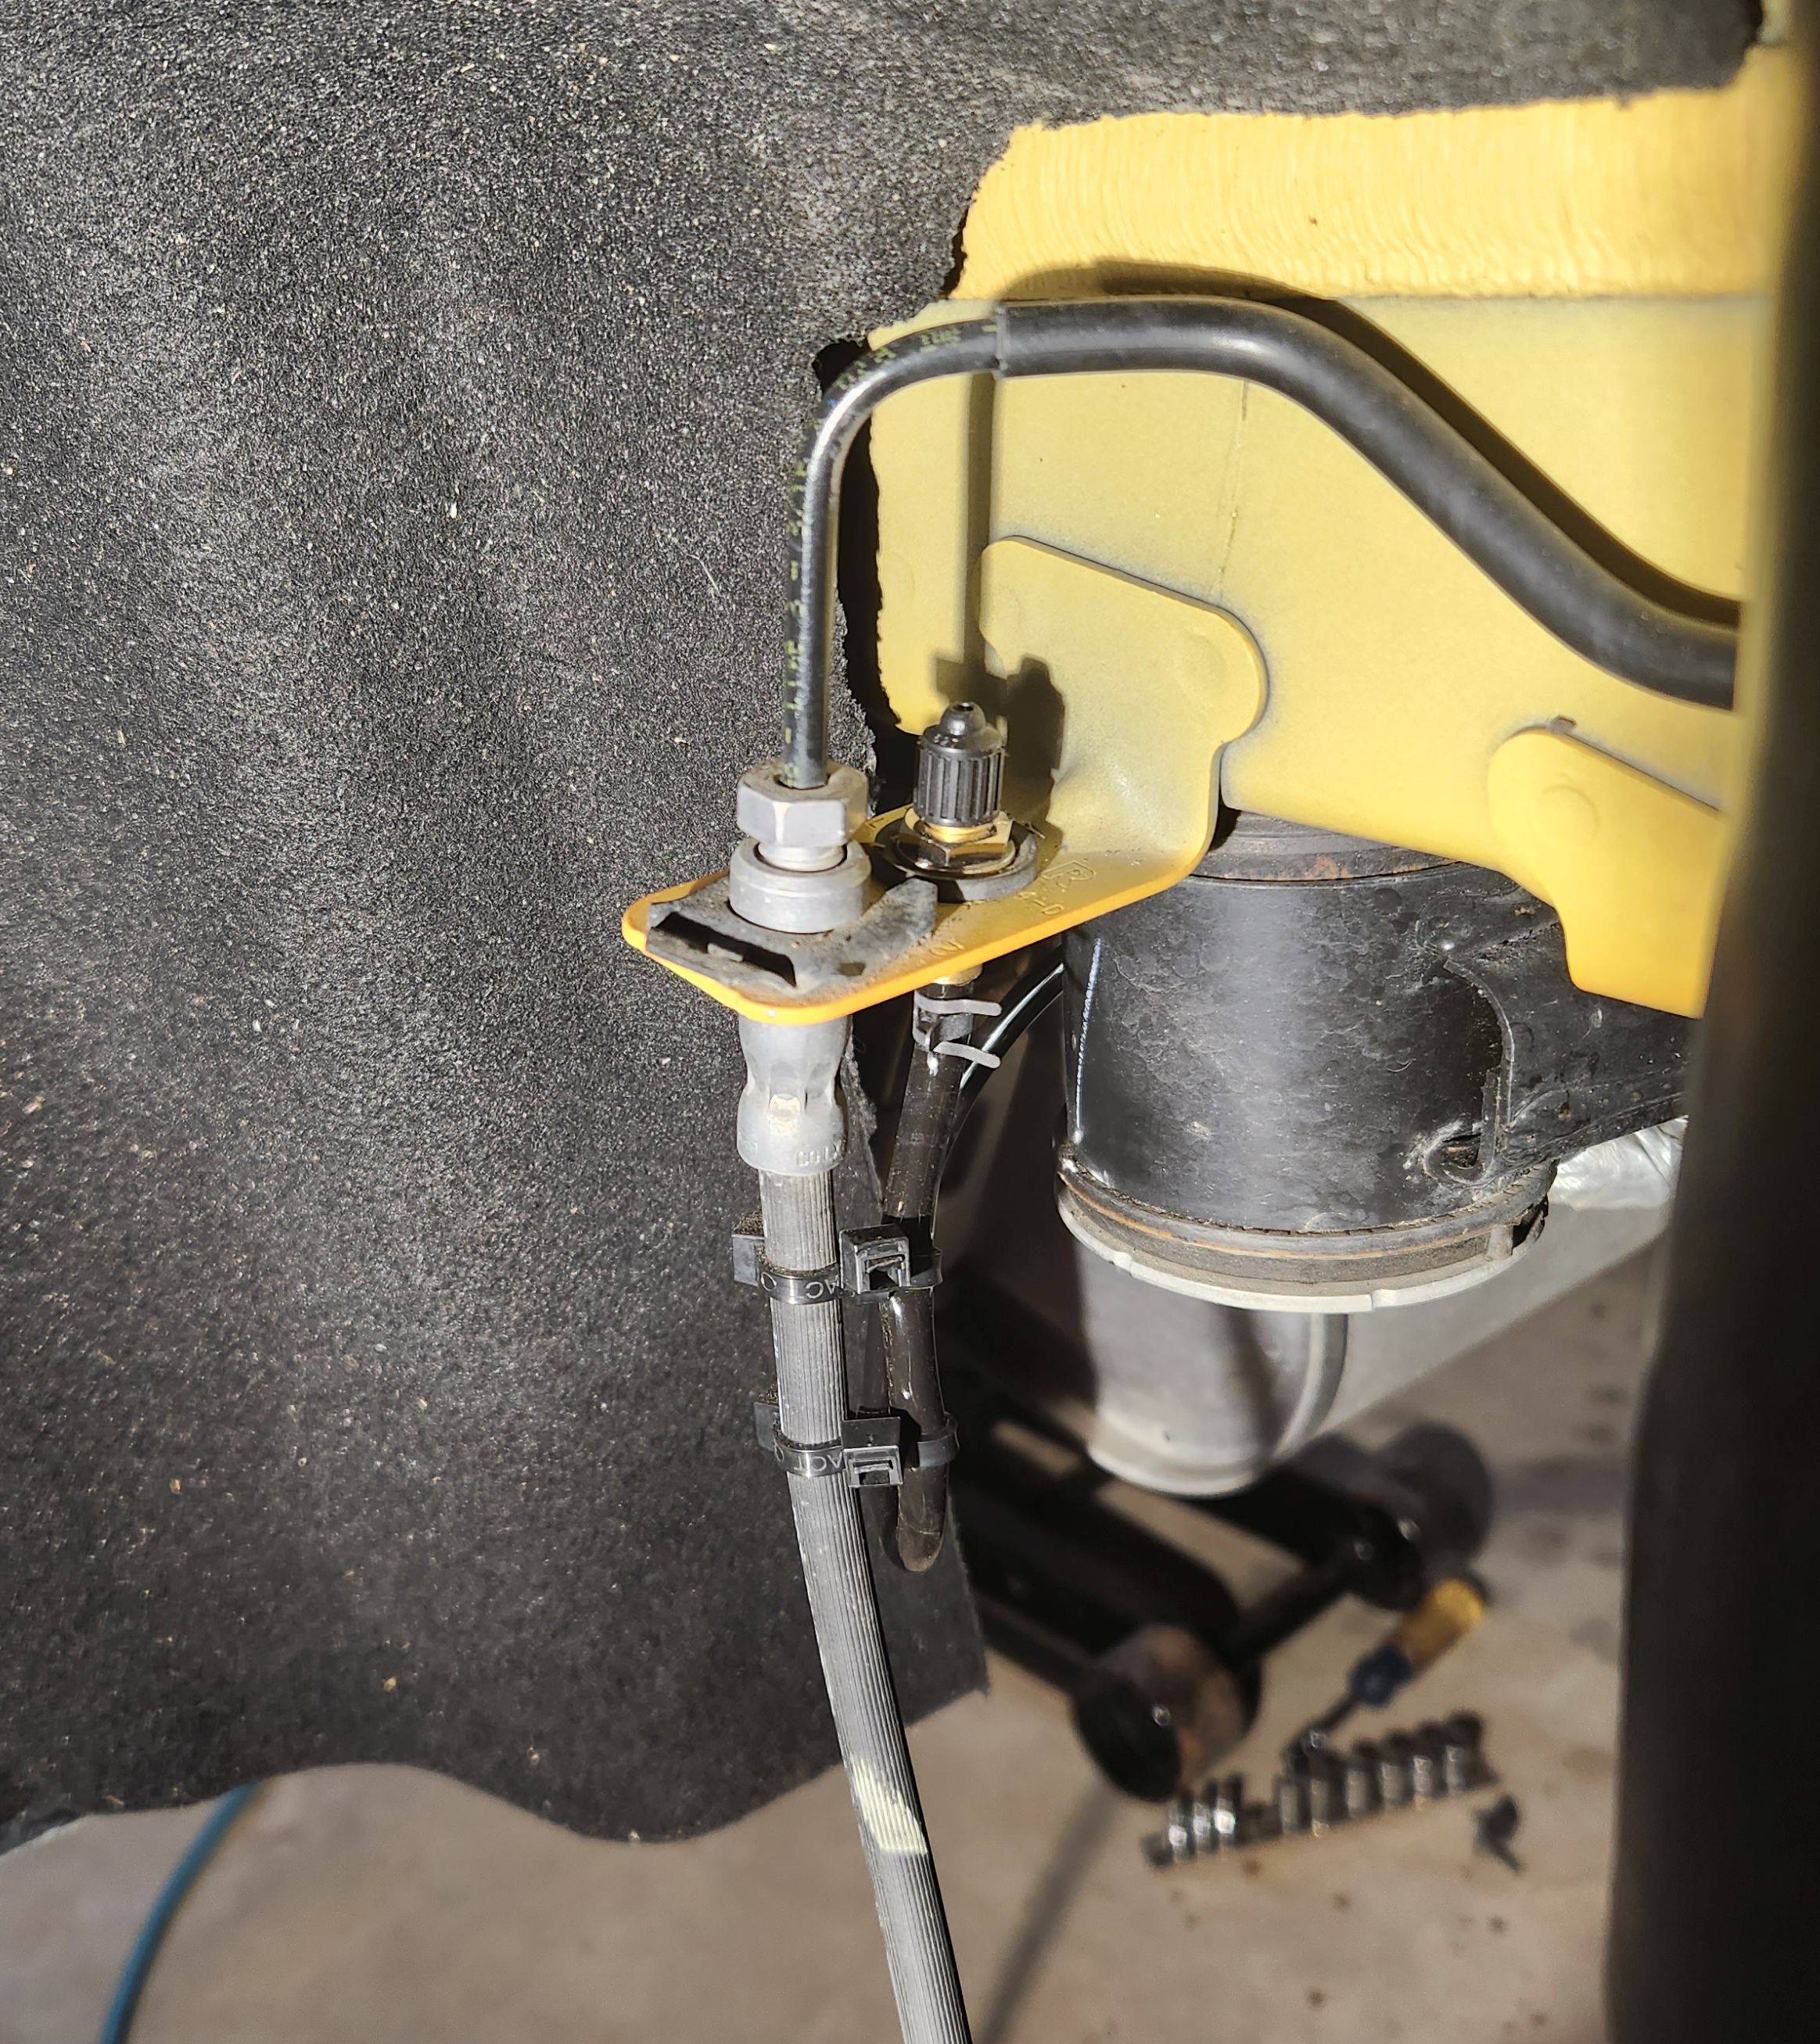
The pic below left was taken from slightly above and behind the rear axle looking inboard and aft on the passenger side. You can see the air line exiting the slot in the upper control arm mount, which just happens to be right next to the brake line support tab. The pic below right is a better view of the air line secured to the brake line and connected to the Schrader valve in the brake line support tab.
NOTE: Be sure to slide the clamp on the air line before connecting it to the barbed fitting on the Schrader valve. If you forget you have to take the air line off the barbed fitting. Getting the air line off the barbed fitting is a royal PITA. Ask me how I know...
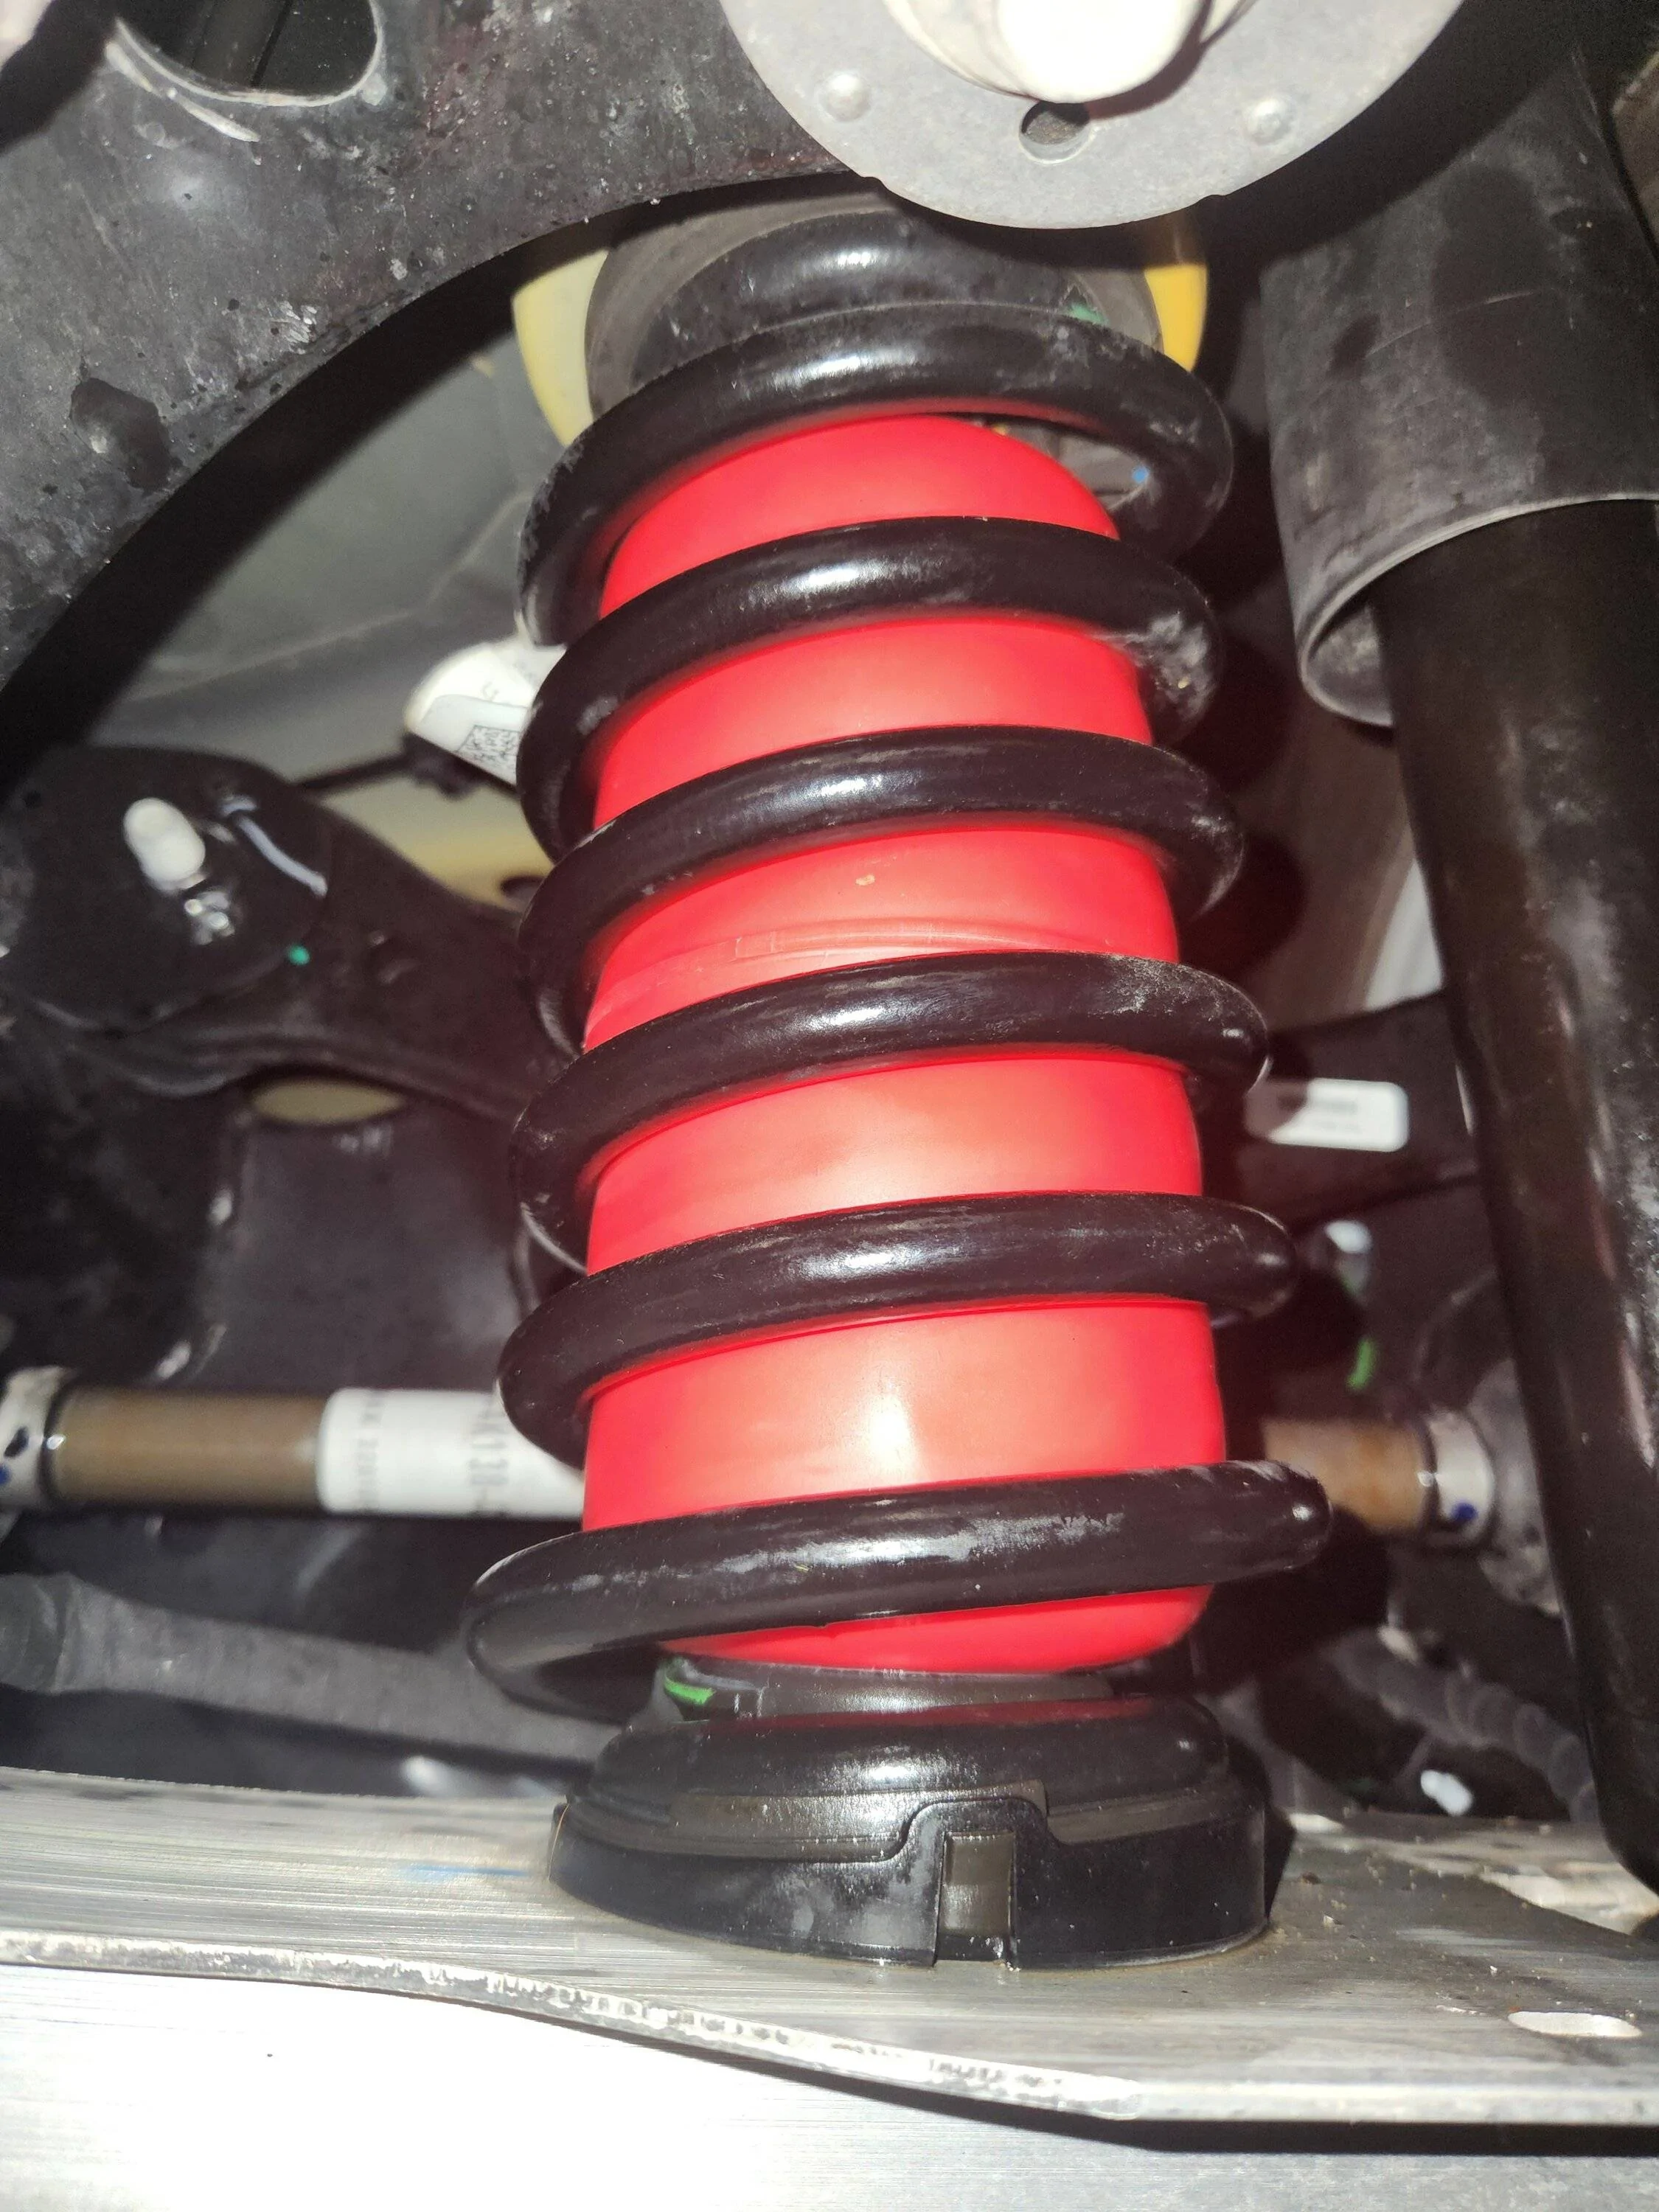
After routing the air line it's time to install the airbag inside the spring. To do this you must first deflate the bag, getting all the air out of it, then fold it into the shape of a hotdog bun. These bags are made of sturdy rubber, and they're not easy to squish and fold. I started by putting them in hot water for a few minutes to make them more pliable (not in the instructions, but seemed logical). Then I squeezed/folded/held them while my wife wrapped a couple of zip ties around them.
Once you've got it folded/spindled/mutilated (inside joke for the fellow veterans) you can push it through the spirals in the springs. Be sure to get the hose attachment at the bottom.
Before you clip the zip ties and allow the airbag to inflate be sure it's high enough inside the spring that you can access the fitting. Slide one of the provided clamps onto the air line (first!), connect the air line to the fitting, and secure with the clamp.
NOTE: You may have to pump a bit of air into the bag to get it to inflate.
Once the bag is:
After that, you inflate the air bags to 30 psi and let sit overnight to test for leaks. Ours had no leaks, so they're good to go. The user guide requires you leave a minimum of 5 psi in the bags at all times. I drove the car with 5 psi in the bags and didn't notice any difference in the way the car rides/handles.
Let me know if you have any questions. End of post.
------------------------------------------------------------------------------
NOTE FOR ADMIN: I cannot delete the photo below using the site editor.

This is the kit Air Lift recommends for the Bronco Sport:
https://www.airliftcompany.com/shop/60858/
If you decide to purchase online be sure to shop around. These kits are available at wildly different prices. Also make sure you include shipping costs. One of the sites I checked offered this kit at a significantly lower price than any other, but after you included the $30 shipping charge (for UPS ground!) it was around the same as other discount sites. I ended up getting mine from Michigan Truck Spring.
Installation took about two hours, including time spent going through the installation instructions and planning. The instructions are pretty clear, and I think anyone with average mechanical skills could install it without too much difficulty. The kit includes all the components you need to either tee the air lines to a single Schrader valve and inflate both airbags to the same pressure, or to install a separate Schrader valve for each airbag. I opted for the latter to account for uneven loading.
First things first; you have to jack up the back end so you can take the wheels off. You can jack up one side at a time, but I don't like working under a vehicle sitting on a jack. Instead, I jacked up the entire back end and placed a jack stand under the aft jacking points on each side. Be sure and chock the front wheels since you cannot use the parking brake.

Once you have the wheels off you can decide where to route the air lines. The airbag will sit inside the coil spring with the air line exiting a hole in the bottom of the spring mount. The instructions don't really tell you where to route the lines (there is a recommended location for the Schrader valve which I chose not to use), but it does include a warning to stay away from heat sources. My first idea was to run the lines to the back bumper and install the Schrader valves there. If you look underneath your car you'll see the exhaust system takes up almost all the room between the rear axle and the bumper. Routing the lines away from all the hot exhaust parts back there seemed like too much trouble. Additionally, the Schrader valves would have to mount in the plastic fascia covering the bumper, which is not a very sturdy option. I decided to use the brake line support tab welded to the frame in each wheel well. It's solidly mounted, and plenty big enough to drill the 5/16" hole required to mount the Schrader valve.
That decision made, air line routing became super simple. I ran the line through the hole in the bottom spring mount on the lower control arm, then internally through the lower control arm inboard to the pivot point, then up through the inboard hole on the lower control arm. The photo below was taken from behind the rear axle looking inboard on the driver's side. You can see the black air line going in the hole at the bottom of the spring mount, and out the hole near the pivot point.
From there, I went up into a hole in the upper control arm, then outboard back toward the spring before exiting through a slot on the upper control arm mount weldment. The pic below left was taken from in front of the control arms looking aft on the driver's side. You can see the air line entering through the spring mount on the lower control arm, coming out the inboard hole near the pivot point, then going up in the the upper control arm before exiting the slot at the top mount. Note the spiral wrap on the air line where it exits the upper control arm mount. You'll see in later pics I installed this everywhere the air line contacts an edge to prevent abrasion. This spiral wrap is not included with the kit. The pic below right is from behind the control arms looking inboard/forward; it's a better view of the air line routing between the control arms.
The pic below left was taken from slightly above and behind the rear axle looking inboard and aft on the passenger side. You can see the air line exiting the slot in the upper control arm mount, which just happens to be right next to the brake line support tab. The pic below right is a better view of the air line secured to the brake line and connected to the Schrader valve in the brake line support tab.
NOTE: Be sure to slide the clamp on the air line before connecting it to the barbed fitting on the Schrader valve. If you forget you have to take the air line off the barbed fitting. Getting the air line off the barbed fitting is a royal PITA. Ask me how I know...
After routing the air line it's time to install the airbag inside the spring. To do this you must first deflate the bag, getting all the air out of it, then fold it into the shape of a hotdog bun. These bags are made of sturdy rubber, and they're not easy to squish and fold. I started by putting them in hot water for a few minutes to make them more pliable (not in the instructions, but seemed logical). Then I squeezed/folded/held them while my wife wrapped a couple of zip ties around them.
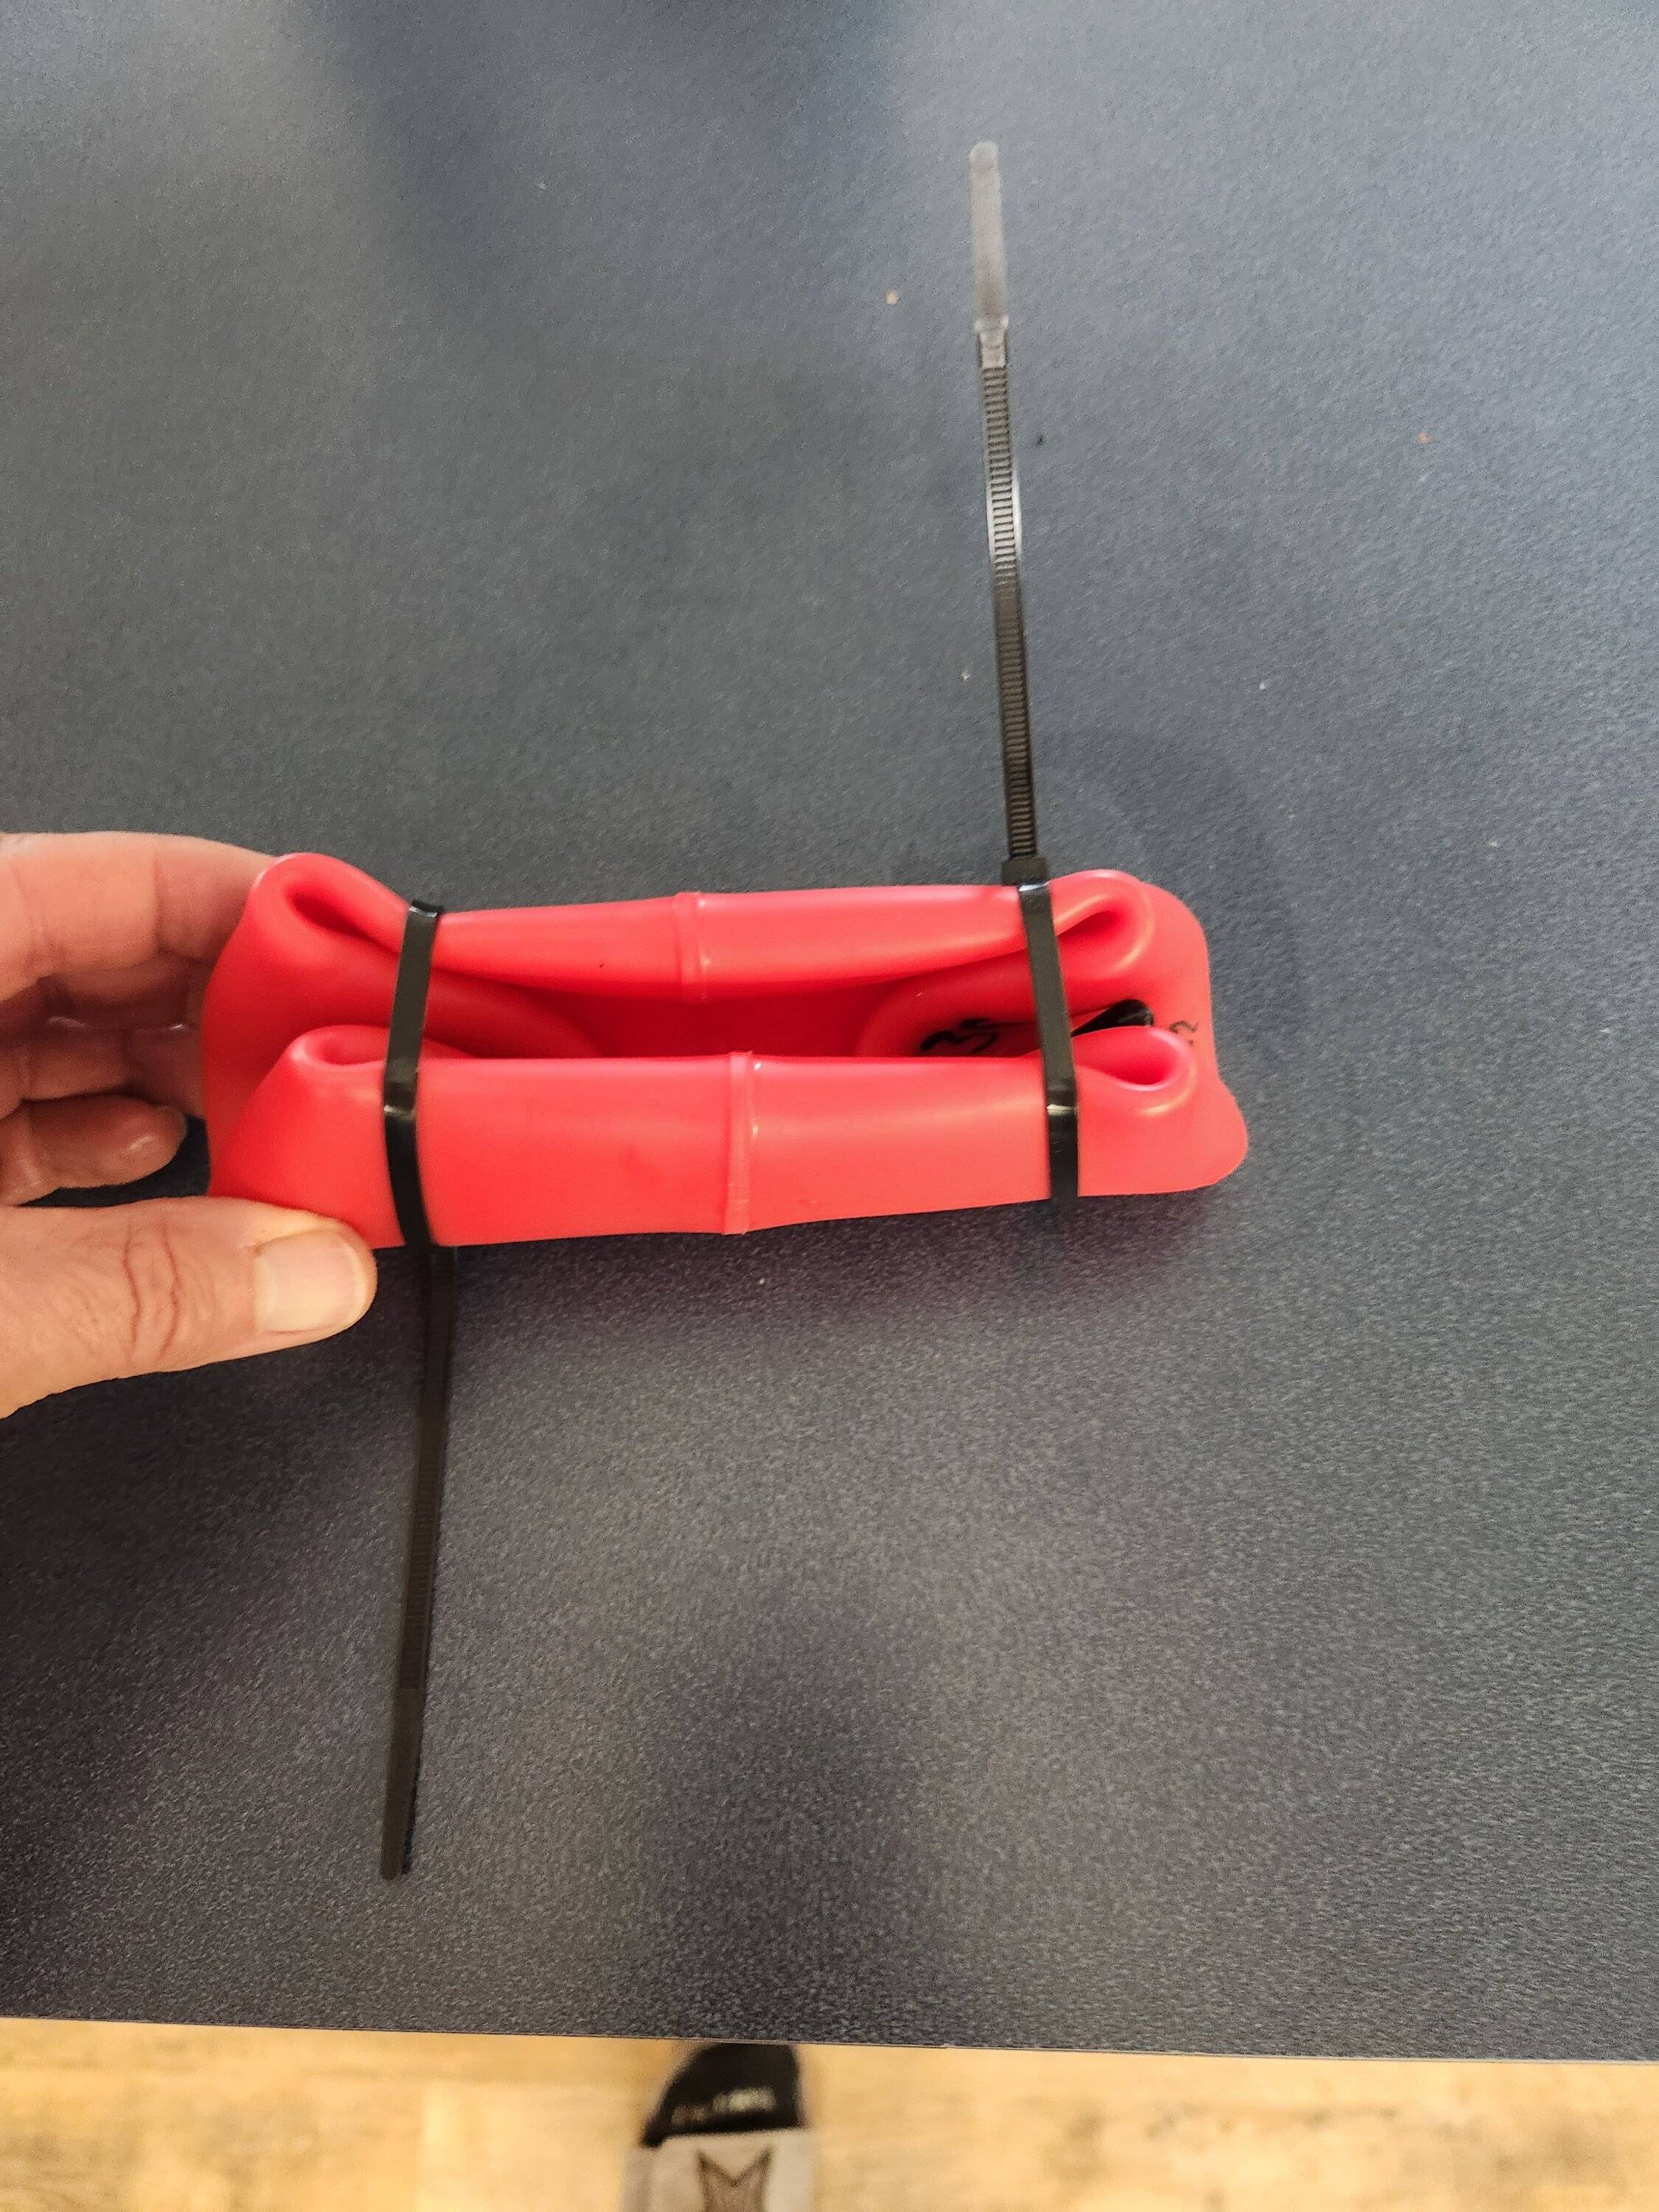
Once you've got it folded/spindled/mutilated (inside joke for the fellow veterans) you can push it through the spirals in the springs. Be sure to get the hose attachment at the bottom.
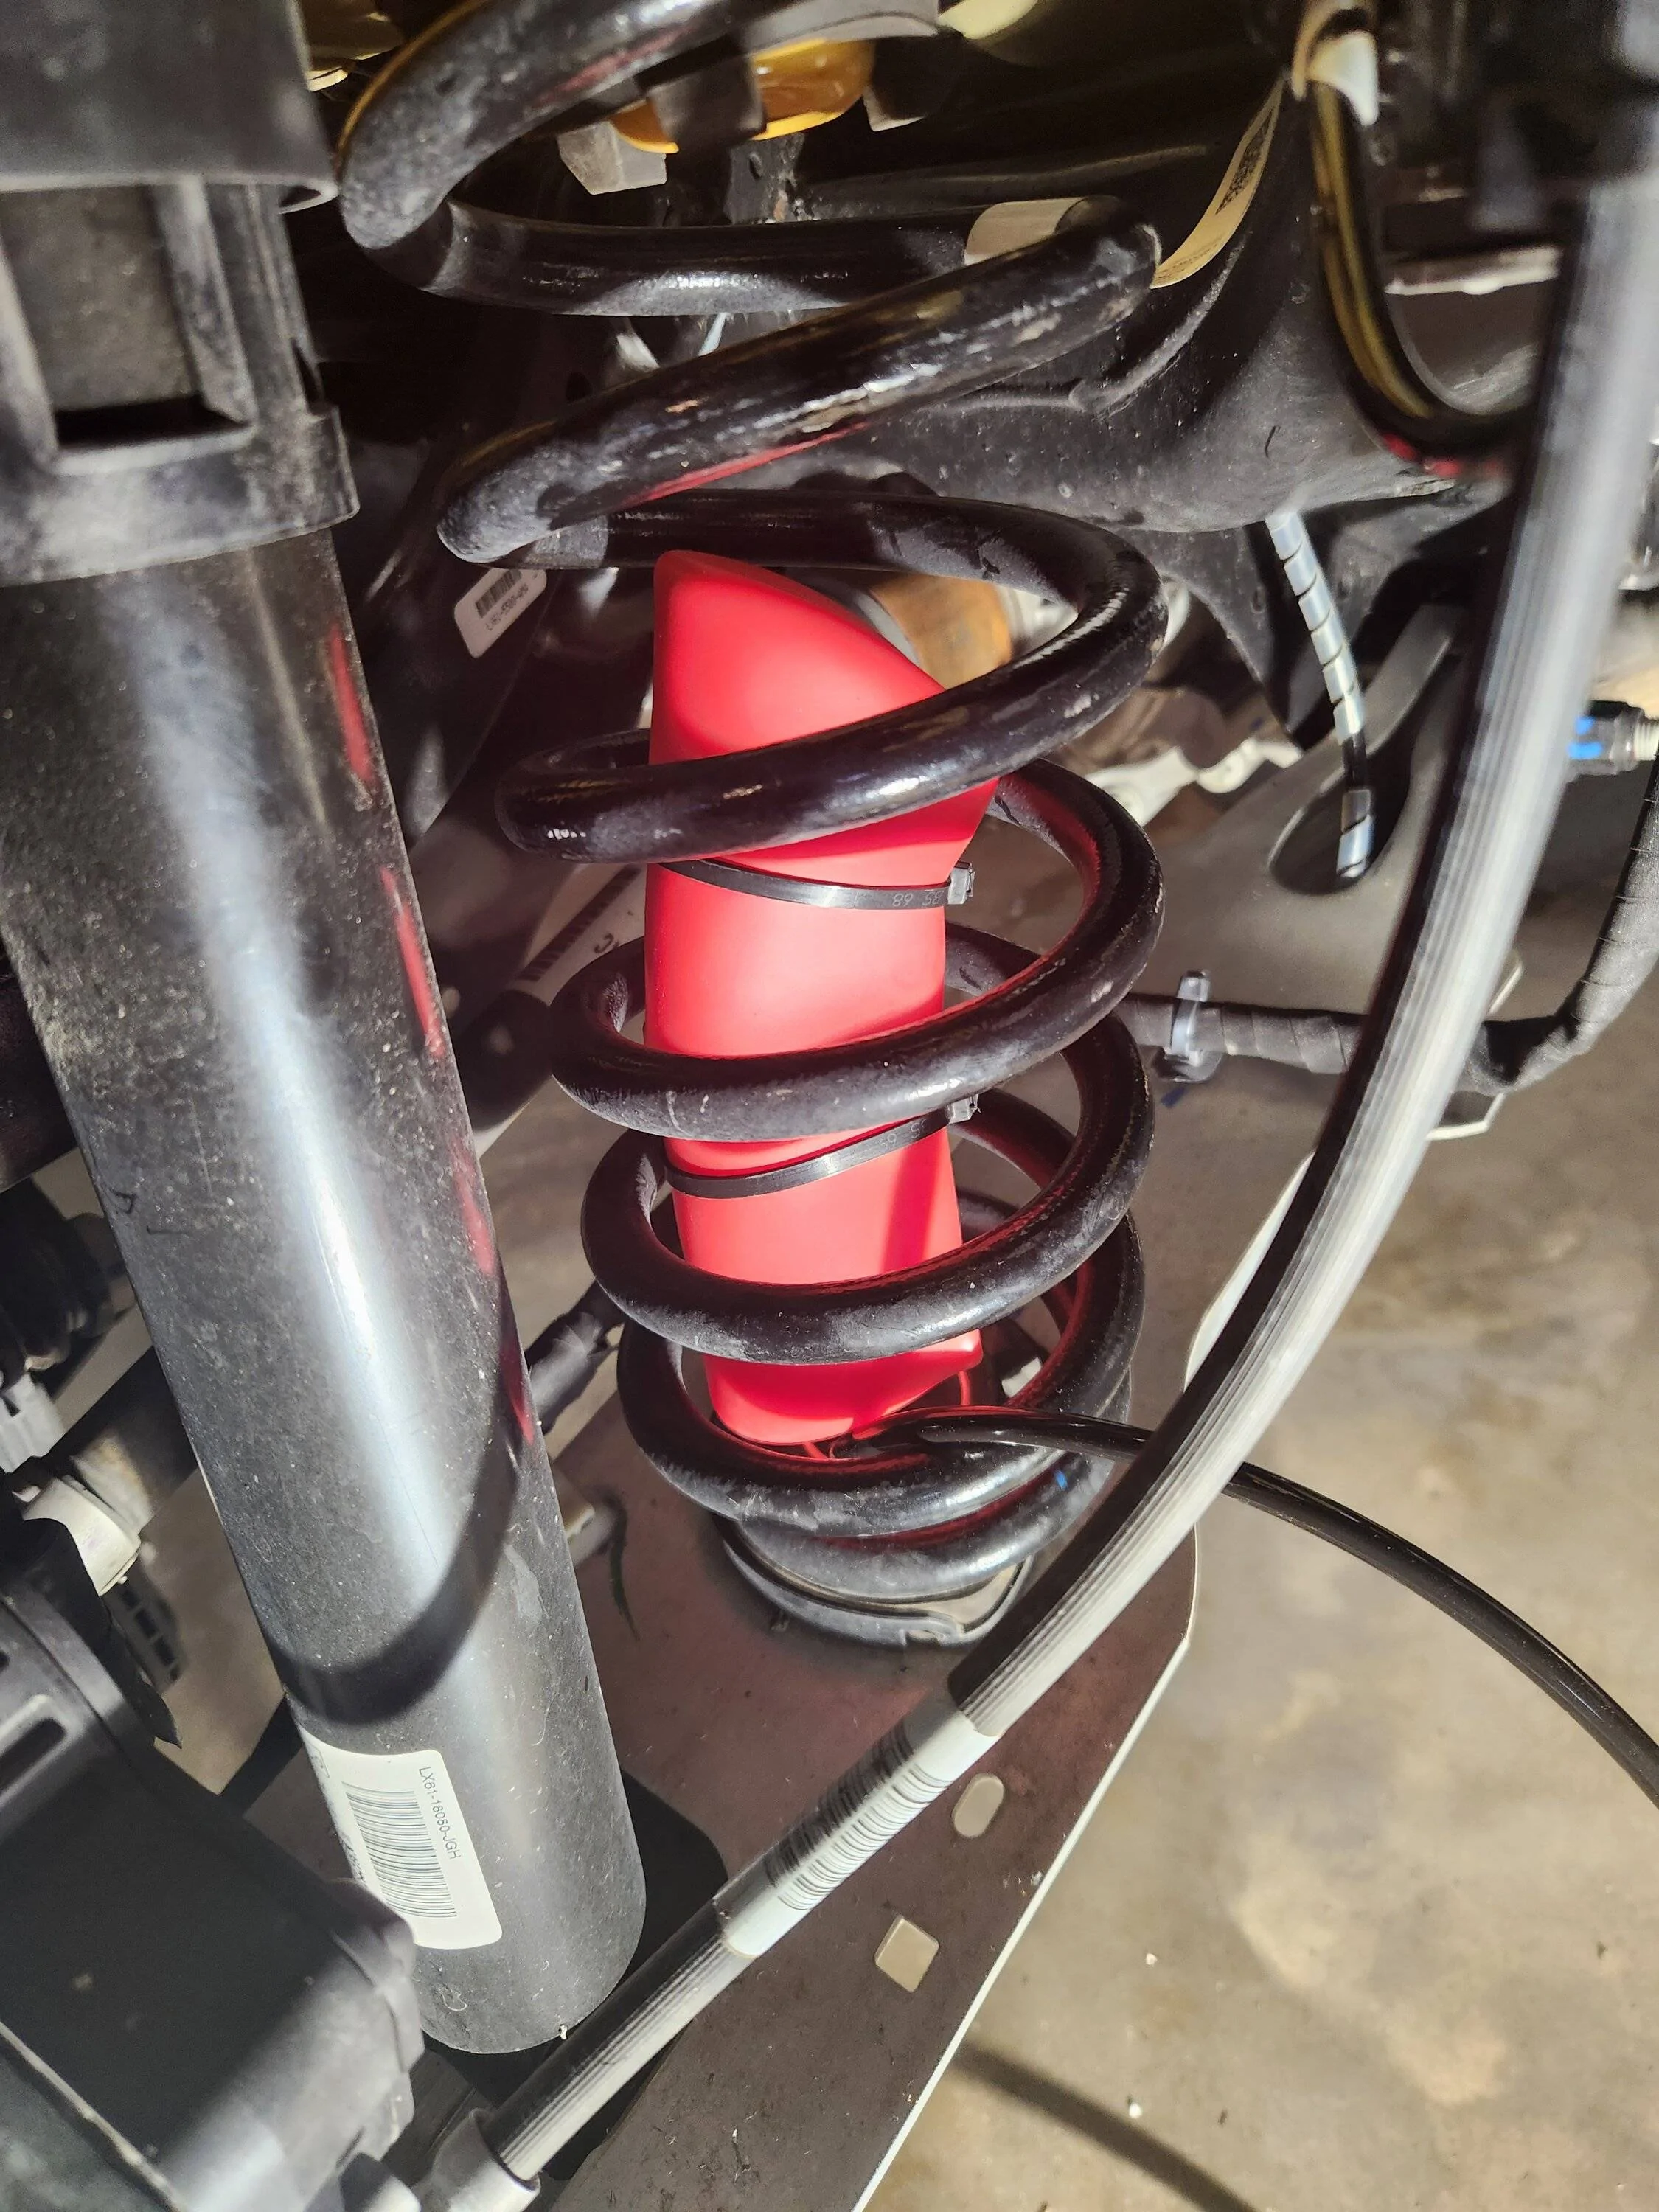
Before you clip the zip ties and allow the airbag to inflate be sure it's high enough inside the spring that you can access the fitting. Slide one of the provided clamps onto the air line (first!), connect the air line to the fitting, and secure with the clamp.
NOTE: You may have to pump a bit of air into the bag to get it to inflate.
Once the bag is:
- inside the spring
- in it's proper shape
- with the airline connected
After that, you inflate the air bags to 30 psi and let sit overnight to test for leaks. Ours had no leaks, so they're good to go. The user guide requires you leave a minimum of 5 psi in the bags at all times. I drove the car with 5 psi in the bags and didn't notice any difference in the way the car rides/handles.
Let me know if you have any questions. End of post.
------------------------------------------------------------------------------
NOTE FOR ADMIN: I cannot delete the photo below using the site editor.
Last edited: