
- First Name
- Rob
- Joined
- Mar 2, 2024
- Threads
- 5
- Messages
- 91
- Reaction score
- 224
- Location
- Cobourg, Ontario
- Vehicle(s)
- 2023 Ford Bronco Sport
- Thread starter
- #1
Today I installed the Ford (Thinkware) accessory dash cam VHL3Z-19G490-C on our 2023 Big Bend. The actual install was easy but I ran into a few small challenges. This model gets its power off the OBD port and Includes a module to maintain uninterrupted recording during auto stop/start cycles.
I‘ve included a link to the factory instructions, but I’ve added some additional tips and photos covering what I learned that were not covered very clearly in the instructions :
1. You will need an 8mm socket and wrench to remove the existing OBD2 connector so it can be interconnected with the new OBD connector. A new OBD port is supplied, and while one side of the new bracket uses the old bolt , a 1/8 inch hole needs to be drilled to secure the other side of the new OBD bracket with a self tapping screw.
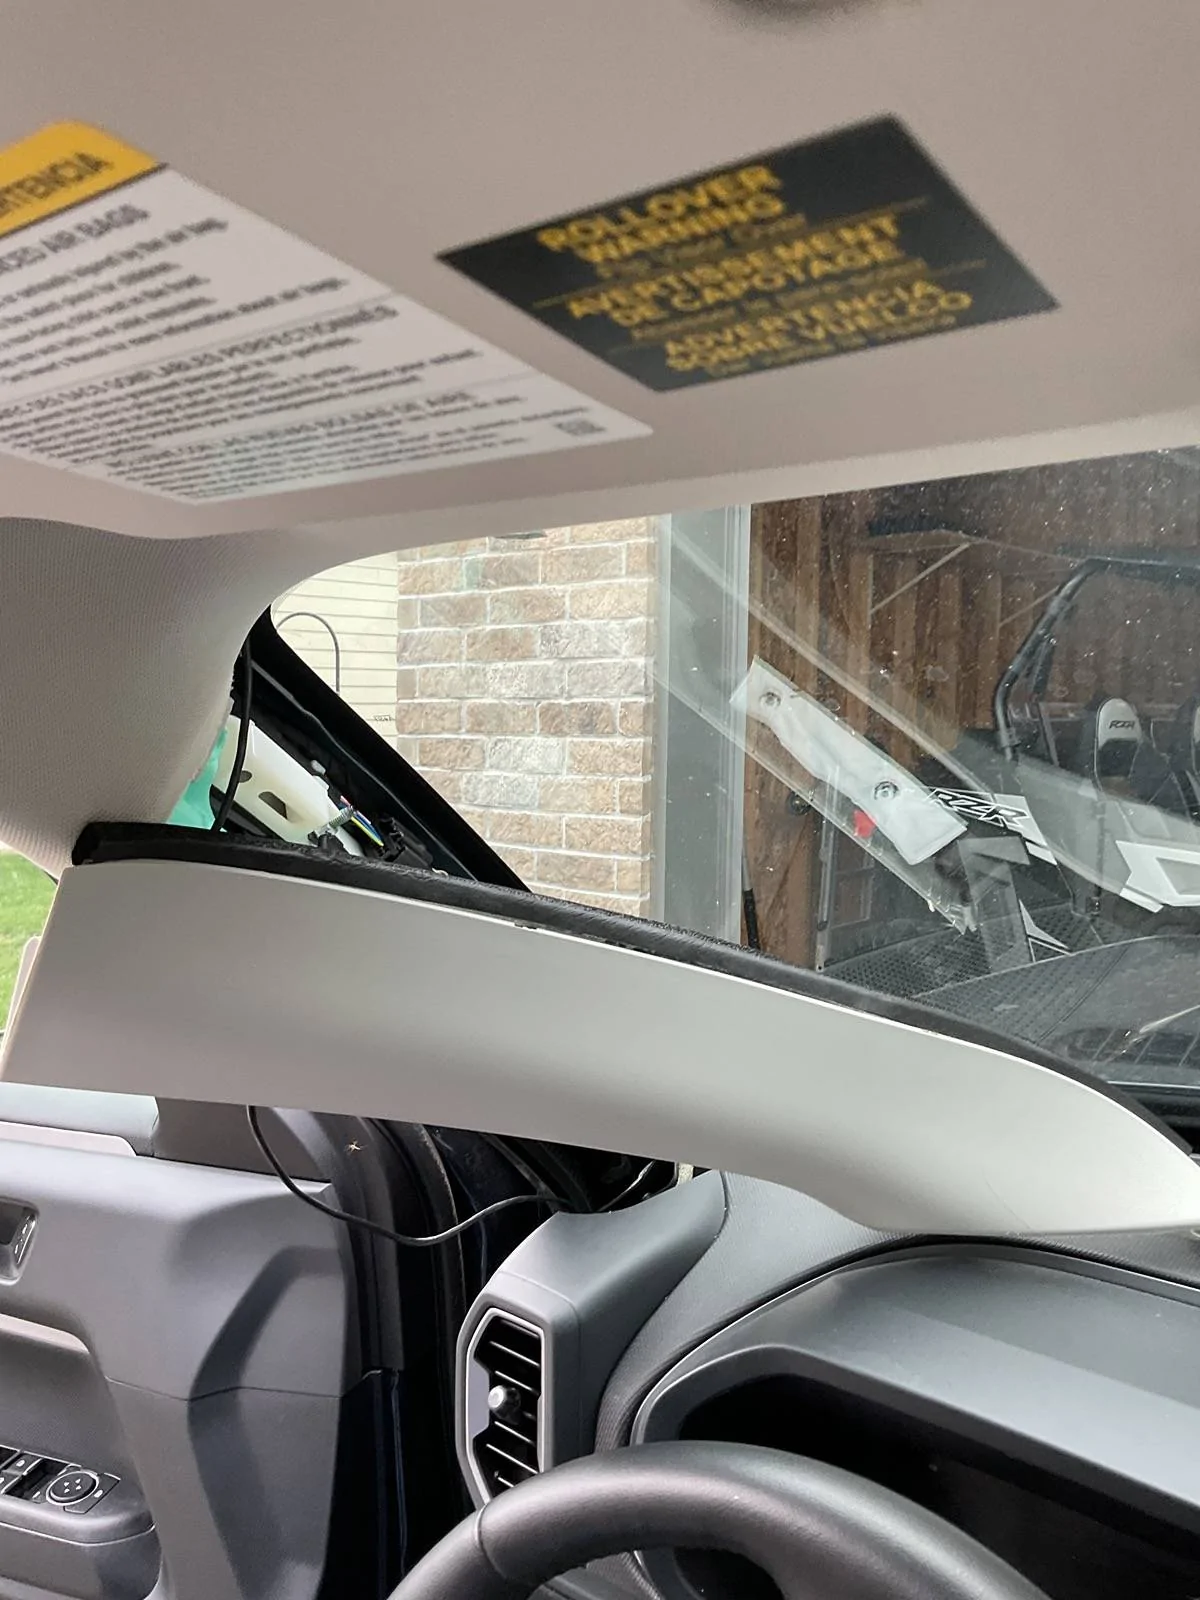
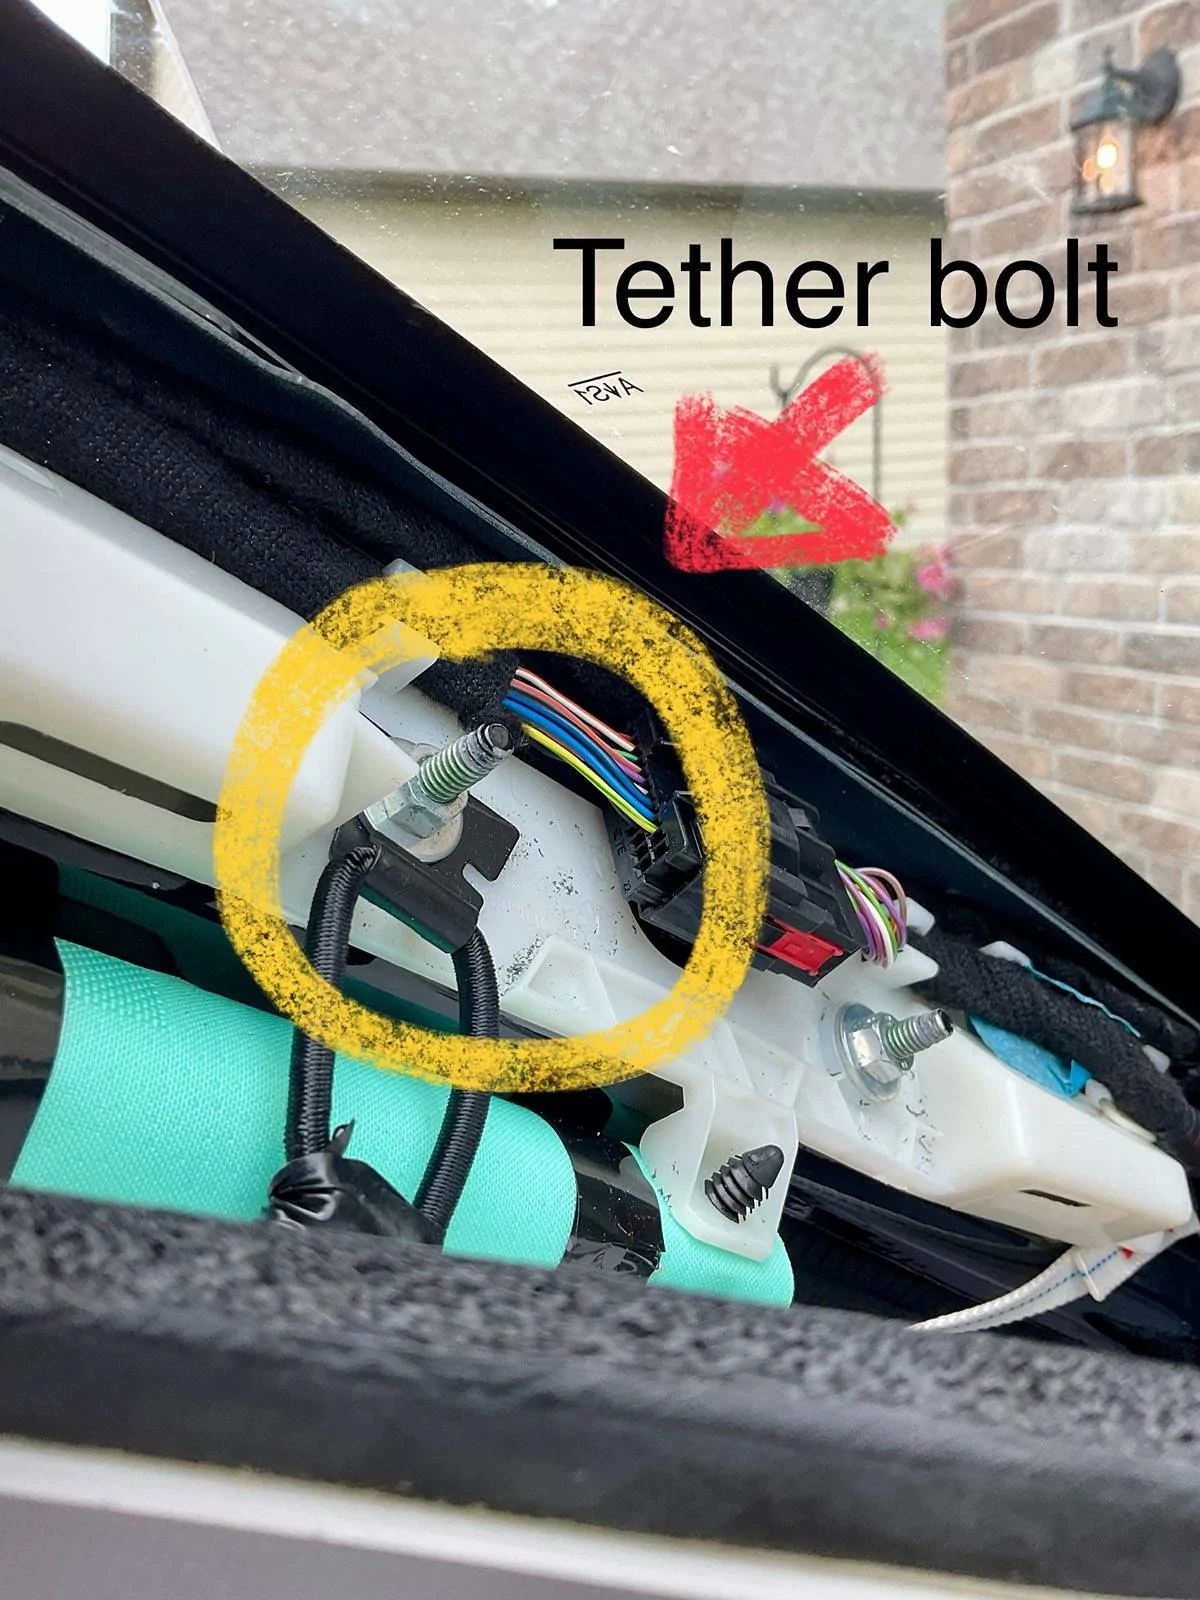
2. Remove the driver side A pillar trim by pulling it straight towards you. A pair of latex gloves helps with the grip. The Pilar trim is secured loosely to the frame with a short tether (10mm bolt) which optionally can be removed for better access to route the power wire. I left the tether in place and just worked around the dangling A pillar cover.

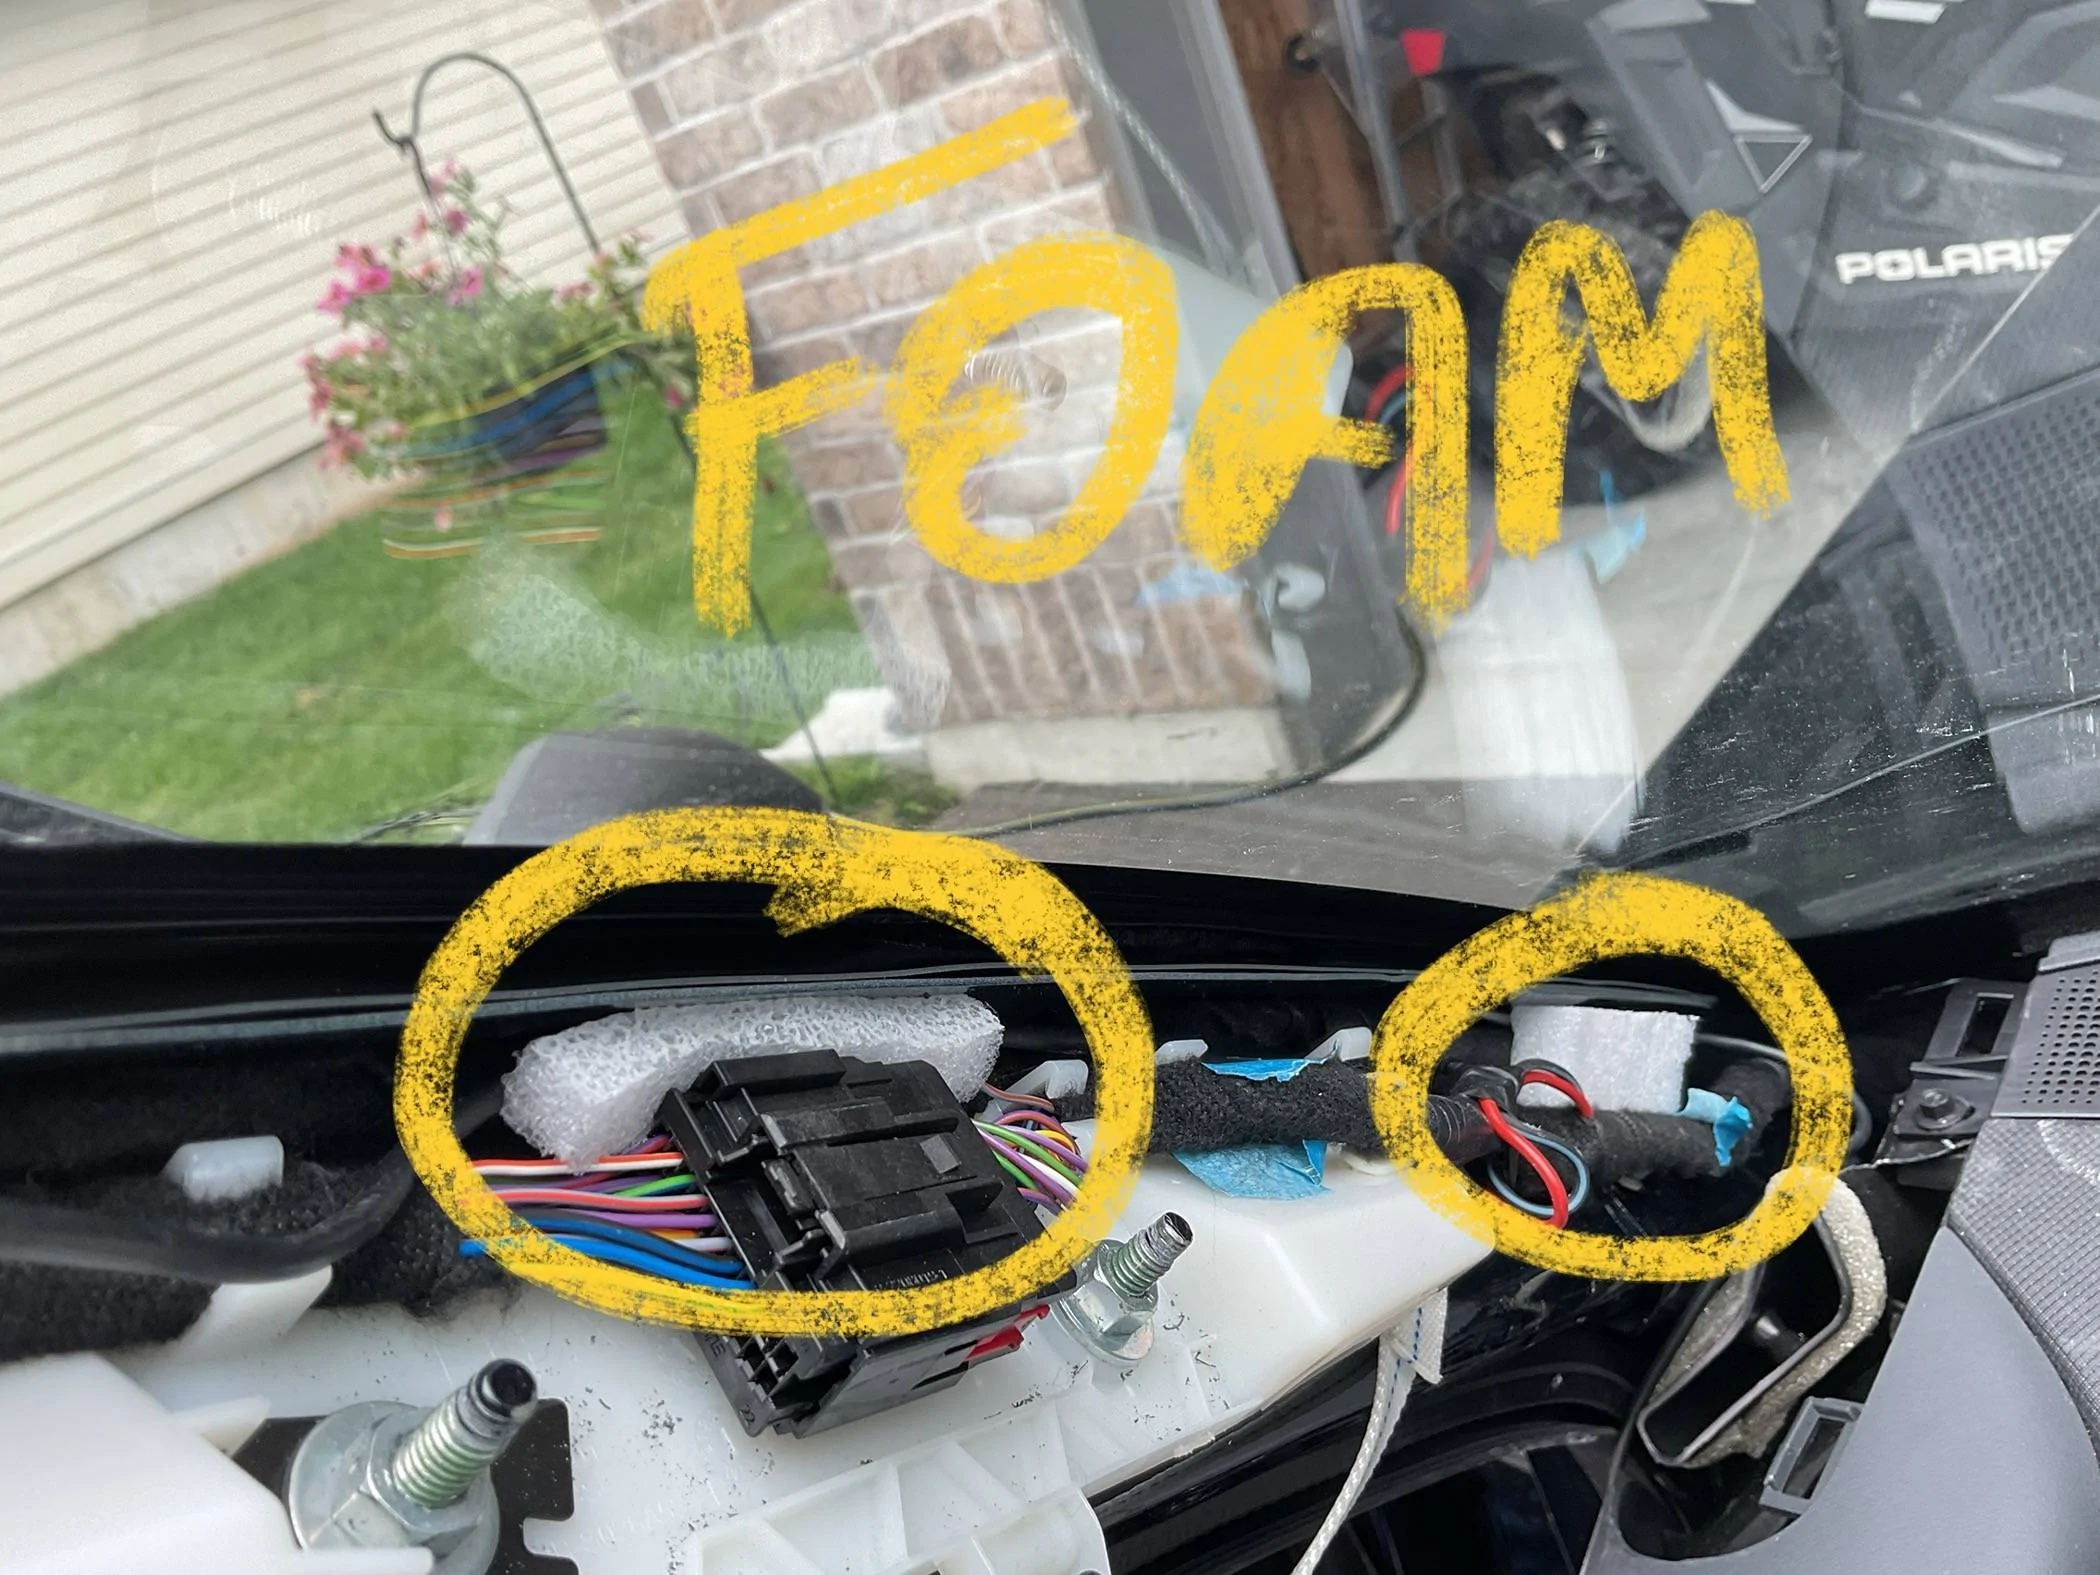
3. Tuck the power wire along the front of the pillar , away from the airbag and use some soft foam to keep it in place. Reinstall The pillar

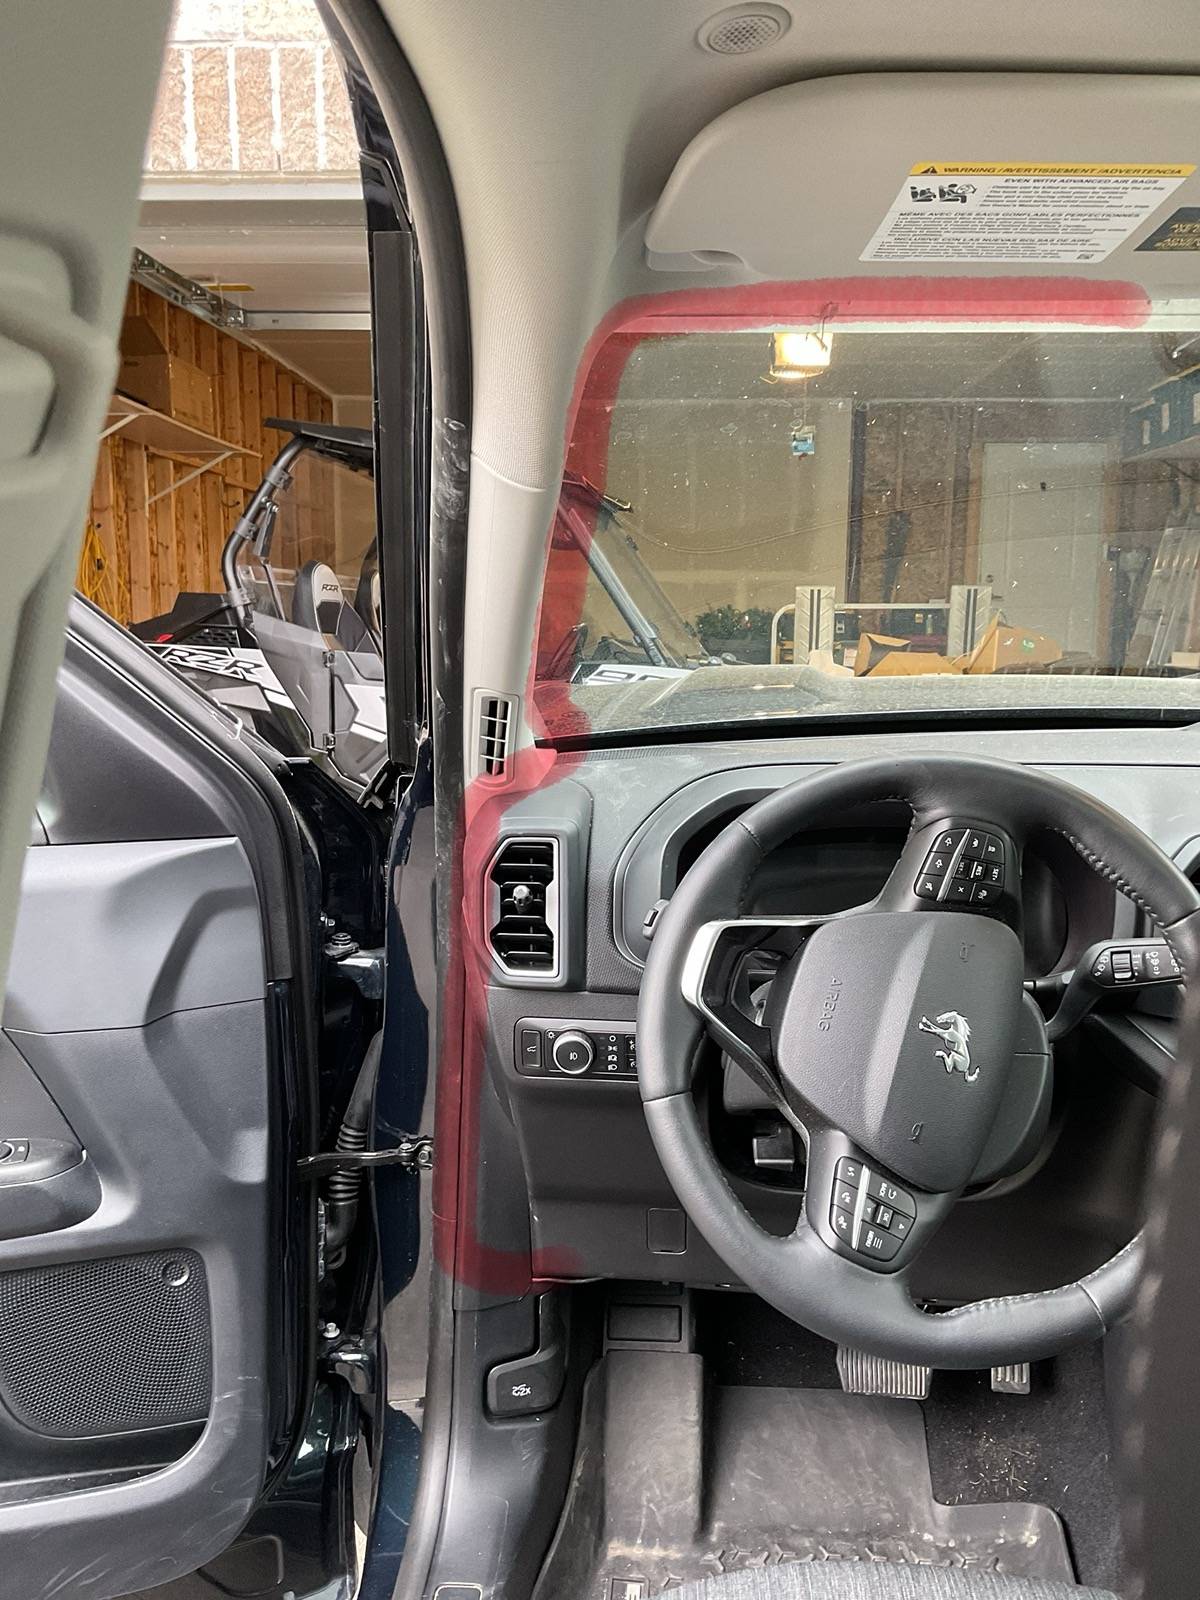
4. Run the wire the side of the inside doorframe and tuck under the trim.
FACTORY INSTRUCTIONS AT echomaster.com
I‘ve included a link to the factory instructions, but I’ve added some additional tips and photos covering what I learned that were not covered very clearly in the instructions :
1. You will need an 8mm socket and wrench to remove the existing OBD2 connector so it can be interconnected with the new OBD connector. A new OBD port is supplied, and while one side of the new bracket uses the old bolt , a 1/8 inch hole needs to be drilled to secure the other side of the new OBD bracket with a self tapping screw.
2. Remove the driver side A pillar trim by pulling it straight towards you. A pair of latex gloves helps with the grip. The Pilar trim is secured loosely to the frame with a short tether (10mm bolt) which optionally can be removed for better access to route the power wire. I left the tether in place and just worked around the dangling A pillar cover.
3. Tuck the power wire along the front of the pillar , away from the airbag and use some soft foam to keep it in place. Reinstall The pillar
4. Run the wire the side of the inside doorframe and tuck under the trim.
FACTORY INSTRUCTIONS AT echomaster.com
Last edited:
