- Thread starter
- #1
A.K.A. How I saved my sanity and improved my ride for the cost of a gallon.
It wasn't always there. At some point the car developed a quiet clunk sound on the driver's side. Eliminated a bunch of things by trial and error. Loose trim. Speaker mounts. Door panel. Exterior plastic panel. Rain vents / wind combo. As the sound slowly drove me down to madness, I narrowed it down to something in the pillar by pressing my ear right to it while driving. Tensioning the belt and pressing on the panels had no effect so I had to do a deeper dive.
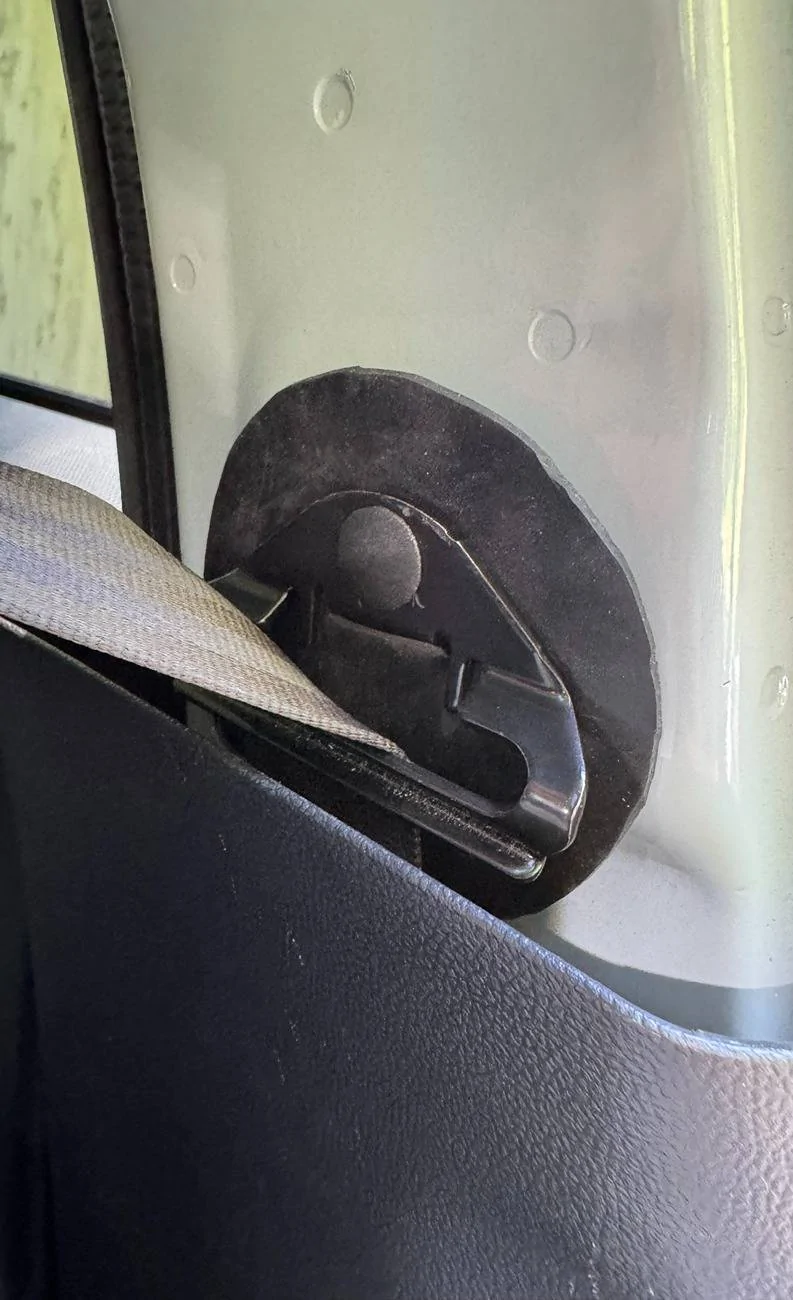
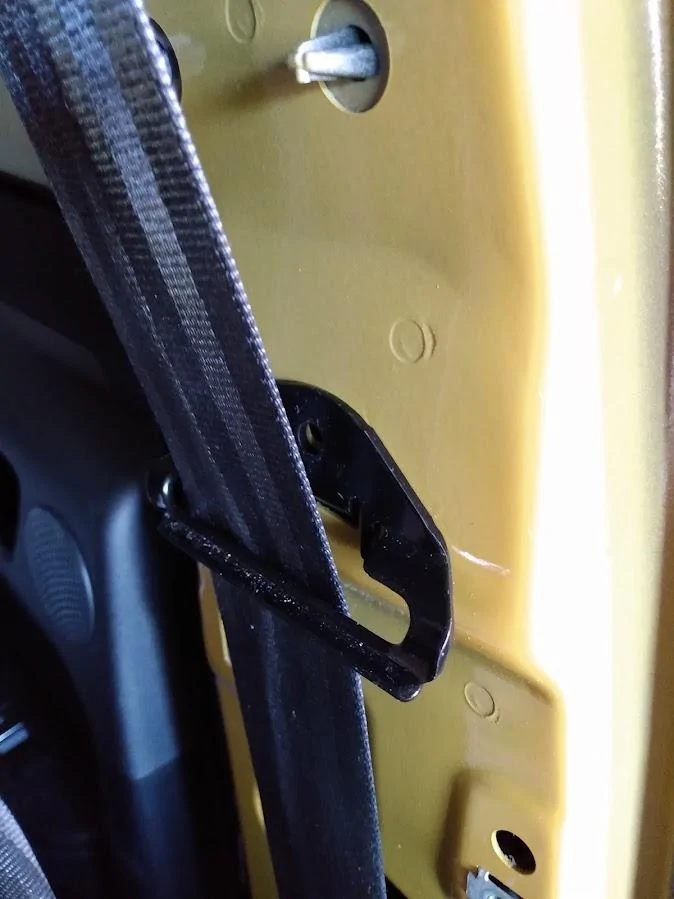
By removing all the panels, I thought at first it was the door harness where it contacted the inner panel. But it turns out it is this weird metal guide piece for the seat belt doing it. The way it was covered in dust and fuzz, I think it must also be part strop. When Ford built the thing, this metal tab was hung on the frame and then it is all held together with a plastic pin. You know, why use actual hardware when you can press in a plastic plug and send it? I'm guessing over time, the plastic pin lost a little bit of grip, allowing the piece to hit metal to metal and make the sound. Normally, one might insert some kind of dampener in there. But you know, Jim Farley can't possibly spend the $0.001 for a shim, times are tough!

If you have this issue and want to try to DIY, here's what I did.
Tools: Auto trim tool. Boxknife. Awl. Scissors. Small hammer. 7mm something; I used a nutdriver and crazy hand strength. A socket or wrench would do better because that one bolt was put in with all the power of Zeus.
Parts: Trim pin. Jug.
Be prepared to remove about a mile of trim pieces. You need to get the upper pillar cover off. To do that, you need to first remove the rocker panel covers from the front and rear doors. Just pull them out steady and firmly and the tabs will pop out of the sockets. You just need to pull the front up enough to release the captured pillar panel. The lower panel (black) comes out the same way, pulling force. There are several rows of tabs and once it is freed a bit, you can slip the belt hold down through the slit in the panel, if you want to.
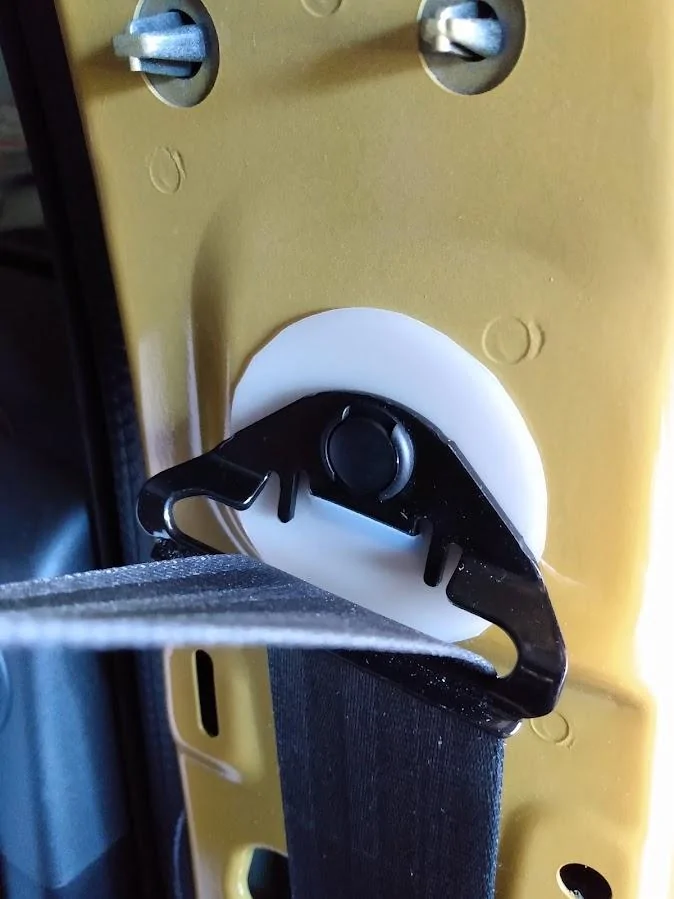
Now you're ready to remove the upper trim piece (white). First undo the one 7mm bolt holding the bottom front to the pillar. Then do another pull and pop on the tabs. Under there you'll find the belt guide pictured above.
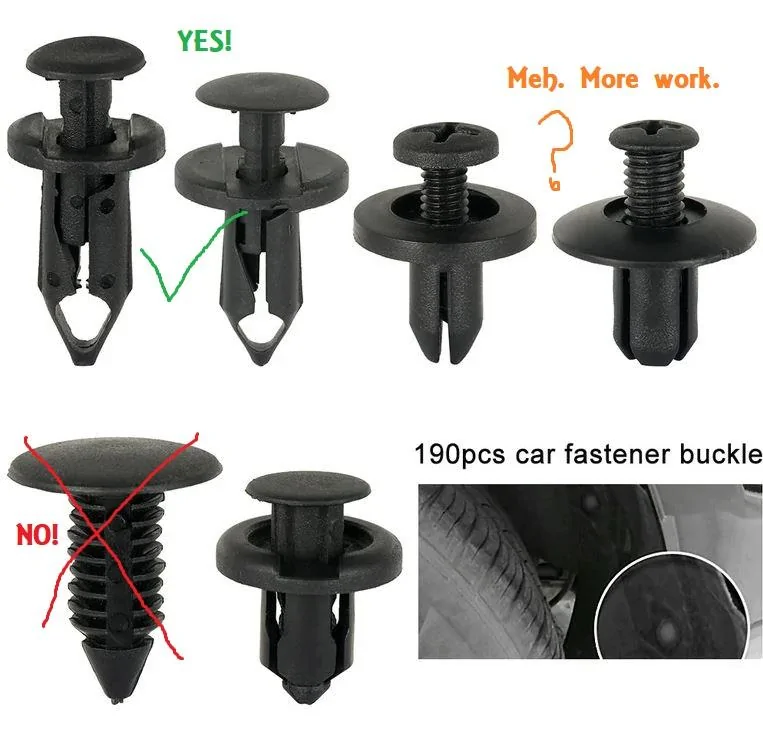
It is held in the center with that one cheap, plastic pin. Pulling them typically destroys them. Yeah, in theory it can go back in. But a lack of hold strength is how we got to this point. Get a big bag of assorted pins from the parts store or the big rainforest place. I prefer the more... reusable type pins. Instead of a barbed end, they have an anchor and a centerpin to spread it like drywall anchors. You need to match the pin diameter to the hole.

You're going to use a trim tool to pry that thing out. If you want to save it, you'll have to be more careful than I was. I almost ended up using pliers to finish ripping it, but it surrendered.
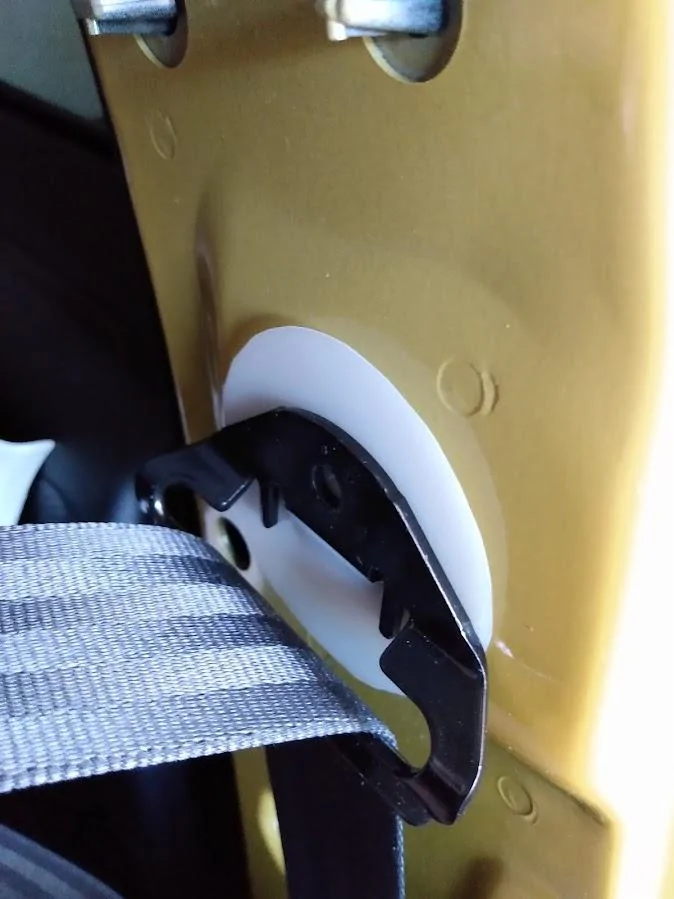
Now comes the technical part. I needed something to put between the guide and the body. Something that would let it move slightly and not deteriorate. I looked at foam and cork and then plastic to get it thinner and "slipperier". I settled on a 1 gallon milk jug in the recycle. (Sorry Canadians, you'll have to find something else.) It's that sort of slick PET type plastic. I used the boxcutter and scissors to cut out that pre-drawn circle spot on the side. One jug is enough material to do both pillars if you want to. I lined it up and eyeballed a spot to cut a slit for the tab. I put it all back on the pillar and used the awl to make a hole for the body pin.
First tap the base all the way in, then get the center in. I used a small finishing nail hammer. Here it is before I put all the trim back.
Button up all the trim in reverse order. You have to be sure to get all the tabs fully snapped home and hope you don't cause more rattles. Use the trim tool to make sure the headliner is tucked and the rubber is on top of the rocker panels. I was a little concerned about getting the seatbelt height adjuster put back, which moved during diagnosis. I don't know if line up is critical or I am one lucky person, but it only took one try. Perhaps it self-connects when you move the lever. Everyone's happy. I got my quiet back, Jim got his $0.001 by not importing and installing a shim piece. The Chinese trim pin makers got to make 2 pins for one job.
It wasn't always there. At some point the car developed a quiet clunk sound on the driver's side. Eliminated a bunch of things by trial and error. Loose trim. Speaker mounts. Door panel. Exterior plastic panel. Rain vents / wind combo. As the sound slowly drove me down to madness, I narrowed it down to something in the pillar by pressing my ear right to it while driving. Tensioning the belt and pressing on the panels had no effect so I had to do a deeper dive.
By removing all the panels, I thought at first it was the door harness where it contacted the inner panel. But it turns out it is this weird metal guide piece for the seat belt doing it. The way it was covered in dust and fuzz, I think it must also be part strop. When Ford built the thing, this metal tab was hung on the frame and then it is all held together with a plastic pin. You know, why use actual hardware when you can press in a plastic plug and send it? I'm guessing over time, the plastic pin lost a little bit of grip, allowing the piece to hit metal to metal and make the sound. Normally, one might insert some kind of dampener in there. But you know, Jim Farley can't possibly spend the $0.001 for a shim, times are tough!
If you have this issue and want to try to DIY, here's what I did.
Tools: Auto trim tool. Boxknife. Awl. Scissors. Small hammer. 7mm something; I used a nutdriver and crazy hand strength. A socket or wrench would do better because that one bolt was put in with all the power of Zeus.
Parts: Trim pin. Jug.
Be prepared to remove about a mile of trim pieces. You need to get the upper pillar cover off. To do that, you need to first remove the rocker panel covers from the front and rear doors. Just pull them out steady and firmly and the tabs will pop out of the sockets. You just need to pull the front up enough to release the captured pillar panel. The lower panel (black) comes out the same way, pulling force. There are several rows of tabs and once it is freed a bit, you can slip the belt hold down through the slit in the panel, if you want to.
Now you're ready to remove the upper trim piece (white). First undo the one 7mm bolt holding the bottom front to the pillar. Then do another pull and pop on the tabs. Under there you'll find the belt guide pictured above.
It is held in the center with that one cheap, plastic pin. Pulling them typically destroys them. Yeah, in theory it can go back in. But a lack of hold strength is how we got to this point. Get a big bag of assorted pins from the parts store or the big rainforest place. I prefer the more... reusable type pins. Instead of a barbed end, they have an anchor and a centerpin to spread it like drywall anchors. You need to match the pin diameter to the hole.
You're going to use a trim tool to pry that thing out. If you want to save it, you'll have to be more careful than I was. I almost ended up using pliers to finish ripping it, but it surrendered.
Now comes the technical part. I needed something to put between the guide and the body. Something that would let it move slightly and not deteriorate. I looked at foam and cork and then plastic to get it thinner and "slipperier". I settled on a 1 gallon milk jug in the recycle. (Sorry Canadians, you'll have to find something else.) It's that sort of slick PET type plastic. I used the boxcutter and scissors to cut out that pre-drawn circle spot on the side. One jug is enough material to do both pillars if you want to. I lined it up and eyeballed a spot to cut a slit for the tab. I put it all back on the pillar and used the awl to make a hole for the body pin.
First tap the base all the way in, then get the center in. I used a small finishing nail hammer. Here it is before I put all the trim back.
Button up all the trim in reverse order. You have to be sure to get all the tabs fully snapped home and hope you don't cause more rattles. Use the trim tool to make sure the headliner is tucked and the rubber is on top of the rocker panels. I was a little concerned about getting the seatbelt height adjuster put back, which moved during diagnosis. I don't know if line up is critical or I am one lucky person, but it only took one try. Perhaps it self-connects when you move the lever. Everyone's happy. I got my quiet back, Jim got his $0.001 by not importing and installing a shim piece. The Chinese trim pin makers got to make 2 pins for one job.