- Thread starter
- #1
Howdy all,
I've seen this sporadically reported, but if you're like me you've got a Bronco Sport with a front camera // front camera washer. That front camera washer leaks, even while not using the washer system. Eventually it will just puke out the entire reservoir onto your garage floor. Replacing the camera washer assembly, either from Ford or on your own, does not fix the issue.
Luckily, the fix is really easy! Since replacing the washer sprayer assembly doesn't fix it, and other reports had their reservoirs or pumps replaced without fixing it, I suspect it's caused by a failing check valve somewhere in Washer Hose - Ford (M1PZ-17A605-D). Due to some funky physics, I believe that its position relative to the receiver and some pressure differences with the malfunction have it acting like a siphon, sucking out the fluid even without use of the pump. This hose is a little difficult to fully replace without removing the bumper; if someone wants to attempt and confirm go crazy, but I took a simpler route.
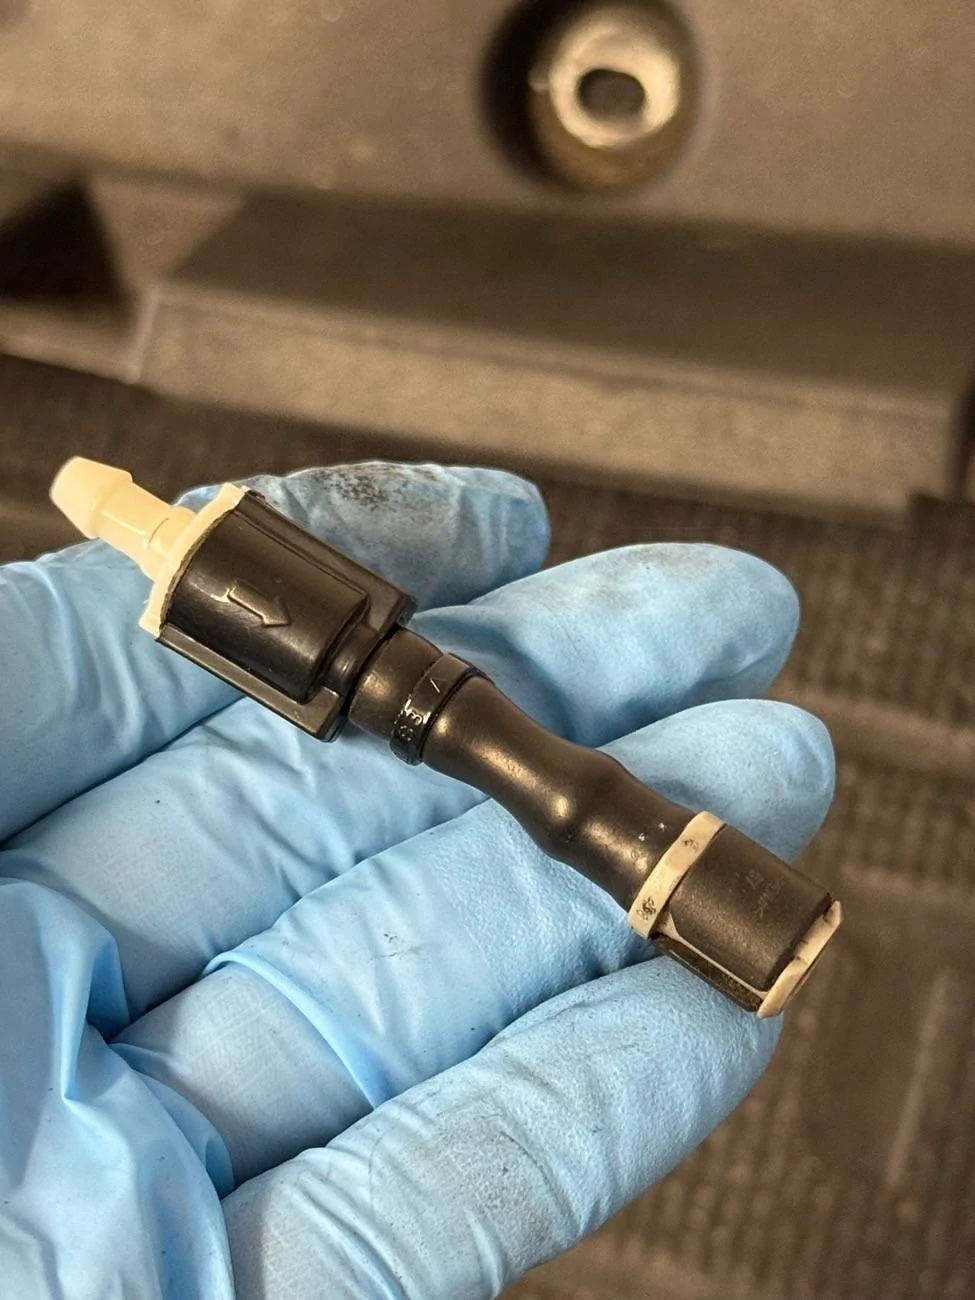
First, you'll want one of these universal washer check valves. Doesn't necessarily need to be this exact one, but it was cheap and easy to get ahold of. In short, you're going to snip the rubber line as close to the camera washer assembly as you can and insert this check valve inline (make sure the arrow is facing the camera!).
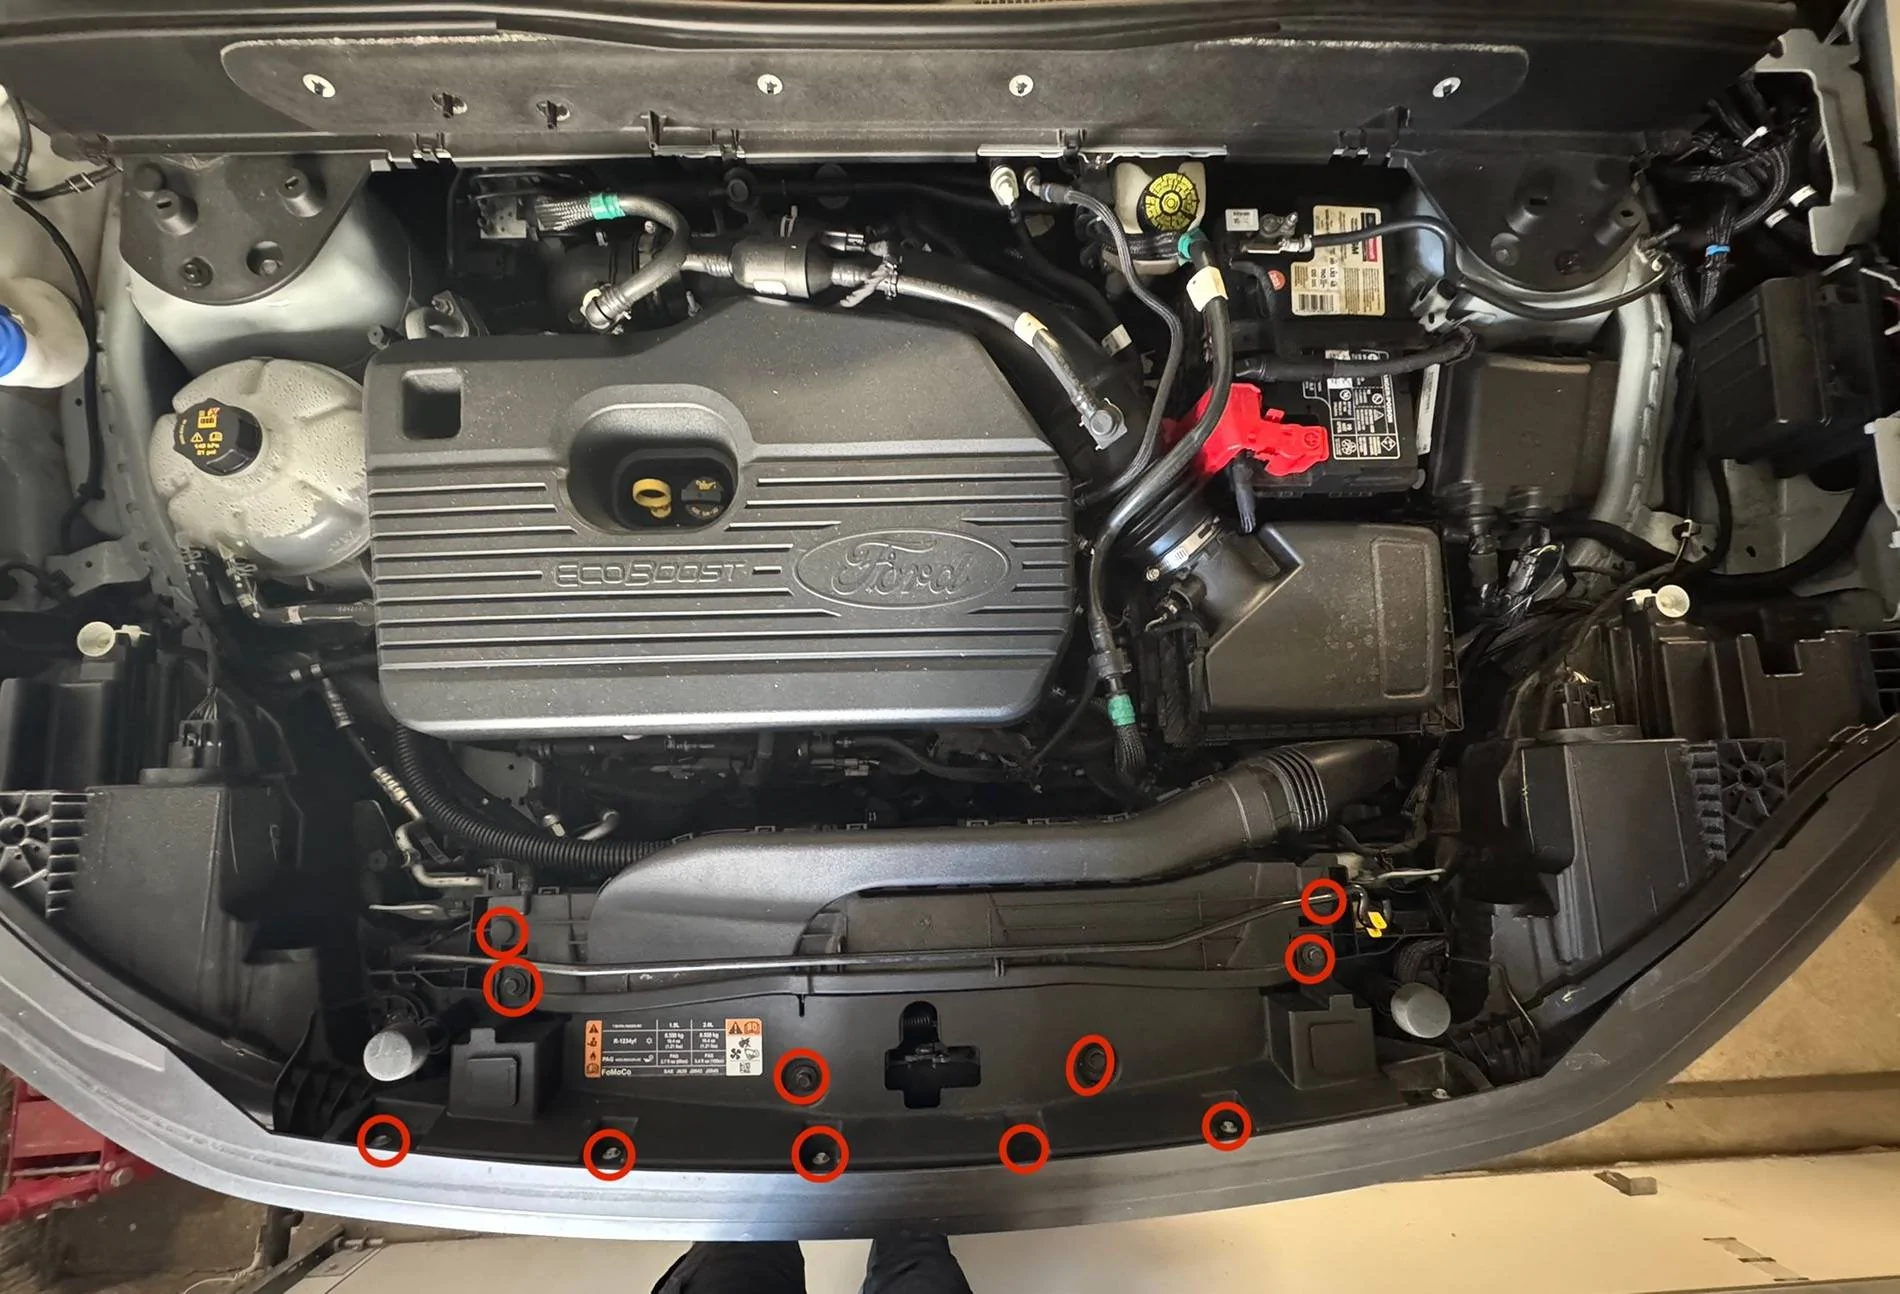
First, you're going to want to remove bolts and pop-tabs everywhere I've circled in red (hopefully I marked them all). We're going to remove this top fascia to access behind the grill. Once everything is unbolted and unbuttoned you should be able to slide the intake back slightly and slide out the plastic fascia.

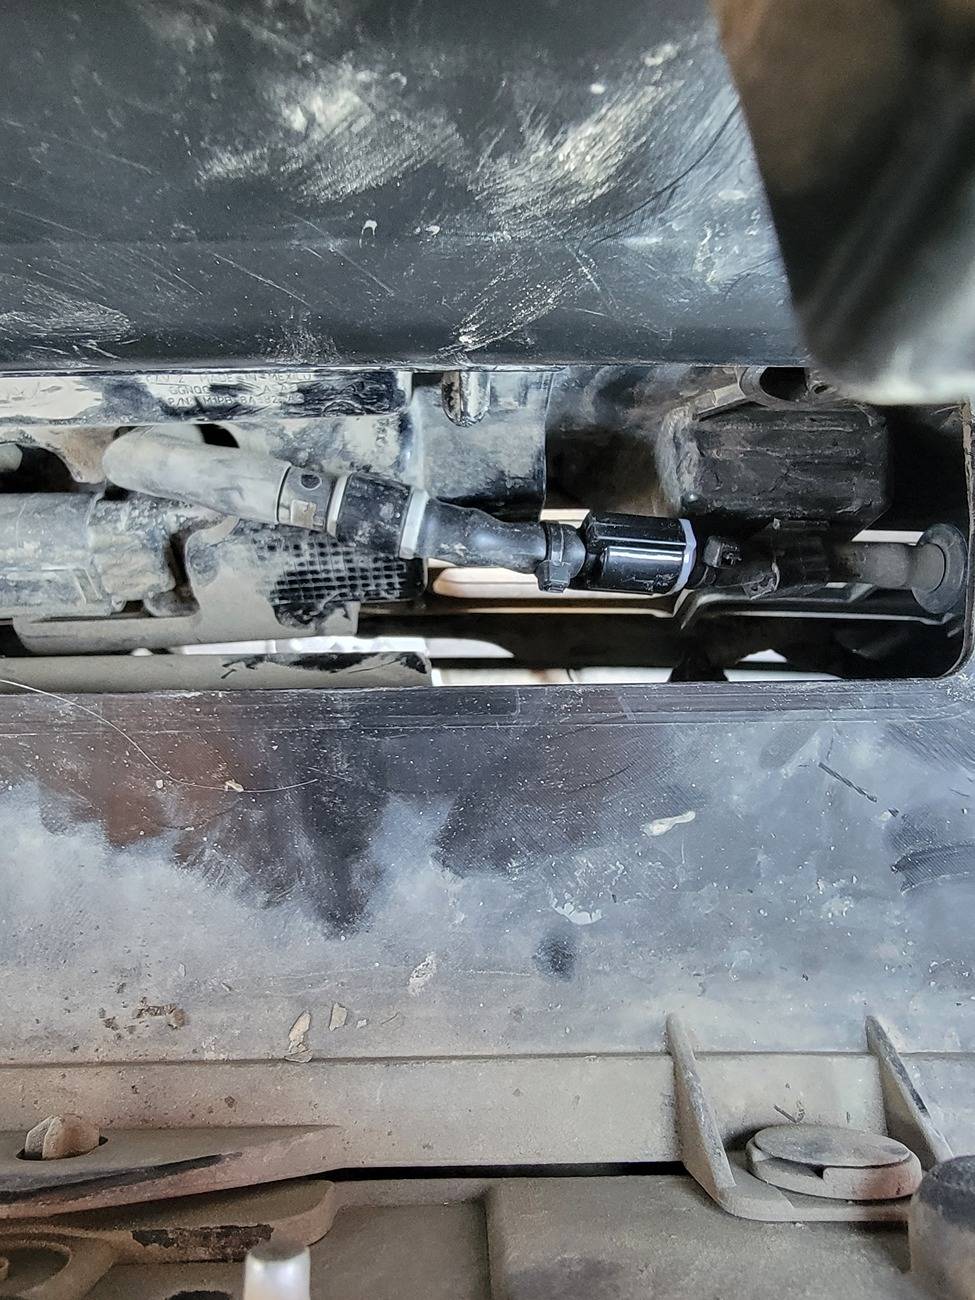
Note the camera washer assembly and the hose coming from the passenger side of the vehicle to it. There is a plastic sort of U clip that connects the hose to the camera. You're going to want to unclip it and remove the hose from the camera. There's also a plastic rivet holding the hose to the grille assembly; go ahead and pop that out so that we have some room to work.
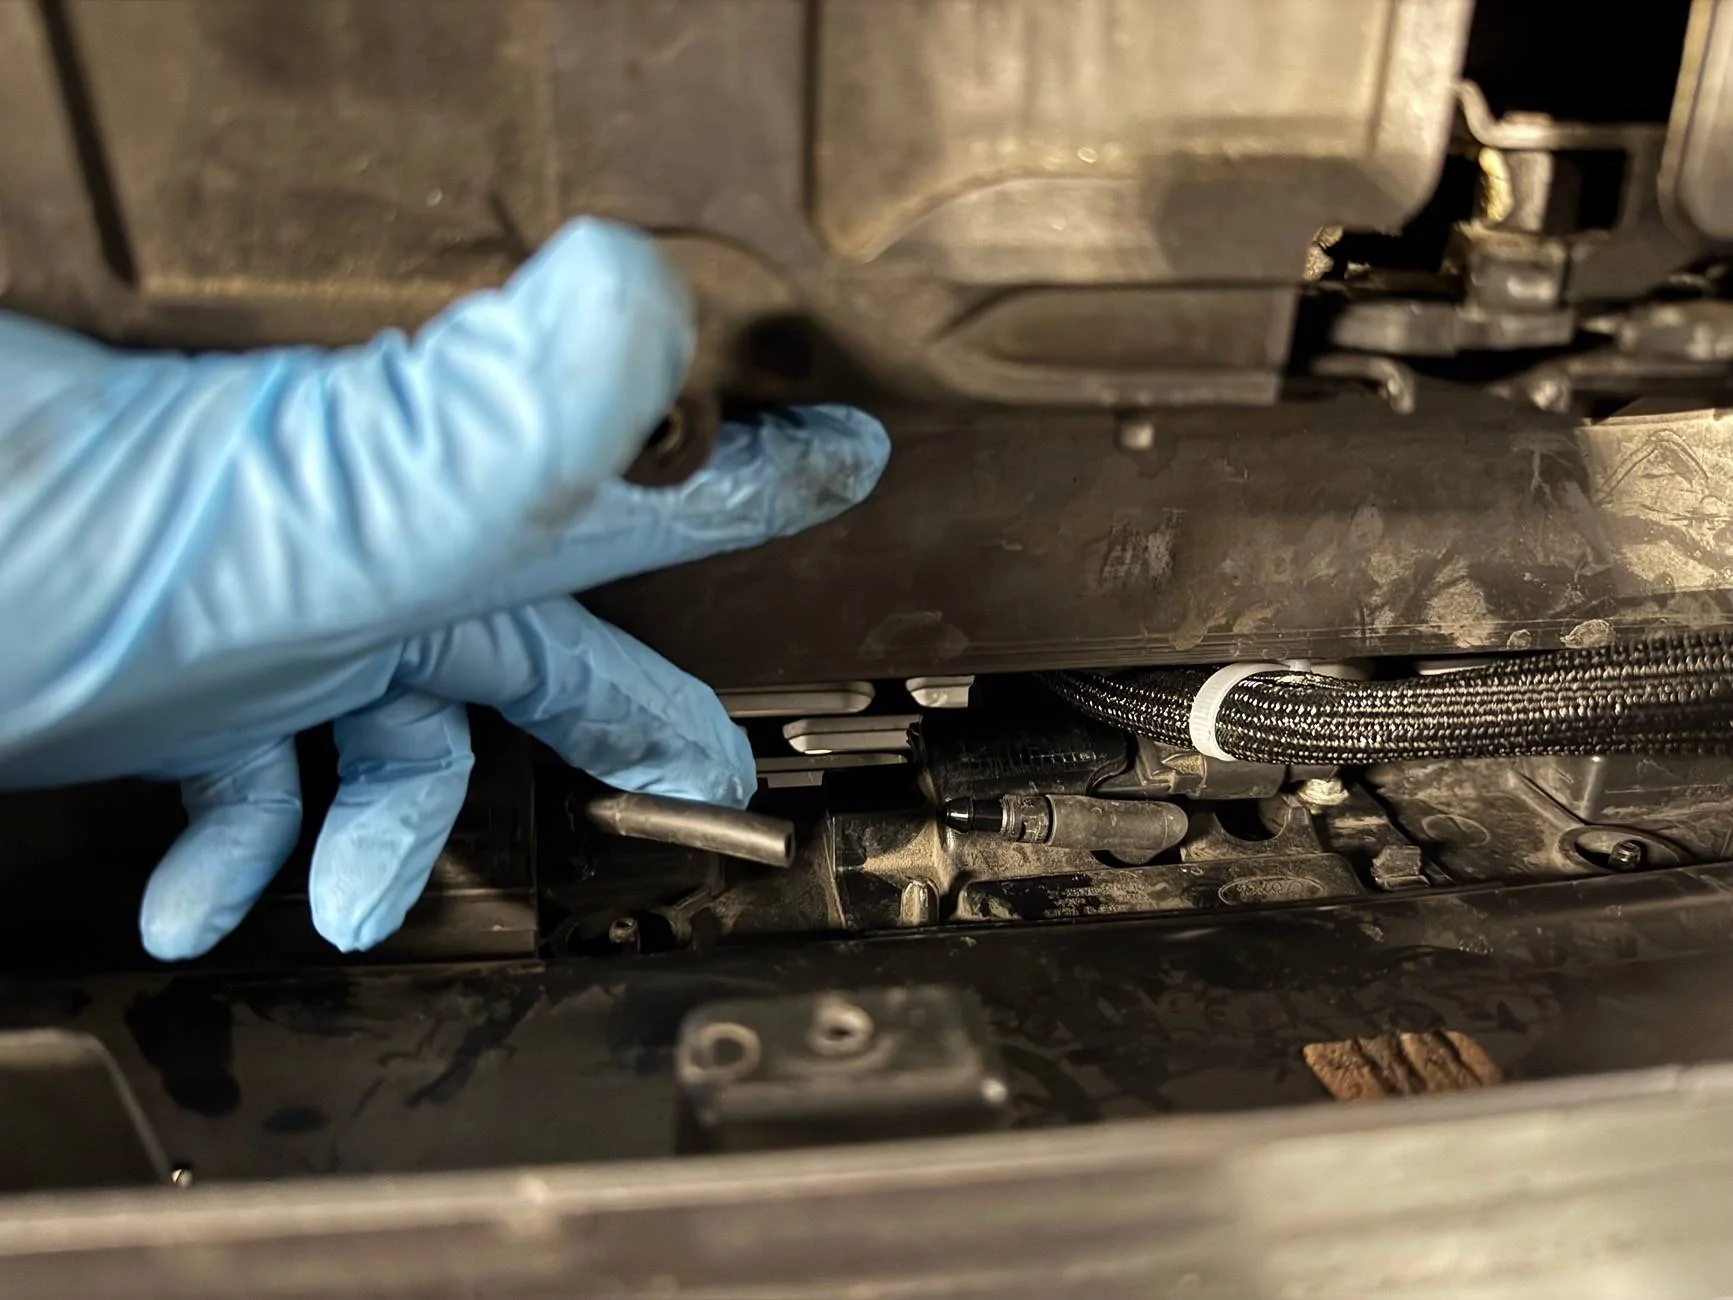
You're going to snip the rubber washer hose somewhere in the middle between where it's clipped to the grille and the camera connector. The closer to the camera the better, but ensure you leave enough room for the check valve nozzle to slide in fully.

Next, insert the check valve into the cut piece of hose with the camera connector it. ENSURE THE ARROW POINTS TOWARDS THE CAMERA CONNECTOR, THIS IS THE DIRECTION YOU WANT FLUID TO FLOW. Throw a ziptie on there to ensure everything is nice and secure.

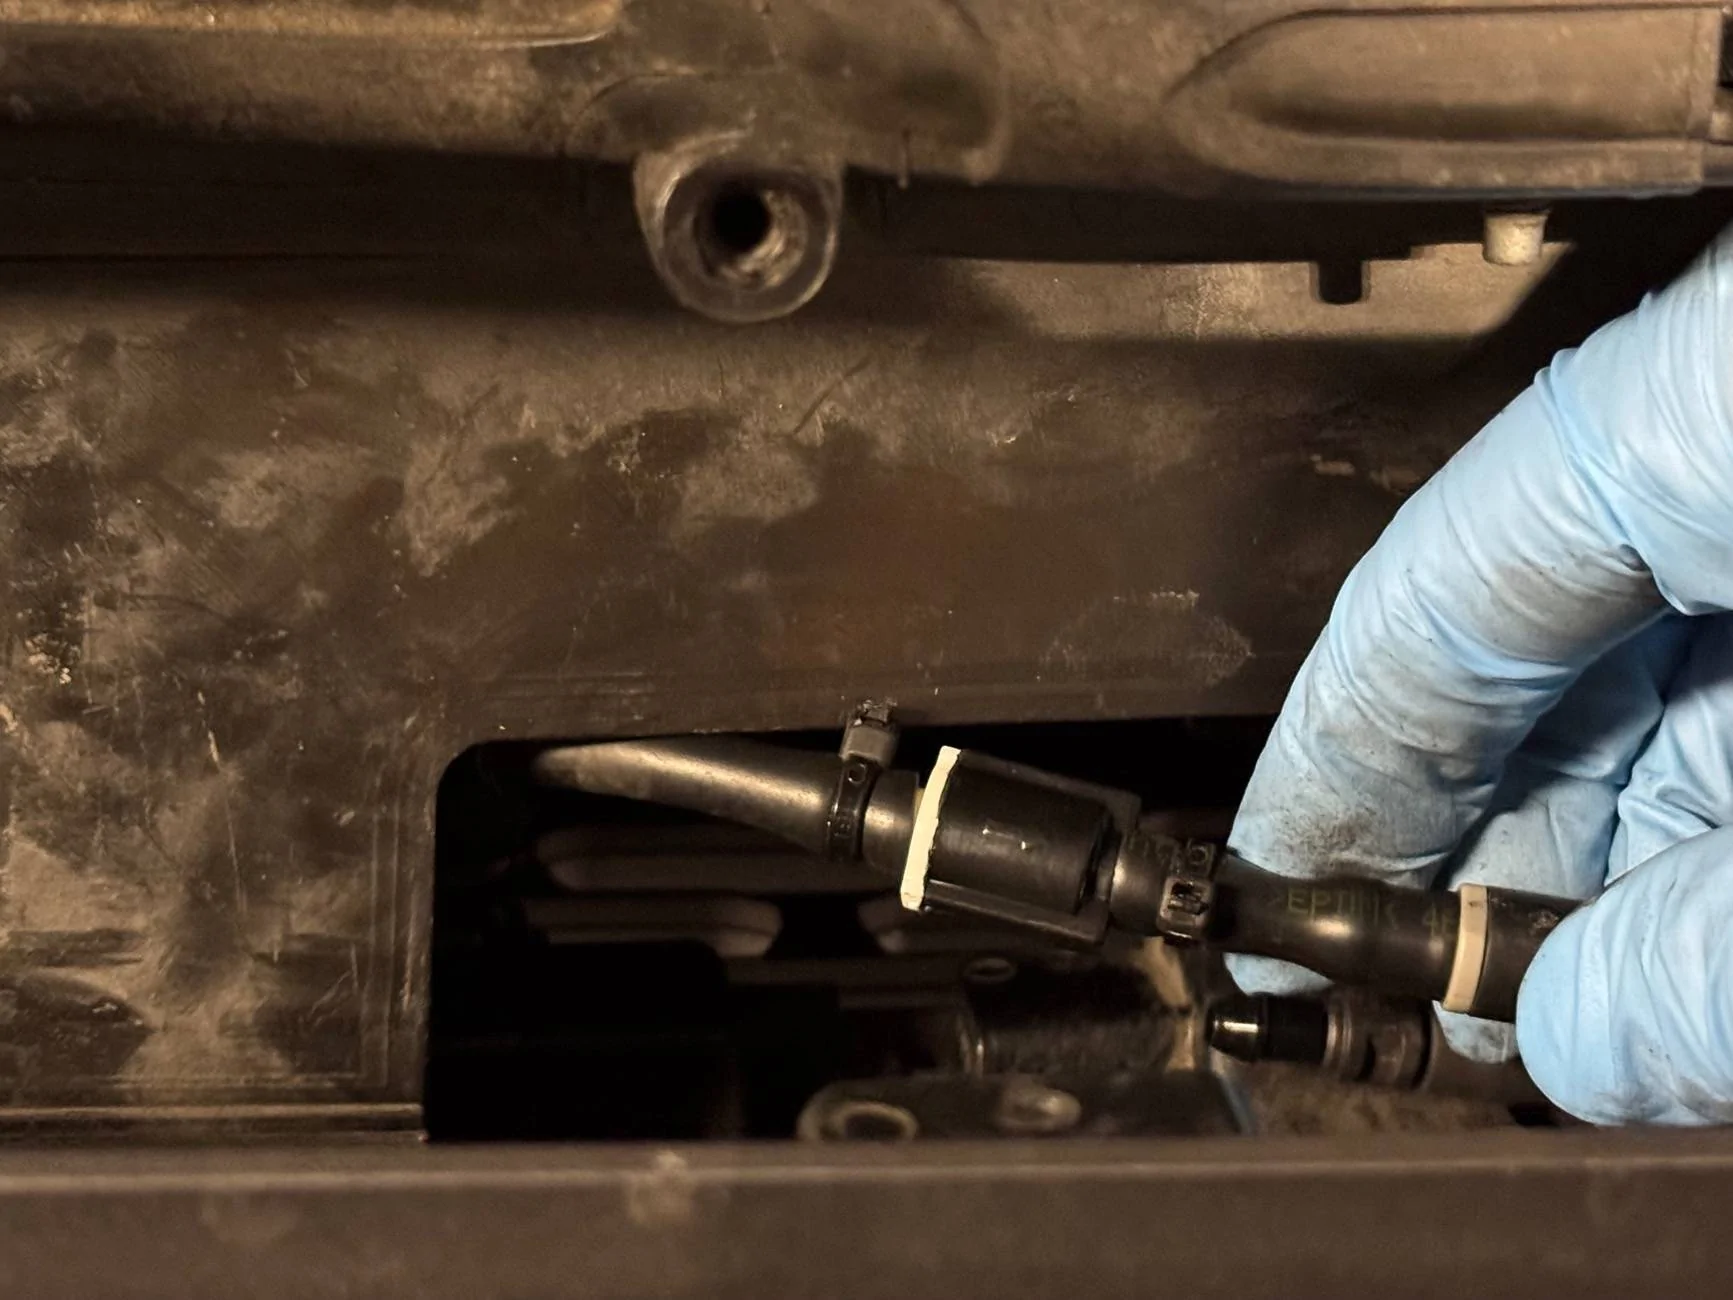
Finally, insert the other end of the check valve into the cut end of the hose from the body. Add another zip tie, then reconnect the plastic rivet to the grille and the washer connector to the camera assembly. Ensure everything is connected tightly so you don't get any leaks! (Pic is pre-connecting to camera assembly)
With it all connected, go ahead and test the front washer to ensure fluid still flows correctly and nothing is leaking where you don't want it to. Once you've verified everything is secure and leak-free, bolt everything back together from the first step, and enjoy your leak free camera.
I've seen this sporadically reported, but if you're like me you've got a Bronco Sport with a front camera // front camera washer. That front camera washer leaks, even while not using the washer system. Eventually it will just puke out the entire reservoir onto your garage floor. Replacing the camera washer assembly, either from Ford or on your own, does not fix the issue.
Luckily, the fix is really easy! Since replacing the washer sprayer assembly doesn't fix it, and other reports had their reservoirs or pumps replaced without fixing it, I suspect it's caused by a failing check valve somewhere in Washer Hose - Ford (M1PZ-17A605-D). Due to some funky physics, I believe that its position relative to the receiver and some pressure differences with the malfunction have it acting like a siphon, sucking out the fluid even without use of the pump. This hose is a little difficult to fully replace without removing the bumper; if someone wants to attempt and confirm go crazy, but I took a simpler route.
First, you'll want one of these universal washer check valves. Doesn't necessarily need to be this exact one, but it was cheap and easy to get ahold of. In short, you're going to snip the rubber line as close to the camera washer assembly as you can and insert this check valve inline (make sure the arrow is facing the camera!).
First, you're going to want to remove bolts and pop-tabs everywhere I've circled in red (hopefully I marked them all). We're going to remove this top fascia to access behind the grill. Once everything is unbolted and unbuttoned you should be able to slide the intake back slightly and slide out the plastic fascia.

Note the camera washer assembly and the hose coming from the passenger side of the vehicle to it. There is a plastic sort of U clip that connects the hose to the camera. You're going to want to unclip it and remove the hose from the camera. There's also a plastic rivet holding the hose to the grille assembly; go ahead and pop that out so that we have some room to work.
You're going to snip the rubber washer hose somewhere in the middle between where it's clipped to the grille and the camera connector. The closer to the camera the better, but ensure you leave enough room for the check valve nozzle to slide in fully.
Next, insert the check valve into the cut piece of hose with the camera connector it. ENSURE THE ARROW POINTS TOWARDS THE CAMERA CONNECTOR, THIS IS THE DIRECTION YOU WANT FLUID TO FLOW. Throw a ziptie on there to ensure everything is nice and secure.
Finally, insert the other end of the check valve into the cut end of the hose from the body. Add another zip tie, then reconnect the plastic rivet to the grille and the washer connector to the camera assembly. Ensure everything is connected tightly so you don't get any leaks! (Pic is pre-connecting to camera assembly)
With it all connected, go ahead and test the front washer to ensure fluid still flows correctly and nothing is leaking where you don't want it to. Once you've verified everything is secure and leak-free, bolt everything back together from the first step, and enjoy your leak free camera.